The Great Secret to Growing Chayote: Abundant Fruit at Minimal Cost

The Great Secret to Growing Chayote: Abundant Fruit at Minimal Cost

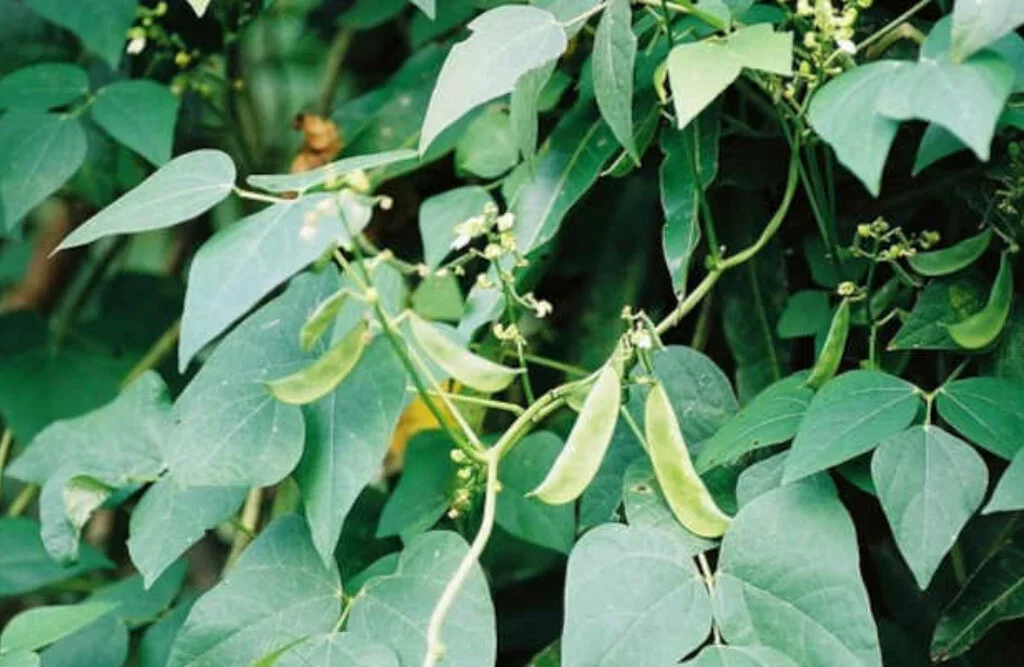
If you’ve ever dreamed of growing your own fruit-bearing vines at home with minimal effort and cost, then chayote (Sechium edule) is the perfect choice. Known for its crisp, tender texture and subtle, slightly sweet flavor, chayote is a highly productive vine that thrives in home gardens and small spaces. What’s even more exciting is that with a few smart techniques, you can enjoy bountiful harvests without spending a fortune.

In this detailed guide, we’ll reveal the great secret to growing chayote at home, from planting and care to harvesting, ensuring you get lots of fruit while keeping costs low. This method is ideal for beginners, urban gardeners, and anyone looking to maximize yield from minimal resources.


1. Why Grow Chayote at Home?
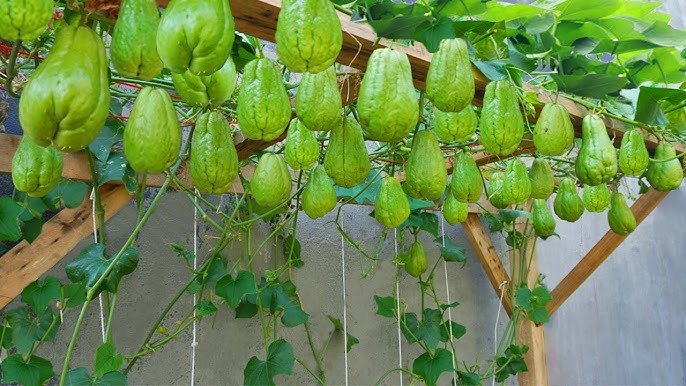
Chayote, sometimes called vegetable pear or mirliton, is a versatile vegetable popular in many cuisines around the world. It is highly nutritious and easy to grow.

Nutritional benefits of chayote include:

  • Low in calories, making it ideal for weight management
  • Rich in vitamins C and B6, supporting immunity and metabolism
  • Contains fiber, aiding digestion
  • Provides potassium and magnesium, promoting heart health

By growing chayote at home, you can:

  • Enjoy fresh, organic produce free from pesticides
  • Save money compared to buying from the market
  • Reduce trips to the grocery store
  • Engage in sustainable and rewarding gardening practices

2. Understanding Chayote Growth
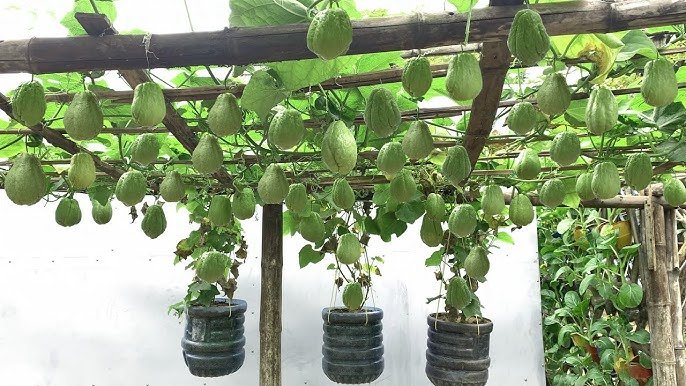
Chayote is a fast-growing climbing vine that produces fruit prolifically when given the right conditions. It prefers:

  • Warm climates with plenty of sunlight
  • Well-draining, fertile soil or alternative planting media
  • Adequate water, but without waterlogging

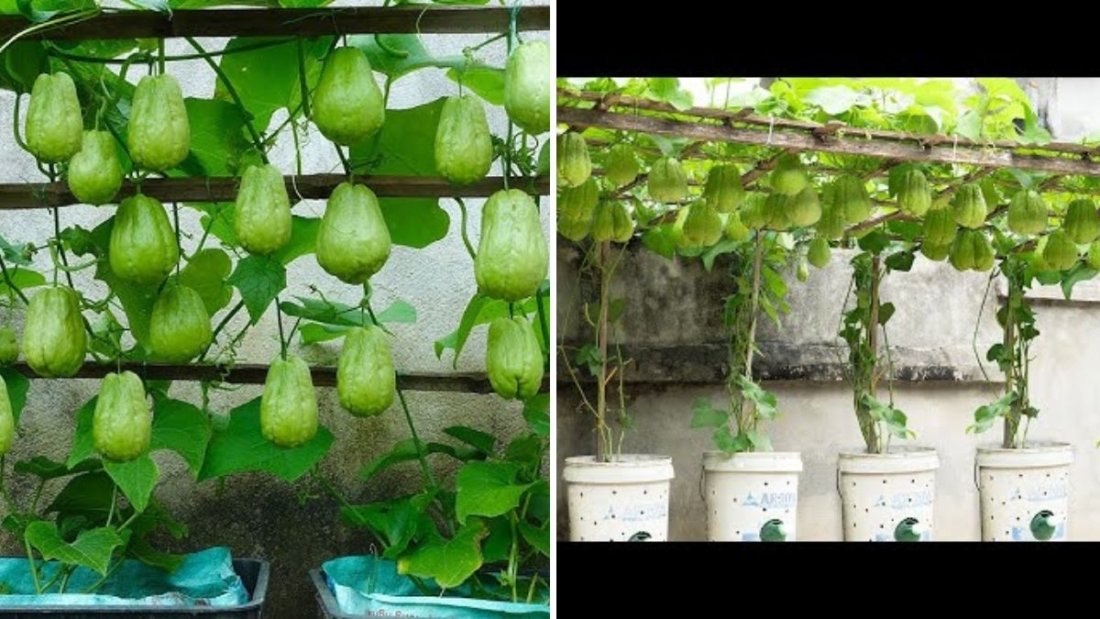
A single chayote fruit can produce a vining plant that grows several meters, climbing on trellises, fences, or supports. With proper care, you can get dozens of fruits per plant per season.


3. The Secret to Low-Cost Chayote Gardening
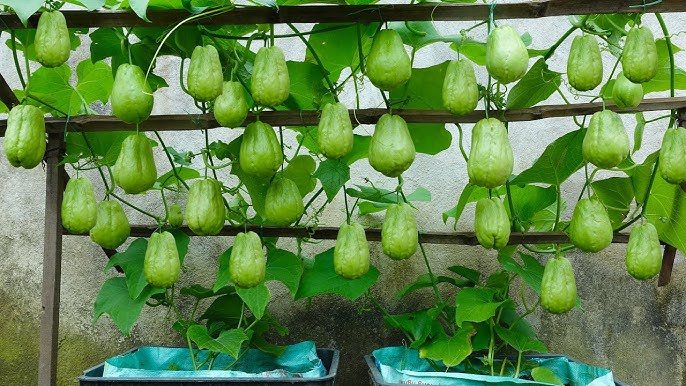
The key to high-yield, low-cost chayote gardening lies in using recycled materials and simple techniques that reduce expenses while maximizing growth:

  • Planting in recycled containers like plastic bottles, buckets, or old crates
  • Using kitchen scraps for natural fertilizers, like vegetable peels and compost
  • Supporting vines with low-cost trellises made from bamboo, sticks, or wire
  • Mulching with old leaves or shredded paper to retain soil moisture and reduce watering needs

These simple hacks allow you to grow healthy plants and abundant fruits without purchasing expensive gardening equipment or fertilizers.


4. Materials Needed for Growing Chayote

To start your low-cost chayote garden, you’ll need:

  • Chayote fruit or seeds (choose firm, healthy fruit for planting)
  • Plastic containers, old buckets, or recycled crates
  • Potting soil or compost mix
  • Watering can or spray bottle
  • Support structures like bamboo sticks, strings, or trellis nets
  • Mulching material such as dried leaves, shredded newspaper, or straw

With these materials, you can create a productive, budget-friendly chayote garden in your backyard or terrace.


5. Selecting the Right Chayote Fruit for Planting
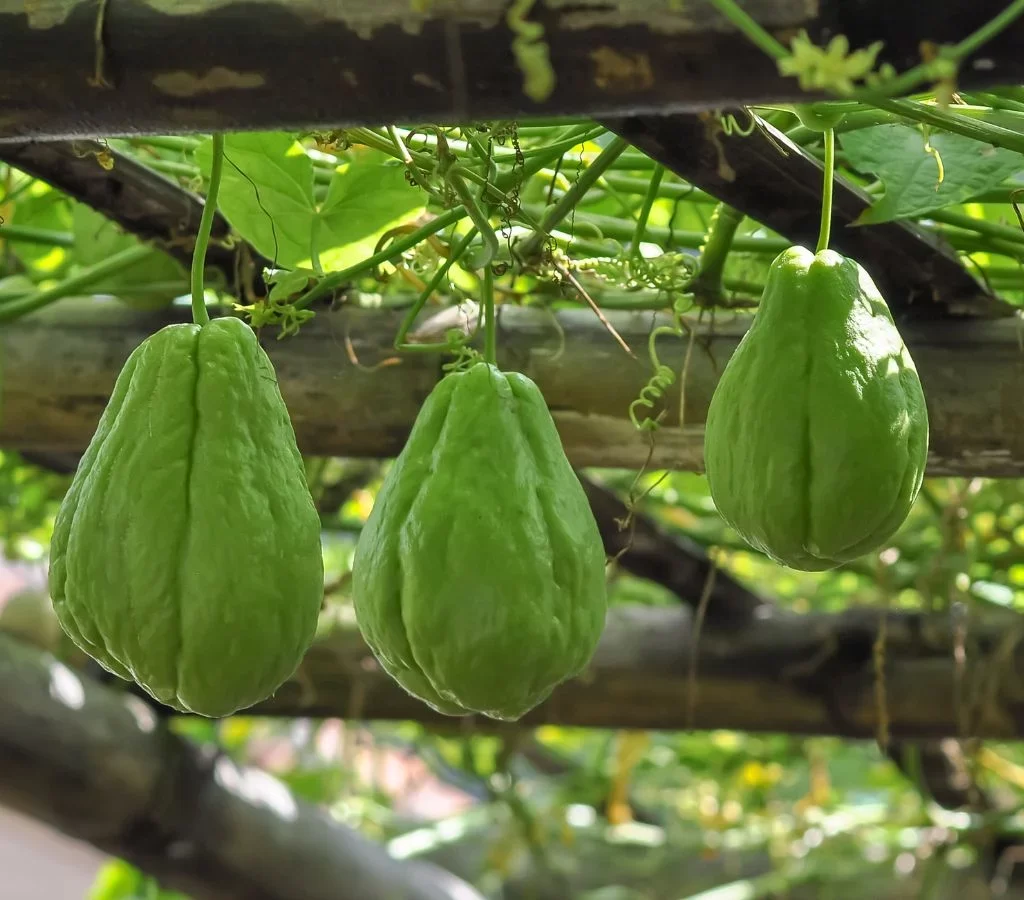
Planting the right chayote fruit is crucial for a successful harvest:

  • Choose firm, healthy, and mature chayote. Avoid damaged or shriveled fruit.
  • Chayote fruit with slight sprouting is ideal as it is ready to root.
  • For multiple plants, you can split large fruits to plant more than one vine.

Using quality planting material ensures fast growth and higher yield with minimal effort.


6. Preparing Containers for Planting

Chayote is a vine that requires ample space for root growth. Recycled containers are perfect for low-cost gardening:

  1. Clean Containers: Wash thoroughly to remove residues.
  2. Add Drainage Holes: Ensure proper drainage to avoid root rot.
  3. Fill with Soil: Use nutrient-rich potting soil mixed with compost or organic matter.
  4. Optional Mulch Layer: Add shredded leaves or paper on top to retain moisture.

This setup allows your chayote plant to thrive in limited space while keeping costs low.


7. Planting Chayote in Containers
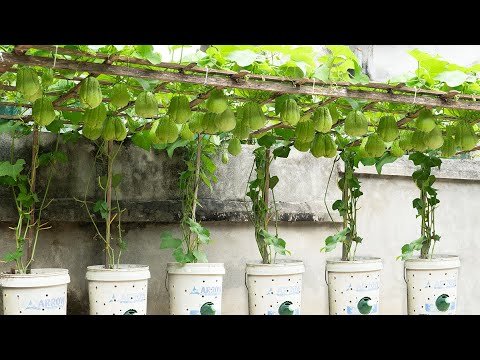
Planting chayote is simple:

  1. Place the fruit horizontally in the soil, ensuring the sprout points upward.
  2. Cover partially with soil, leaving the sprout exposed.
  3. Water gently to keep the soil moist.
  4. Position near support so the vine can climb as it grows.

Chayote roots quickly and begins sending out vines and leaves within a few weeks.


8. Supporting Chayote Vines

Chayote is a vigorous climber and requires support to produce maximum fruit:

  • Use bamboo sticks, trellises, or recycled wire mesh to guide vines upward.
  • Ensure the support is strong enough to hold heavy fruit.
  • Tie vines loosely to prevent breakage while allowing natural growth.

Proper support allows the plant to access sunlight efficiently and produces more fruits with less effort.


9. Watering and Fertilization

Chayote prefers consistent moisture but not waterlogged soil.

  • Water regularly, especially in hot weather, to keep soil evenly moist.
  • Use organic kitchen scraps or homemade compost for fertilization. Banana peels, vegetable scraps, and coffee grounds are excellent natural fertilizers.
  • Optional: Liquid organic fertilizer every 2–3 weeks can boost growth and fruiting.

These low-cost techniques ensure your chayote plants remain healthy and productive without expensive fertilizers.


10. Pruning for Better Yield

Pruning is key to encouraging more fruit production:

  • Remove damaged or yellowing leaves to prevent disease.
  • Trim overly long vines to redirect energy to fruit development.
  • Regular pruning encourages bushier growth, which means more flowers and fruits.

Even minimal pruning can significantly increase your harvest without additional costs.


11. Pest and Disease Management

Chayote is relatively hardy, but occasional pests may appear:

  • Aphids and whiteflies: Spray with diluted neem oil or soapy water.
  • Fungal infections: Avoid overwatering and ensure good air circulation.
  • Leaf-eating insects: Handpick or use organic deterrents.

With a little vigilance, you can maintain a healthy, high-yield garden naturally.


12. Harvesting Chayote

Chayote fruits are ready to harvest about 4–5 months after planting:

  • Harvest fruits while still tender for best taste.
  • Leave some fruits on the vine to encourage continuous flowering.
  • Pick mature fruits carefully to avoid damaging the vine.

A single vine can produce 10–20 fruits or more per season, making it a high-yield, low-cost crop.


13. Cooking Ideas for Chayote

Chayote is versatile in the kitchen:

  • Stir-fried with garlic and chili: Simple and nutritious.
  • Boiled or steamed: Retains crispness and nutrients.
  • Soups and curries: Adds mild sweetness and texture.
  • Salads: Shredded raw chayote is crunchy and refreshing.
  • Juices and smoothies: Combine with other greens for a healthy drink.

Homegrown chayote tastes fresher and sweeter than store-bought produce.


14. Tips for Maximizing Yield at Minimal Cost

To grow abundant chayote without spending much:

  • Reuse containers and supports from home materials.
  • Plant multiple fruits for continuous harvest.
  • Use kitchen scraps and homemade compost for fertilization.
  • Mulch regularly to retain moisture and reduce watering.
  • Prune vines and manage space to encourage fruiting.

These strategies help you achieve high productivity with minimal investment.


Conclusion

Growing chayote at home is both rewarding and cost-effective. By using recycled containers, homemade compost, and smart vine management, you can enjoy abundant fruit without expensive inputs. With proper planting, care, and harvesting, even beginners can cultivate healthy, productive chayote vines in their backyard, terrace, or balcony.

Start your chayote garden today and experience the joy of homegrown, low-cost, organic fruits. With a few simple secrets, your chayote vines will flourish, giving you fresh, nutritious vegetables all season long.
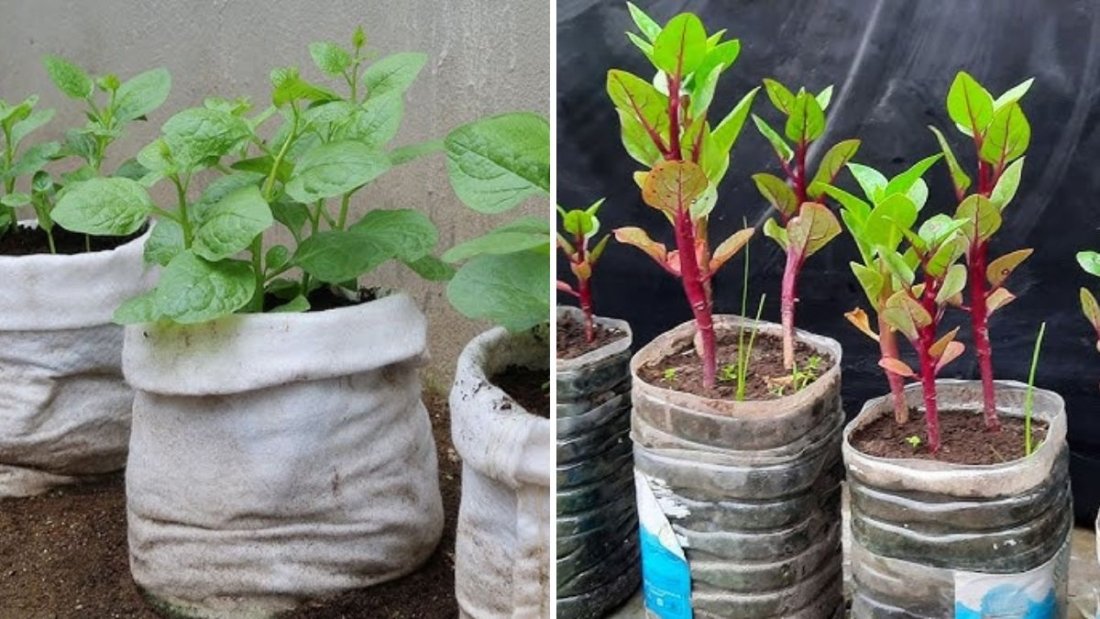
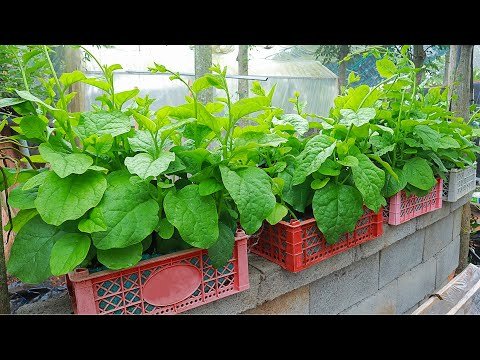
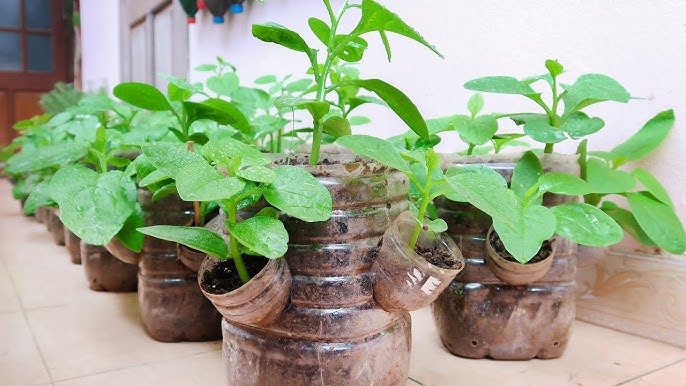
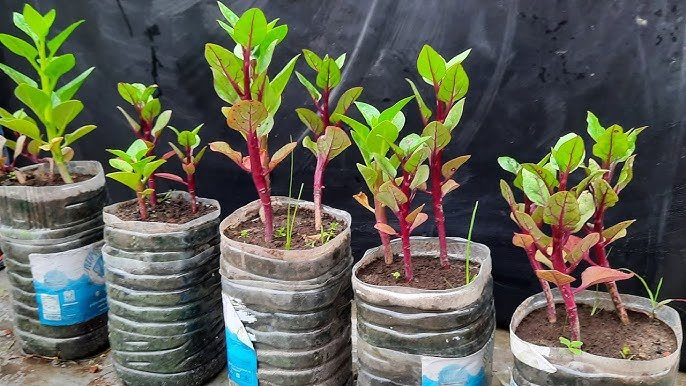
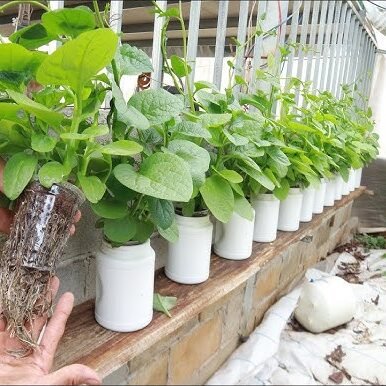
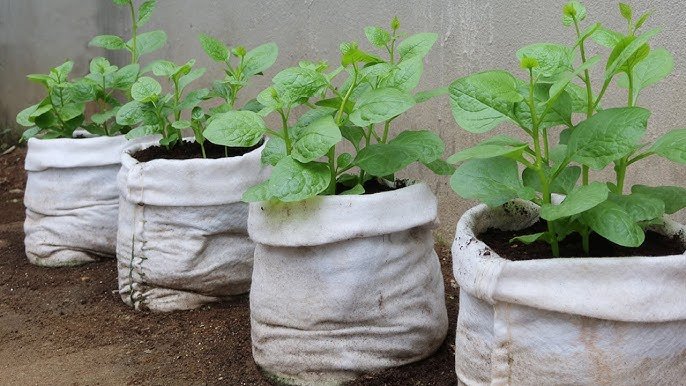
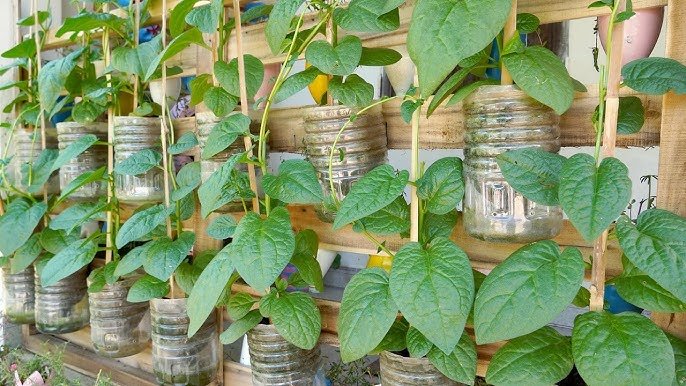
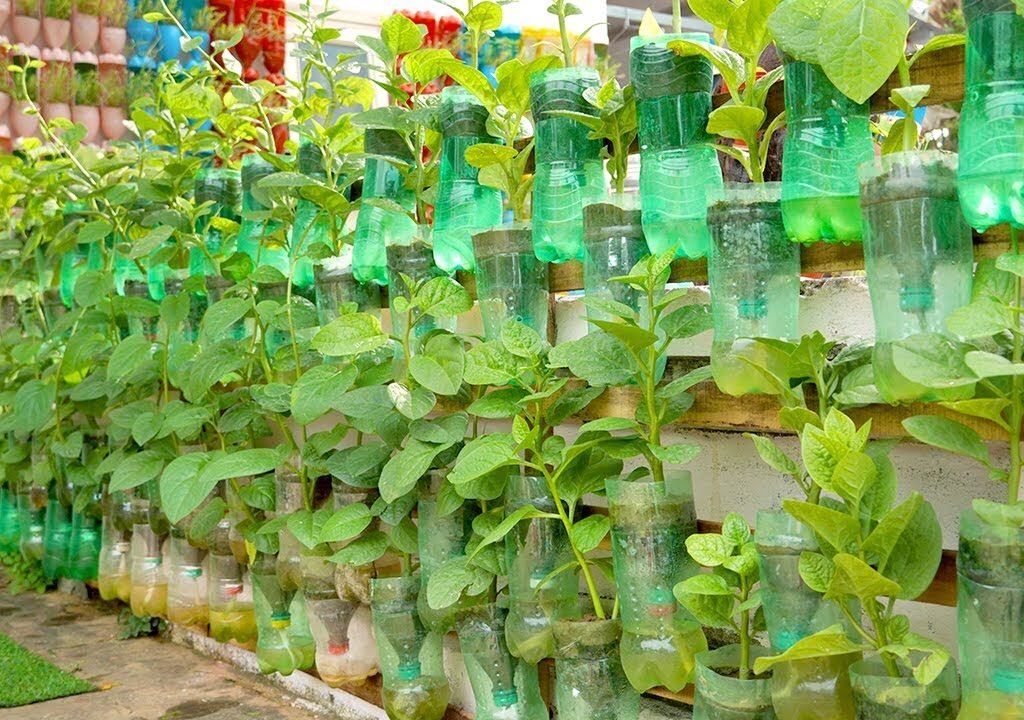
How to Grow Malabar Spinach at Home Using Recycled Plastic Bottles – A Simple, Sustainable Gardening Idea

How to Grow Malabar Spinach at Home Using Recycled Plastic Bottles – A Simple, Sustainable Gardening Idea

If you’re looking for a way to grow fresh, nutritious greens at home without taking up much space, Malabar spinach is an excellent choice. Also known as Basella alba, Malabar spinach is a fast-growing, heat-tolerant vine packed with vitamins and minerals. Even better, you can grow it easily using recycled plastic bottles, turning trash into a productive mini-garden. This method is perfect for urban gardeners, beginners, or anyone who wants organic vegetables at home while practicing sustainability.

In this detailed guide, we’ll explore how to grow Malabar spinach at home using plastic bottles, including preparation, planting, care, and harvesting. By the end, you’ll have a thriving, eco-friendly Malabar spinach garden—even on your balcony, terrace, or kitchen windowsill.


1. Why Grow Malabar Spinach at Home?

Malabar spinach is not only delicious but also extremely nutritious. It is commonly used in stir-fries, soups, salads, and curries.

Health benefits of Malabar spinach include:

  • Rich in vitamins A, C, and iron, supporting immunity and energy levels.
  • High in calcium and magnesium, promoting strong bones and heart health.
  • Packed with antioxidants, which help fight free radicals.
  • Contains fiber, aiding digestion and overall gut health.

Growing it at home guarantees fresh, chemical-free produce, saves money, and allows you to harvest whenever needed.


2. Why Use Recycled Plastic Bottles?

Plastic bottle gardening is a creative and eco-friendly solution for urban spaces. Using recycled bottles for Malabar spinach provides several benefits:

  • Reduces plastic waste by repurposing old bottles.
  • Space-saving: Ideal for balconies, terraces, or indoor gardening.
  • Water-efficient: Bottles retain water well, reducing frequent watering.
  • Portable: Easy to move bottles to get sunlight or protect plants from harsh weather.
  • Beginner-friendly: Low-cost, easy-to-use containers make gardening simple.

This method is perfect for turning unused bottles into productive mini-planters.


3. Materials Needed for Bottle Gardening

Before starting your Malabar spinach garden, gather the following materials:

  • Plastic bottles (1.5–2 liters, clean and washed)
  • Potting soil (well-draining, nutrient-rich)
  • Malabar spinach seeds or seedlings
  • Scissors or craft knife
  • String, wire, or hooks (optional for hanging bottles)
  • Watering can or spray bottle

Optional: Organic fertilizer or compost to boost growth and yield.

With these simple materials, you can create an eco-friendly, productive garden at home.


4. Preparing Plastic Bottles for Planting

Turning plastic bottles into planters is straightforward:

  1. Clean the Bottles:
    Wash thoroughly to remove labels and residues.
  2. Cut an Opening:
    Make a rectangular or circular opening along the side of the bottle for planting and easy harvesting.
  3. Add Drainage Holes:
    Poke small holes at the bottom to allow excess water to drain, preventing root rot.
  4. Optional Hanging Setup:
    Use holes near the top and thread a string or wire to hang bottles vertically. This is perfect for space-saving vertical gardens.
  5. Fill with Soil:
    Add 3–4 inches of nutrient-rich soil, mixed with compost or perlite for aeration and drainage.

Your bottle is now ready to support healthy Malabar spinach growth.


5. Choosing Seeds or Seedlings

Selecting the right seeds or seedlings is important for a successful harvest:

  • Use healthy, disease-free seeds from a reliable source.
  • If using seedlings, select plants with 2–3 healthy leaves.
  • Malabar spinach is a vigorous vine, so even small seedlings adapt quickly to bottles.

Healthy seeds and seedlings ensure fast germination and strong growth.


6. Sowing Malabar Spinach Seeds

Growing from seeds is simple and cost-effective:

  1. Fill the Bottle with Soil:
    Lightly firm the soil for stability.
  2. Plant Seeds:
    Make small holes about ½ inch deep. Place 2–3 seeds per hole and cover lightly with soil.
  3. Water Gently:
    Keep the soil moist but not waterlogged.
  4. Provide Sunlight:
    Place bottles in a sunny location for at least 4–6 hours of direct sunlight daily.

Seeds typically germinate within 7–10 days, producing healthy seedlings ready for care.


7. Transplanting Seedlings in Bottles

If you start seedlings in trays or small pots, transplant them when they have 2–3 true leaves:

  1. Make a small hole in the bottle soil.
  2. Place the seedling into the hole and firm the soil gently.
  3. Water lightly to help the plant establish.
  4. Ensure sunlight exposure to promote strong growth.

Malabar spinach seedlings adapt quickly to bottle planters and start producing long, leafy vines.


8. Caring for Malabar Spinach in Bottles

Malabar spinach is relatively low-maintenance but benefits from some care:

  • Watering: Keep the soil consistently moist. Bottles retain water well, reducing frequent watering.
  • Sunlight: Provide at least 4–6 hours of sunlight daily. Partial shade works, but growth may slow.
  • Fertilization: Use organic fertilizer every 2–3 weeks to encourage lush growth.
  • Pruning: Regularly trim vines to prevent overcrowding and promote new growth.

Even if you occasionally forget watering, Malabar spinach is hardy and continues to grow.


9. Supporting Vine Growth

Malabar spinach is a climbing vine and benefits from support:

  • Use trellises, sticks, or strings to guide the vines upward.
  • Hanging bottles naturally allow vines to cascade down or climb along a wall.
  • Prune long vines occasionally to encourage bushier growth and more leaves.

Providing support ensures your plant grows healthy, strong, and productive.


10. Preventing Pests and Diseases

Malabar spinach is hardy but occasionally faces issues:

  • Aphids or small insects: Spray with neem oil or soapy water.
  • Yellowing leaves: Usually caused by nutrient deficiency or overwatering. Adjust care accordingly.
  • Fungal problems: Ensure good drainage and avoid waterlogged soil.

Regular observation and minimal intervention are enough to keep your plants healthy.


11. Harvesting Malabar Spinach

Harvesting Malabar spinach is easy and encourages continuous growth:

  • Cut-and-come-again method: Snip outer leaves and vines regularly.
  • Full harvest: Cut entire vines if needed, and new shoots will sprout from the base.
  • Continuous harvest: Succession planting ensures a steady supply of fresh greens.

Leaves are tender and can be used in stir-fries, soups, salads, and curries.


12. Advantages of Growing Malabar Spinach in Bottles

Growing Malabar spinach in recycled plastic bottles offers numerous benefits:

  • Space-efficient: Ideal for small apartments, terraces, or balconies.
  • Eco-friendly: Reuses plastic and promotes sustainability.
  • Low-maintenance: Hardy vines grow well with minimal care.
  • Cost-effective: Reduces grocery bills.
  • Fresh and nutritious: Pesticide-free, organic leaves at your fingertips.

This method is perfect for urban gardeners who want fresh, homegrown vegetables with minimal effort.


13. Cooking Ideas for Malabar Spinach

Malabar spinach is versatile in the kitchen:

  • Stir-fried with garlic or chili: Quick and flavorful.
  • Soups and curries: Adds texture and nutrition.
  • Salads: Young leaves are tender and ideal for fresh salads.
  • Smoothies: Blend leaves for a nutrient-packed green drink.
  • Boiled or steamed: Retains nutrients and pairs well with sauces.

Homegrown leaves are fresher and more flavorful than store-bought options.


14. Why Bottle Gardening Works for Urban Spaces

Plastic bottle gardening is ideal for city dwellers because:

  • Utilizes small terraces, balconies, or indoor areas effectively.
  • Allows vertical gardening, saving floor space.
  • Reduces water usage and prevents soil mess indoors.
  • Supports low-maintenance gardening, even for beginners or busy individuals.
  • Promotes sustainable and eco-friendly practices.

Even a few bottles can produce enough Malabar spinach for family meals, making it practical and rewarding.


Conclusion

Growing Malabar spinach at home using recycled plastic bottles is simple, sustainable, and highly rewarding. This method allows you to enjoy fresh, organic greens with minimal space, time, or effort. By preparing bottles, planting seeds or seedlings, providing light and water, and supporting vine growth, you can create a lush, productive garden in small urban spaces.

Start your bottle garden today and turn waste plastic into a source of nutritious, delicious vegetables. With minimal care, Malabar spinach will thrive, providing healthy, homegrown leaves all year round

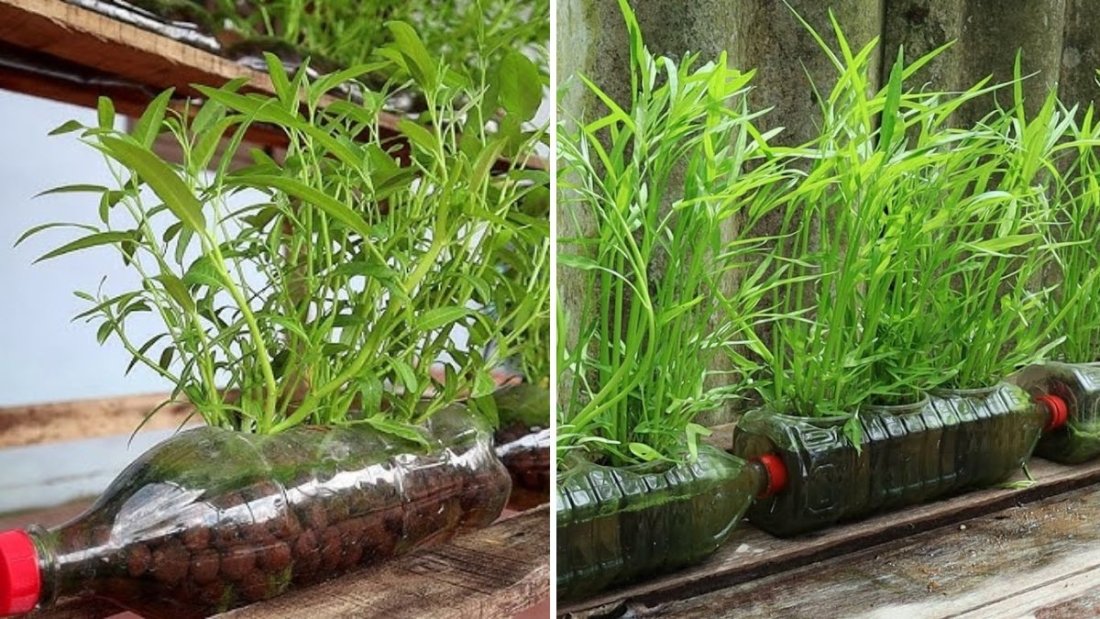
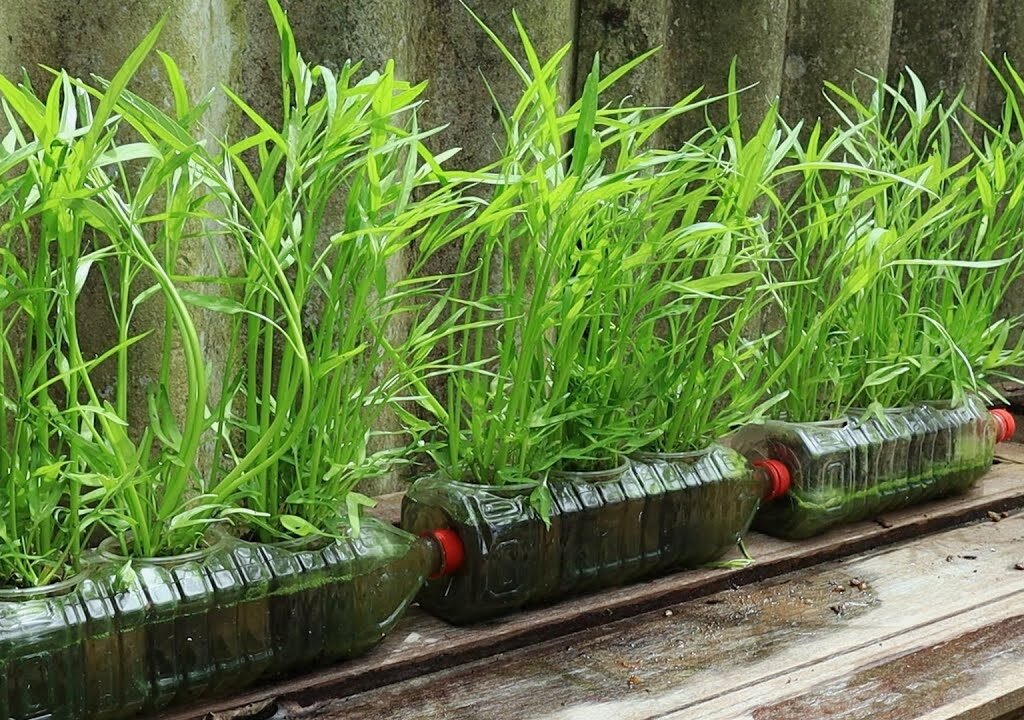
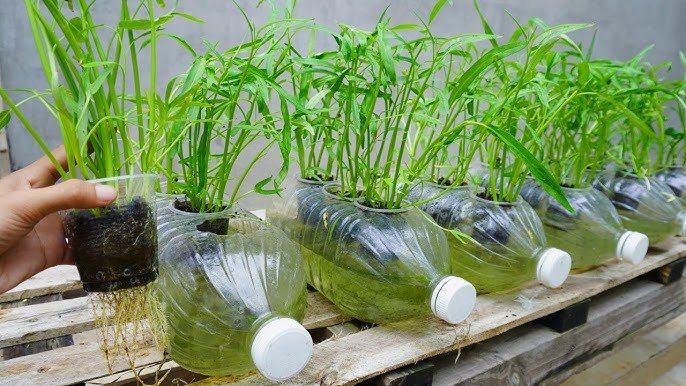
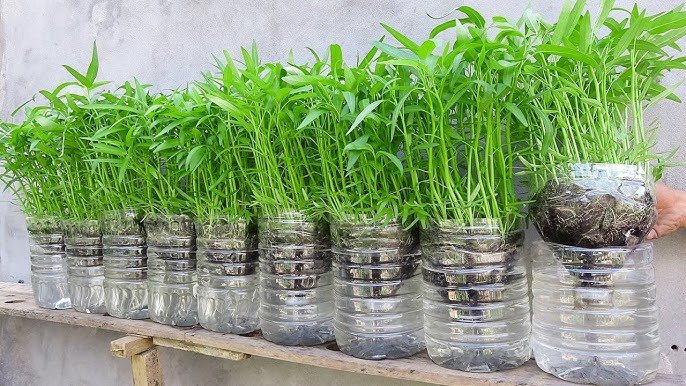
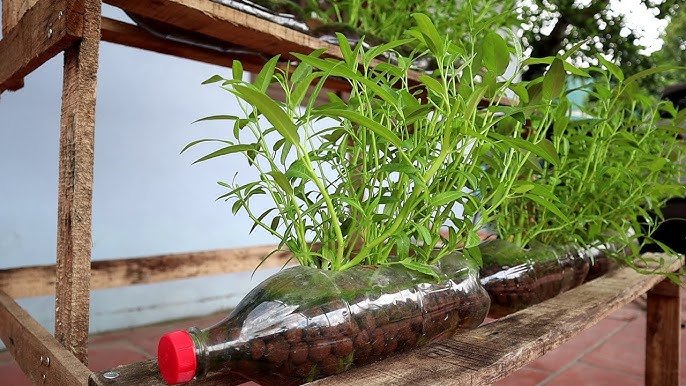
How to Grow Vegetables Without Soil Using Recycled Plastic Bottles – Water Spinach (Kangkung) Guide

How to Grow Vegetables Without Soil Using Recycled Plastic Bottles – Water Spinach (Kangkung) Guide

Have you ever imagined growing fresh, nutritious vegetables at home without soil? If so, you’re in for a treat! Using recycled plastic bottles, you can grow water spinach, also known as kangkung, in a hydroponic setup that’s easy, sustainable, and perfect for small spaces. This innovative method is not only eco-friendly but also a fun way to cultivate fresh greens year-round.

In this comprehensive guide, we’ll show you step-by-step how to grow water spinach in recycled plastic bottles without soil, including preparation, planting, maintenance, and harvesting. This method is beginner-friendly and ideal for urban gardeners who want fresh, healthy vegetables with minimal effort.


1. Why Grow Water Spinach at Home?

Water spinach (Ipomoea aquatica) is a popular leafy green vegetable in many Asian cuisines. It is nutritious, fast-growing, and highly versatile in the kitchen.

Nutritional benefits of water spinach:

  • Rich in vitamins A and C, supporting immunity and vision
  • Contains iron, calcium, and potassium, promoting bone and heart health
  • High in fiber, aiding digestion
  • Low in calories, making it ideal for healthy diets

Growing water spinach at home ensures fresh, chemical-free vegetables, reduces grocery bills, and supports a sustainable lifestyle.


2. Why Use Recycled Plastic Bottles?

Recycling plastic bottles for vegetable growth offers multiple benefits:

  • Eco-friendly: Reduces plastic waste by reusing bottles as planters.
  • Space-saving: Ideal for terraces, balconies, and small indoor spaces.
  • Water-efficient: Hydroponic setup minimizes water usage.
  • Portable: Easy to move bottles to adjust sunlight exposure.
  • Beginner-friendly: No soil is needed, making it simple for first-time gardeners.

Using bottles not only helps the environment but also allows you to grow fresh, healthy greens anywhere.


3. Materials Needed for Hydroponic Water Spinach

To start your bottle hydroponic garden, gather the following materials:

  • Plastic bottles (1.5–2 liters)
  • Water spinach cuttings (preferably with small roots or nodes)
  • Water (tap water is sufficient, but let it sit for 24 hours to remove chlorine)
  • Nutrient solution (optional for faster growth, can use liquid compost or hydroponic fertilizer)
  • Scissors or craft knife
  • String or wire (optional for hanging setup)

With these materials, you can grow fresh water spinach without soil, making it ideal for limited spaces.


4. Preparing Plastic Bottles for Hydroponic Gardening

Transforming a plastic bottle into a hydroponic planter is simple:

  1. Clean the Bottles:
    Wash thoroughly to remove any residues or labels.
  2. Cut the Bottle:
    Cut a rectangular opening on the side to insert plant cuttings. Leave the bottom intact to hold water.
  3. Optional Hanging Setup:
    Make holes near the top for string or wire to hang bottles vertically, saving terrace or balcony space.
  4. Add Water:
    Fill the bottle with clean water. If using a nutrient solution, mix according to instructions.

Your bottle is now ready to support water spinach growth without soil.


5. Selecting Water Spinach Cuttings

Water spinach is one of the easiest vegetables to propagate through cuttings. Here’s how to choose the best ones:

  • Look for healthy stems with at least 3–4 nodes (small bumps where roots can develop).
  • Avoid wilted, yellow, or damaged cuttings.
  • Cuttings around 6–8 inches long are ideal for bottle hydroponics.

Healthy cuttings ensure fast growth and continuous harvests.


6. Planting Water Spinach in Plastic Bottles

Planting water spinach in a hydroponic bottle is straightforward:

  1. Insert Cuttings:
    Place the cuttings into the bottle’s opening, ensuring that nodes are submerged in water.
  2. Positioning:
    Place the bottle in a sunny location with 4–6 hours of sunlight daily.
  3. Water Maintenance:
    Change water every 3–4 days or top up with fresh water. If using a nutrient solution, replenish according to instructions.
  4. Support Growth:
    Ensure the cuttings are stable and not floating out of place. Use a small foam piece or mesh if necessary to hold them upright.

Within a week, you will notice roots starting to form at the submerged nodes.


7. Caring for Hydroponic Water Spinach

One of the great things about water spinach is that it requires minimal care:

  • Watering: Keep the water level consistent. Bottles hold enough moisture for days, reducing frequent attention.
  • Light: Adequate sunlight is crucial for leaf development. Adjust the bottle position if leaves lean toward light.
  • Nutrients: Optional, but adding organic liquid fertilizer every 2 weeks can accelerate growth.
  • Pruning: Harvest outer leaves regularly to encourage new growth and prevent overcrowding.

Even if you forget to water for a day or two, water spinach is resilient and continues to grow.


8. Harvesting Water Spinach

Water spinach grows rapidly, and you can begin harvesting within 2–3 weeks:

  • Cut-and-come-again method: Snip outer stems and leaves 2–3 inches above the waterline. Leave inner stems to continue growing.
  • Full harvest: If needed, cut the entire plant for cooking. New growth emerges from nodes for a second harvest.
  • Continuous harvest: Start new cuttings every 1–2 weeks for a steady supply of fresh greens.

This method allows for frequent, fresh harvests without replanting each time.


9. Advantages of Growing Vegetables in Plastic Bottles Without Soil

Using recycled bottles for hydroponic gardening offers numerous benefits:

  • Space-saving: Perfect for urban apartments and small terraces.
  • Water-efficient: Uses less water than traditional soil gardening.
  • Low-maintenance: Hardy plants like water spinach grow well with minimal care.
  • Sustainable: Recycles plastic and promotes zero-waste gardening.
  • Fresh and organic: Enjoy chemical-free, nutrient-rich greens year-round.

This approach is ideal for anyone looking to grow vegetables sustainably and conveniently.


10. Common Challenges and Solutions

Even though hydroponic water spinach is easy to grow, some issues may arise:

  • Yellowing leaves: Caused by insufficient sunlight or lack of nutrients. Adjust position and add liquid fertilizer.
  • Algae growth in water: Prevent by using opaque bottles or covering clear bottles with paper or cloth.
  • Root rot: Change water regularly and avoid stagnant conditions.
  • Pests: Minimal indoors, but watch for small insects. Neem oil or organic spray works if necessary.

Regular observation ensures your plants stay healthy and productive.


11. Maximizing Yield in Bottle Hydroponics

To get the best results:

  • Grow multiple bottles for continuous harvest.
  • Rotate bottles to ensure even sunlight exposure.
  • Use succession planting, adding new cuttings every 1–2 weeks.
  • Keep water clean and enriched with nutrients for faster growth.
  • Hang bottles vertically to save space and improve airflow.

With these tips, a small balcony or terrace can produce enough water spinach for regular family meals.


12. Cooking Ideas for Homegrown Water Spinach

Water spinach is delicious and versatile in the kitchen:

  • Stir-fried with garlic and chili: Quick and flavorful.
  • Boiled or steamed: Retains nutrients and crispness.
  • Soups and broths: Adds a healthy green boost.
  • Salads: Lightly blanched leaves with a dash of sesame oil or dressing.
  • Juices and smoothies: Blend fresh leaves for a nutrient-rich green drink.

Freshly harvested water spinach from your hydroponic bottles is more flavorful and nutritious than store-bought greens.


13. Why Hydroponic Bottle Gardening Works

Hydroponic gardening in plastic bottles works because:

  • Water spinach is naturally aquatic and thrives in water without soil.
  • Bottles retain water, creating an ideal environment for roots.
  • Limited space encourages compact, manageable growth.
  • Vertical or hanging setups maximize sunlight exposure.

Even beginners can grow vegetables successfully with minimal attention, making it perfect for urban living.


14. Benefits of Low-Maintenance Bottle Gardening

  • Reduces time spent on daily watering and weeding
  • Encourages eco-friendly practices by reusing plastic bottles
  • Provides a continuous supply of fresh, healthy vegetables
  • Perfect for small spaces like kitchen counters, terraces, or balconies
  • Ideal for kids or beginner gardeners to learn about plant growth

Hydroponic bottle gardening transforms even limited spaces into productive, sustainable vegetable gardens.


Conclusion

Growing water spinach in recycled plastic bottles without soil is easy, fun, and sustainable. Even with minimal care, you can enjoy fresh, nutrient-rich vegetables year-round. Using this method, you can create a low-maintenance, space-efficient, and eco-friendly garden on your balcony, terrace, or kitchen counter.

Start your hydroponic bottle garden today and enjoy the benefits of fresh, homegrown water spinach—without soil, without constant care, and with minimal effort. This approach not only provides healthy greens but also supports a sustainable, environmentally-friendly lifestyle.

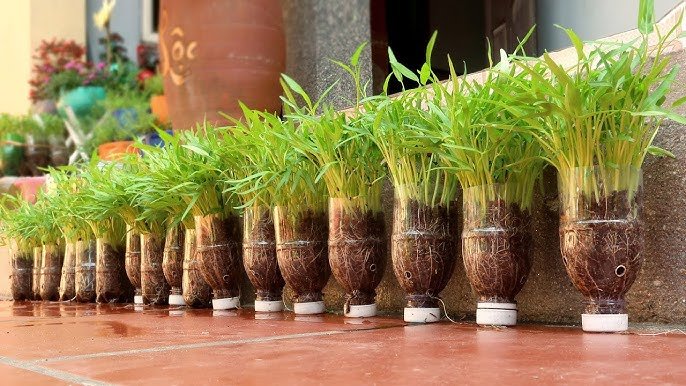
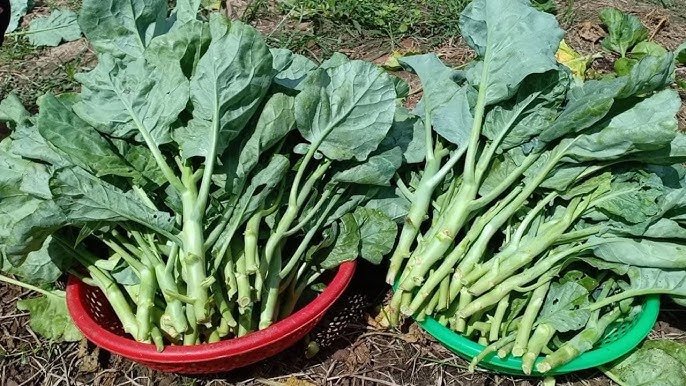
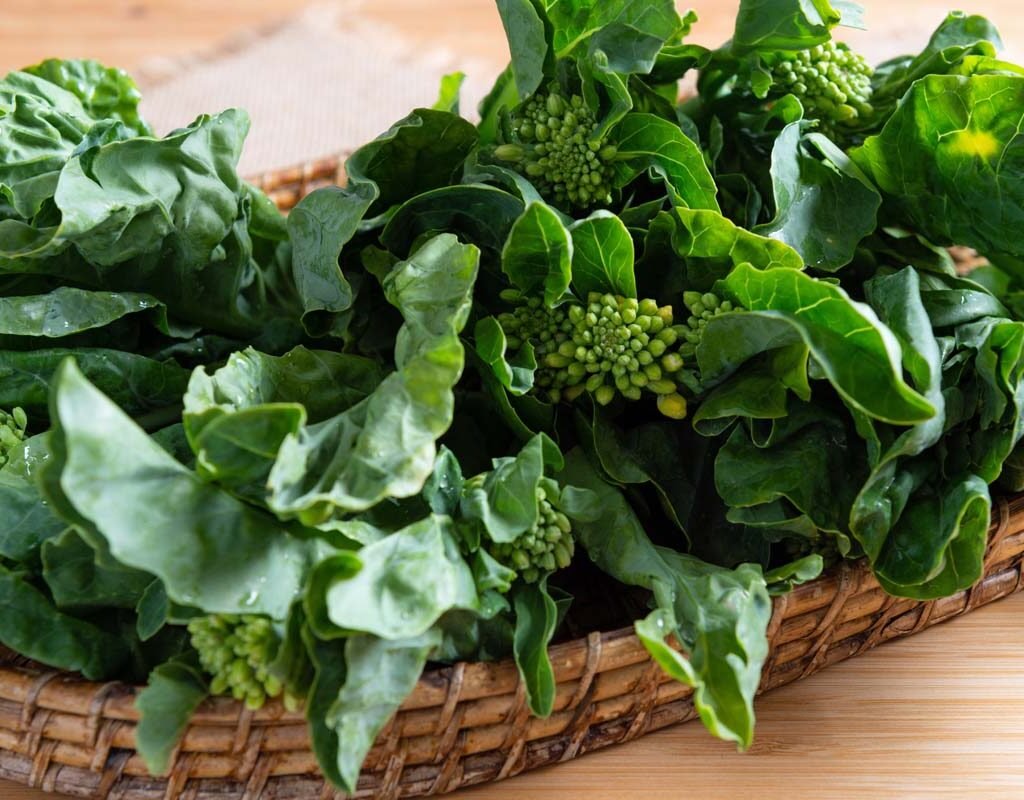
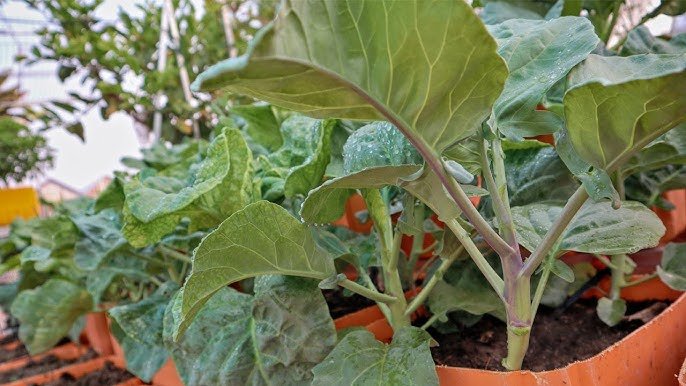
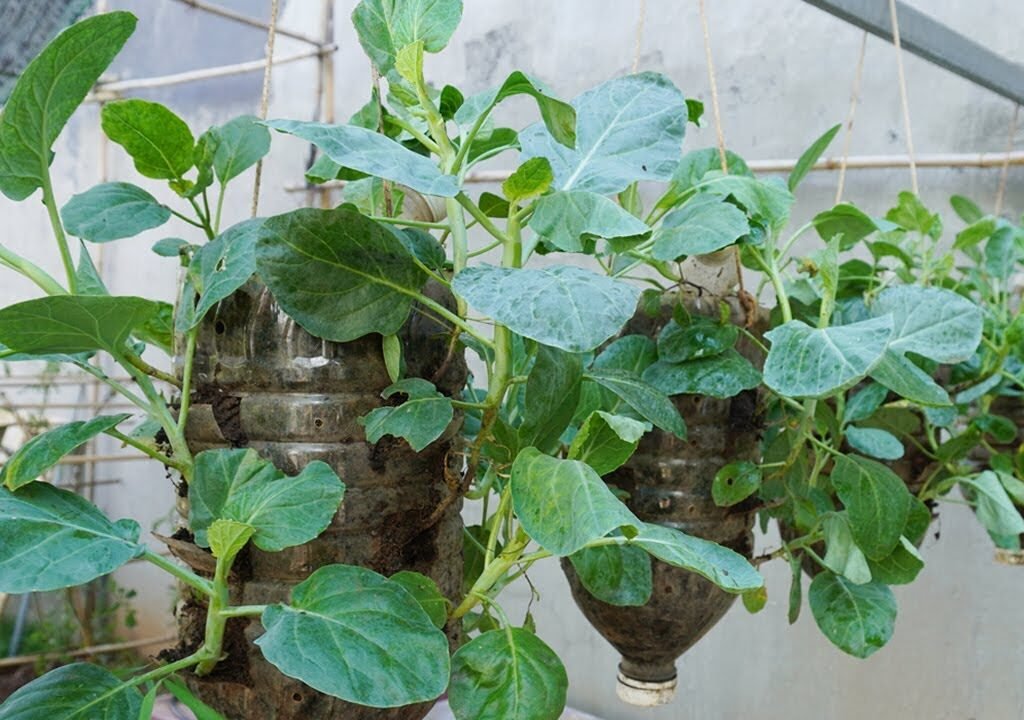
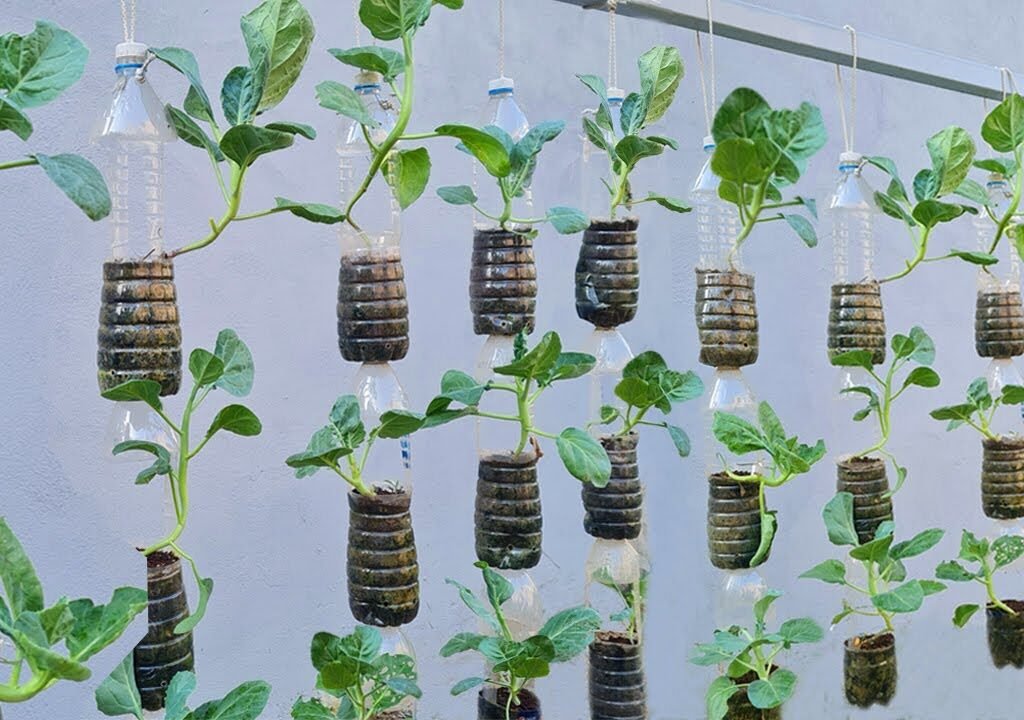
How to Grow Fresh Chinese Broccoli in Plastic Bottles – Minimal Care, Maximum Harvest

How to Grow Fresh Chinese Broccoli in Plastic Bottles – Minimal Care, Maximum Harvest

Imagine being able to grow fresh, nutritious vegetables at home without spending hours on gardening chores. With Chinese broccoli (Gai Lan) and a few simple materials, this is entirely possible. Using plastic bottles as mini-planters, you can cultivate fresh Chinese broccoli right on your balcony, terrace, or kitchen counter—even with minimal attention. This method is perfect for beginners, busy individuals, and anyone looking to enjoy homegrown, healthy greens without intensive care.

In this comprehensive guide, we’ll cover everything you need to know about growing Chinese broccoli in plastic bottles, including preparation, planting, care, and harvesting.


1. Why Grow Chinese Broccoli at Home?

Chinese broccoli, also known as Gai Lan, is a leafy green vegetable with tender stems and flavorful leaves. It is widely used in Asian cuisine and is highly nutritious.

Nutritional benefits of Chinese broccoli include:

  • Rich in vitamins A, C, and K
  • High in calcium, iron, and fiber
  • Contains antioxidants that support overall health
  • Promotes bone health, immunity, and digestion

Growing it at home allows you to:

  • Ensure fresh, pesticide-free vegetables
  • Save money on grocery bills
  • Reduce trips to the market
  • Engage in sustainable, eco-friendly gardening

Even without constant care, Chinese broccoli is hardy and grows quickly, making it ideal for container gardening.


2. Why Use Plastic Bottles for Growing Vegetables?

Plastic bottle gardening is a smart, eco-friendly solution for urban gardeners. Using recycled bottles for Chinese broccoli offers several advantages:

  • Saves space: Ideal for balconies, terraces, and small kitchens.
  • Eco-friendly: Recycles plastic, reducing environmental waste.
  • Water-efficient: Soil in bottles retains moisture, requiring less frequent watering.
  • Portable: Bottles can be moved for optimal sunlight or protection from harsh weather.
  • Low-maintenance: Perfect for busy individuals who want fresh vegetables with minimal effort.

This approach allows you to grow organic vegetables anywhere, even if you don’t have a traditional garden.


3. Materials Needed for Plastic Bottle Gardening

Before starting, gather the following materials:

  • Plastic bottles (1.5–2 liters work best)
  • Potting soil or compost mix (well-draining, nutrient-rich)
  • Chinese broccoli seeds or seedlings
  • Scissors or a craft knife
  • String, wire, or hooks (optional for hanging bottles)
  • Watering can or spray bottle

Optional: liquid organic fertilizer to promote healthy growth and faster harvest.

With these simple materials, you can start growing Chinese broccoli right at home.


4. Preparing Plastic Bottles for Planting

Transforming a plastic bottle into a functional planter is easy:

  1. Clean the Bottles:
    Wash thoroughly to remove labels and residues.
  2. Cut an Opening:
    Make a rectangular or circular hole on the side of the bottle for easy planting and harvesting.
  3. Add Drainage Holes:
    Punch small holes at the bottom to prevent waterlogging.
  4. Optional Hanging Setup:
    Use holes near the top and thread a string or wire to hang bottles vertically. This is great for space-saving vertical gardens.
  5. Add Soil:
    Fill the bottle with 3–4 inches of nutrient-rich soil, mixed with compost or perlite for better drainage.

Your bottle is now ready for planting Chinese broccoli seeds or seedlings.


5. Selecting Seeds or Seedlings

Choosing the right seeds or seedlings is crucial for a successful harvest:

  • Look for healthy, disease-free seeds or seedlings from a reliable source.
  • Seedlings with 2–3 leaves are ideal for transplanting into bottles.
  • Compact varieties of Chinese broccoli are preferable for container growth.

Starting with healthy seeds or seedlings ensures robust growth with minimal care.


6. Sowing Chinese Broccoli Seeds

Growing from seeds is economical and satisfying. Follow these steps:

  1. Fill the Bottle:
    Use potting soil and gently firm it.
  2. Plant Seeds:
    Make small holes about ½ inch deep. Place 2–3 seeds per hole and cover lightly with soil.
  3. Water:
    Mist lightly to keep soil moist but not waterlogged.
  4. Sunlight:
    Place the bottle in a bright location with 4–6 hours of sunlight daily.

Seeds usually germinate in 5–10 days, producing tender seedlings ready for growth.


7. Transplanting Seedlings in Bottles

If starting seedlings indoors, transplant them into bottles once they have 2–3 true leaves:

  1. Dig a small hole in the soil-filled bottle.
  2. Gently place the seedling into the hole and firm the soil around it.
  3. Water lightly to settle the roots.
  4. Place in sunlight or under a grow light to encourage healthy growth.

Seedlings quickly adapt to the bottle environment and begin developing strong stems and leafy greens.


8. Caring for Chinese Broccoli in Bottles

Chinese broccoli is hardy and does not require constant attention, but minimal care ensures healthy growth:

  • Watering: Keep soil moist. Bottles retain water well, reducing the need for frequent watering.
  • Light: Ensure 4–6 hours of sunlight daily. Grow lights work if sunlight is insufficient.
  • Fertilization: Use organic liquid fertilizer every 2 weeks for nutrient boost.
  • Pruning: Remove yellow or damaged leaves to maintain airflow and prevent disease.

Even if you occasionally forget to water, Chinese broccoli will continue to grow, making it perfect for low-maintenance gardening.


9. Preventing Pests and Diseases

While hardy, Chinese broccoli can occasionally face issues:

  • Aphids: Spray with neem oil or mild soapy water.
  • Cabbage worms or caterpillars: Handpick or use natural deterrents.
  • Fungal issues: Ensure proper drainage and avoid overwatering.

Routine observation is sufficient to keep your plants healthy, even with minimal gardening effort.


10. Harvesting Chinese Broccoli

Chinese broccoli grows quickly and can be harvested multiple times:

  • Cut-and-come-again method: Snip outer stems and leaves when 4–6 inches long, leaving the center to continue growing.
  • Full harvest: Cut entire plant if needed for cooking.
  • Continuous harvest: Planting seeds every 2–3 weeks ensures a steady supply of fresh greens.

Leaves are tender, stems are crisp, and both can be used in stir-fries, soups, and salads.


11. Advantages of Growing Chinese Broccoli in Plastic Bottles

Using plastic bottles for Chinese broccoli offers several benefits:

  • Space-efficient: Ideal for small terraces, balconies, or kitchen counters.
  • Low-maintenance: Hardy plants grow with minimal care.
  • Sustainable: Reuses plastic bottles and reduces food waste.
  • Cost-effective: Saves money on grocery bills.
  • Fresh and organic: Pesticide-free, nutrient-rich greens.

This method is perfect for busy urban gardeners who want fresh vegetables without intensive labor.


12. Tips for Maximizing Yield

To get the most from your terrace or balcony garden:

  • Grow multiple bottles for continuous harvest.
  • Use succession planting every 2–3 weeks for steady supply.
  • Rotate bottles to ensure even sunlight exposure.
  • Mix compost or organic fertilizer to enhance growth.
  • Keep bottles elevated or hung to save space and improve airflow.

These simple tips allow even low-maintenance gardeners to enjoy abundant harvests.


13. Cooking Ideas for Homegrown Chinese Broccoli

Chinese broccoli is versatile in the kitchen:

  • Stir-fried with garlic: Classic and flavorful.
  • Boiled or steamed: Retains nutrients and crispness.
  • Soups: Adds a healthy green boost.
  • Salads: Lightly blanched leaves with dressing make a delicious side.
  • Sautéed with soy sauce and sesame oil: Perfect for quick meals.

Freshly harvested leaves taste crisp and flavorful, much better than store-bought options.


14. Why Low-Maintenance Bottle Gardening Works

Plastic bottle gardening with hardy vegetables like Chinese broccoli works because:

  • Bottles retain moisture, reducing the need for frequent watering.
  • Hardy plants tolerate brief neglect without significant damage.
  • Limited soil volume encourages compact, manageable growth.
  • Vertical or container setup maximizes sunlight exposure.

Even busy individuals can grow vegetables without daily care, making this a perfect solution for urban homes.


Conclusion

Growing Chinese broccoli in plastic bottles is easy, sustainable, and rewarding. With minimal care, even beginners can enjoy fresh, nutritious vegetables right on their terrace, balcony, or kitchen counter. Plastic bottle gardening is not only eco-friendly but also space-efficient and cost-effective, perfect for city dwellers.

By following the steps for planting, caring, and harvesting, you can enjoy continuous harvests of leafy greens and tender stems. Start your plastic bottle Chinese broccoli garden today and experience the joy of homegrown, organic vegetables with minimal effort.

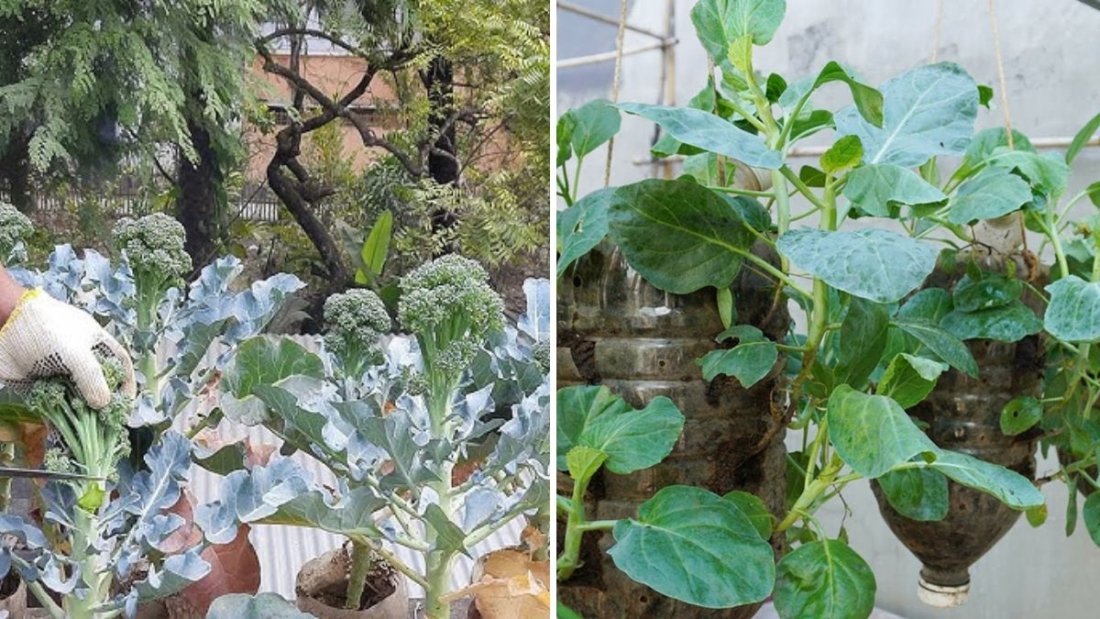
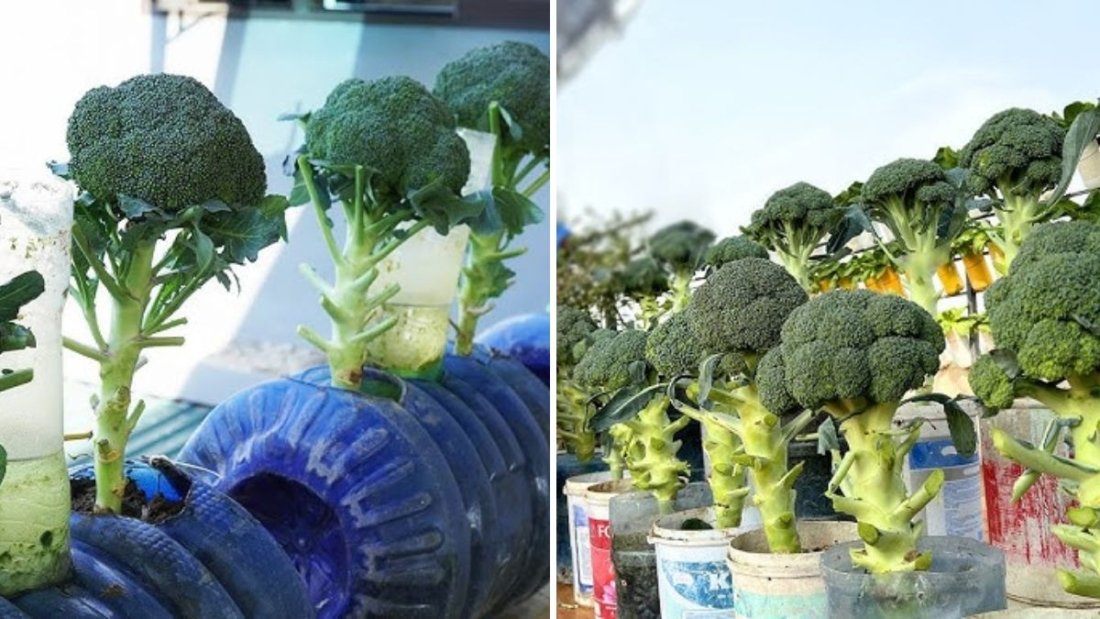
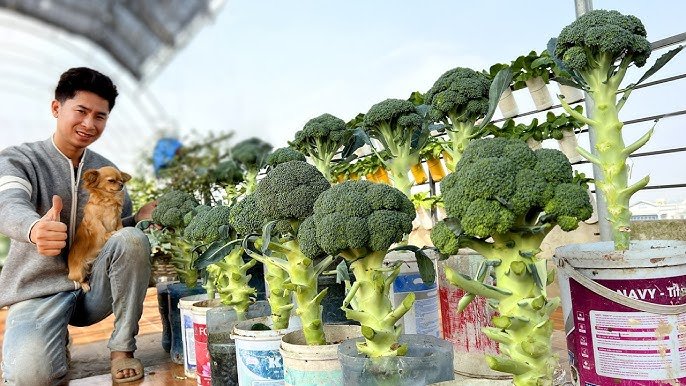
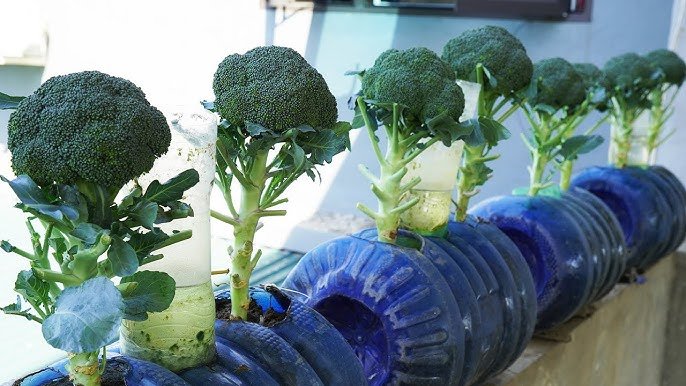
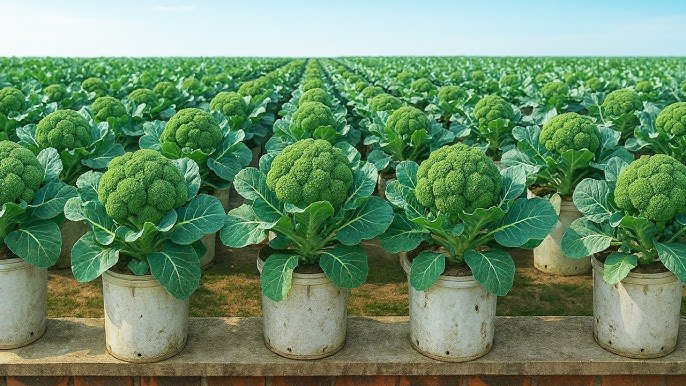
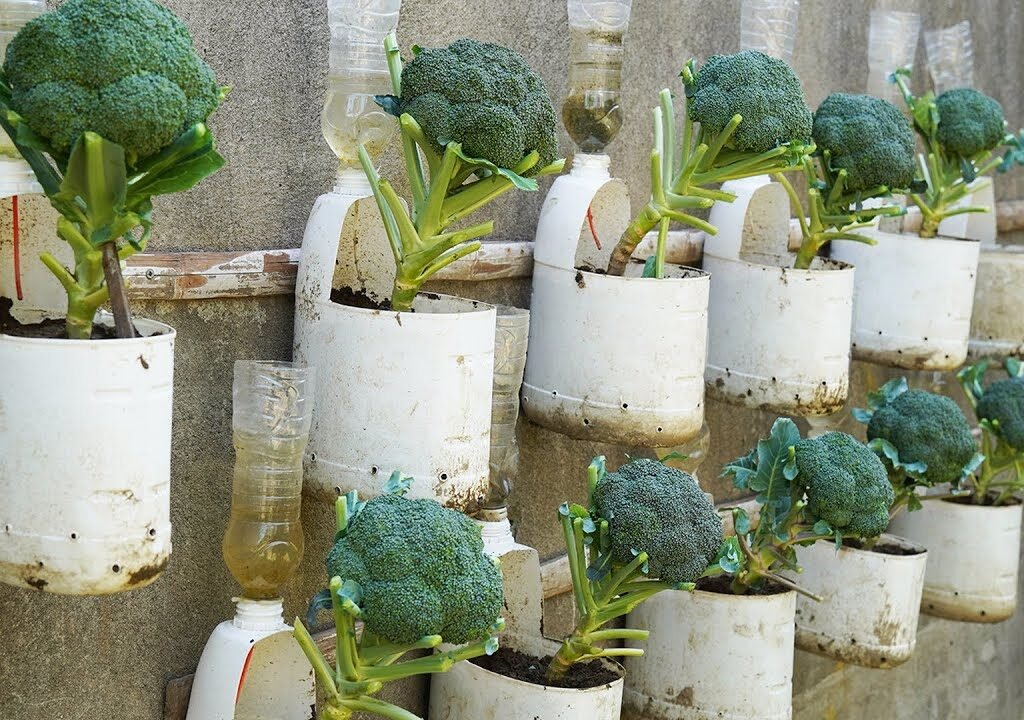
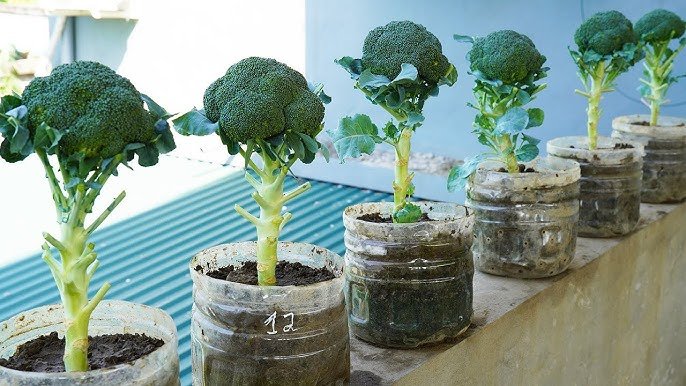
How to Grow Broccoli on Your Terrace Using Plastic Bottles – Easy Container Gardening Guide

How to Grow Broccoli on Your Terrace Using Plastic Bottles – Easy Container Gardening Guide

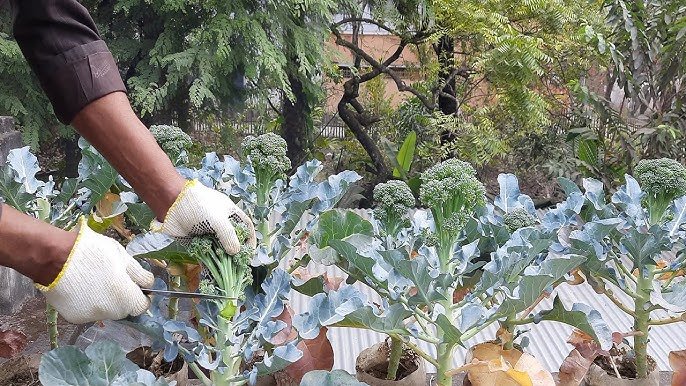
Broccoli is one of the most nutritious and versatile vegetables you can grow at home. Packed with vitamins, minerals, and antioxidants, it supports immunity, digestion, and overall health. But did you know that you can grow broccoli even on your terrace using plastic bottles? Yes, with a little creativity and some DIY container gardening techniques, you can enjoy fresh, homegrown broccoli without a traditional garden.

In this comprehensive guide, we’ll cover how to grow broccoli on a terrace using plastic bottles, including step-by-step instructions for planting, care, and harvesting. This method is beginner-friendly, eco-friendly, and perfect for urban gardeners.


1. Why Grow Broccoli on the Terrace?

Terrace gardening has become increasingly popular, especially in urban areas where space is limited. Growing broccoli on your terrace allows you to:

  • Utilize unused space like rooftops, balconies, or terraces.
  • Enjoy organic, pesticide-free vegetables at home.
  • Reduce trips to the market and save money.
  • Engage in a sustainable, eco-friendly gardening practice.
  • Teach kids and family members about growing their own food.

Terrace gardening also provides the benefit of sunlight exposure, which is essential for broccoli growth.


2. Why Use Plastic Bottles for Broccoli?

Plastic bottle gardening is an innovative, sustainable way to grow vegetables in small spaces. For broccoli, it offers several advantages:

  • Recycles plastic bottles, reducing environmental waste.
  • Space-saving: perfect for terraces or small balconies.
  • Water-efficient: soil in bottles retains moisture, reducing frequent watering.
  • Portable: easy to move for sunlight or protection from harsh weather.
  • Easy for beginners: requires minimal gardening tools or experience.

Using plastic bottles not only helps the environment but also allows you to grow fresh, nutritious broccoli year-round.


3. Materials Needed for Terrace Broccoli in Plastic Bottles

Before starting, gather the necessary materials:

  • Plastic bottles (1.5–2 liters, transparent or opaque)
  • Potting soil or compost mix (well-draining and nutrient-rich)
  • Broccoli seeds or seedlings
  • Scissors or a craft knife
  • String, wire, or hooks (optional for hanging bottles)
  • Watering can or spray bottle

Optional: organic fertilizer such as compost tea or liquid seaweed for healthy growth.

With these materials, you can easily set up a small but productive broccoli garden on your terrace.


4. Preparing Plastic Bottles for Broccoli Planting

Transforming plastic bottles into mini garden containers is simple. Follow these steps:

  1. Clean the Bottles:
    Wash thoroughly and remove any labels or residues to avoid chemical contamination.
  2. Cut the Bottle:
    Cut a rectangular opening along the side of the bottle for planting. Leave the bottom intact for drainage.
  3. Add Drainage Holes:
    Poke 4–5 small holes at the bottom to allow excess water to drain, preventing root rot.
  4. Optional Hanging Setup:
    Make holes near the top and thread string or wire to hang bottles vertically, saving terrace space.
  5. Fill with Soil:
    Add 4–5 inches of nutrient-rich potting soil, mixed with compost or perlite for aeration and drainage.

Your bottles are now ready for broccoli seeds or seedlings.


5. Choosing the Right Broccoli Variety

Selecting the right broccoli variety is key for terrace gardening:

  • Calabrese Broccoli: Classic variety with large heads, ideal for container growth.
  • Sprouting Broccoli: Produces smaller heads but multiple sprouts, great for continuous harvest.
  • Tenderstem or Broccolini: Compact, fast-growing, perfect for small containers.

For terrace gardens, compact or dwarf varieties are recommended because they grow well in limited soil volume and smaller bottles.


6. Sowing Broccoli Seeds in Bottles

You can start broccoli either from seeds or seedlings. Starting from seeds is cost-effective and rewarding:

  1. Fill the bottle with potting soil and gently firm it.
  2. Plant seeds: Make small holes about ½ inch deep and place 1–2 seeds per hole.
  3. Cover lightly with soil and press gently.
  4. Water: Mist lightly to keep soil moist but not soggy.
  5. Provide sunlight: Place the bottles in a sunny terrace area with at least 4–6 hours of direct sunlight.

Seeds typically germinate in 5–10 days, producing tender seedlings ready for care and transplantation.


7. Transplanting Seedlings in Bottles

If you start broccoli seeds indoors, transplant seedlings to bottles when they have 2–3 true leaves:

  1. Dig a small hole in the soil-filled bottle for the seedling.
  2. Place the seedling gently into the hole and firm the soil around it.
  3. Water lightly to settle the roots.
  4. Provide light and air circulation: Sunlight and fresh air help the seedling grow strong.

Broccoli seedlings establish quickly in bottles and begin developing strong roots and leafy stems.


8. Caring for Broccoli in Plastic Bottles

Proper care ensures your terrace-grown broccoli thrives:

  • Watering: Keep soil consistently moist. Bottles retain moisture but check daily.
  • Light: 4–6 hours of sunlight is essential. Use grow lights if terrace sunlight is limited.
  • Fertilization: Use organic fertilizer every 2 weeks to support strong head formation.
  • Pruning: Remove yellowing leaves and lower leaves to encourage airflow and prevent disease.
  • Support: As plants grow taller, you can use sticks or stakes to support them.

With consistent care, broccoli in bottles can produce healthy heads in just 60–90 days.


9. Preventing Pests and Diseases

Even on terraces, broccoli can face challenges:

  • Aphids: Spray with neem oil or soapy water.
  • Cabbage worms or caterpillars: Handpick or use organic deterrents.
  • Fungal diseases: Ensure proper drainage, avoid waterlogging, and provide air circulation.

Regular inspection ensures your terrace broccoli stays healthy and productive.


10. Harvesting Broccoli

Knowing when to harvest is key for maximum flavor and nutrition:

  • Main heads: Harvest when buds are tight and firm, before flowers open.
  • Side shoots: After cutting the main head, side shoots continue to grow, giving multiple harvests.
  • Timing: Typically 60–90 days after sowing, depending on the variety.

Harvesting correctly ensures continuous production and prevents the plant from bolting.


11. Advantages of Terrace Broccoli in Plastic Bottles

Growing broccoli on your terrace in bottles offers numerous benefits:

  • Space-efficient: Ideal for apartments, rooftops, and small balconies.
  • Eco-friendly: Reuses plastic bottles and promotes sustainable gardening.
  • Cost-effective: Reduces grocery bills with fresh, homegrown vegetables.
  • Healthy and organic: Pesticide-free and nutrient-rich.
  • Educational: Teaches family members about gardening and sustainability.

This approach allows even city dwellers to enjoy fresh, organic broccoli at home.


12. Tips for Maximizing Yield

To get the best results from terrace bottle gardening:

  • Grow multiple bottles to ensure a steady supply.
  • Use succession planting by starting new seeds every 2–3 weeks.
  • Provide consistent sunlight and regular watering.
  • Rotate bottles to prevent uneven growth.
  • Consider companion planting with herbs like basil or parsley for natural pest control.

With these techniques, you can turn a small terrace into a productive, eco-friendly vegetable garden.


13. Cooking Ideas for Homegrown Broccoli

Broccoli is versatile in the kitchen:

  • Steamed or boiled: Simple and nutritious.
  • Stir-fried: Combine with garlic, olive oil, and your favorite vegetables.
  • Roasted: Toss with olive oil, salt, and pepper for a crispy texture.
  • Soups and casseroles: Adds flavor and nutrients to various dishes.
  • Salads: Use lightly steamed florets for fresh, crunchy salads.

Homegrown broccoli tastes fresher and is more flavorful than store-bought options.


14. Why Terrace Gardening is Perfect for Urban Living

Terrace gardening allows urban dwellers to enjoy fresh vegetables without needing a garden:

  • Accessible and convenient: Grow food where space is limited.
  • Water-efficient: Plastic bottles reduce water waste.
  • Sunlight exposure: Roofs and terraces provide ideal sun for vegetable growth.
  • Fresh and organic: Harvest vegetables at their peak nutritional value.
  • Sustainable: Reduces plastic waste and promotes eco-friendly gardening.

Even small terraces can produce enough broccoli for regular family meals.


Conclusion

Growing broccoli on your terrace using plastic bottles is easy, sustainable, and rewarding. By following the steps for planting, caring, and harvesting, you can enjoy fresh, organic broccoli even in urban spaces. Plastic bottle gardening is not only eco-friendly but also space-efficient and cost-effective, making it perfect for city dwellers and beginners.

With consistent watering, sunlight, and attention to pests, your terrace broccoli will thrive, providing nutritious heads and side shoots for months. Start your plastic bottle broccoli garden today and experience the joy and satisfaction of growing your own healthy vegetables at home.

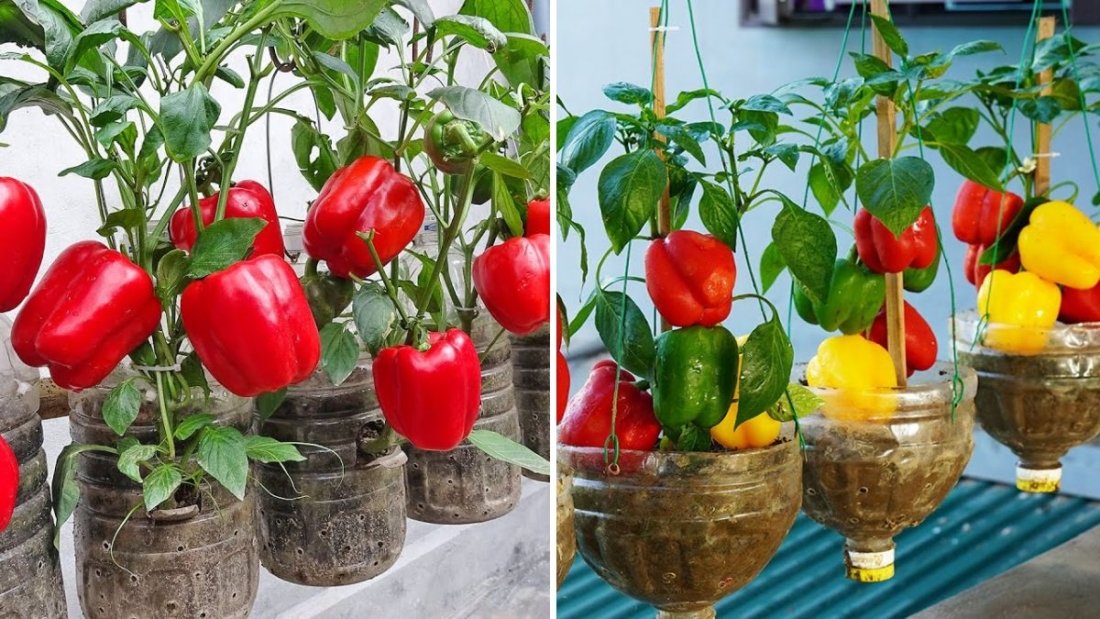
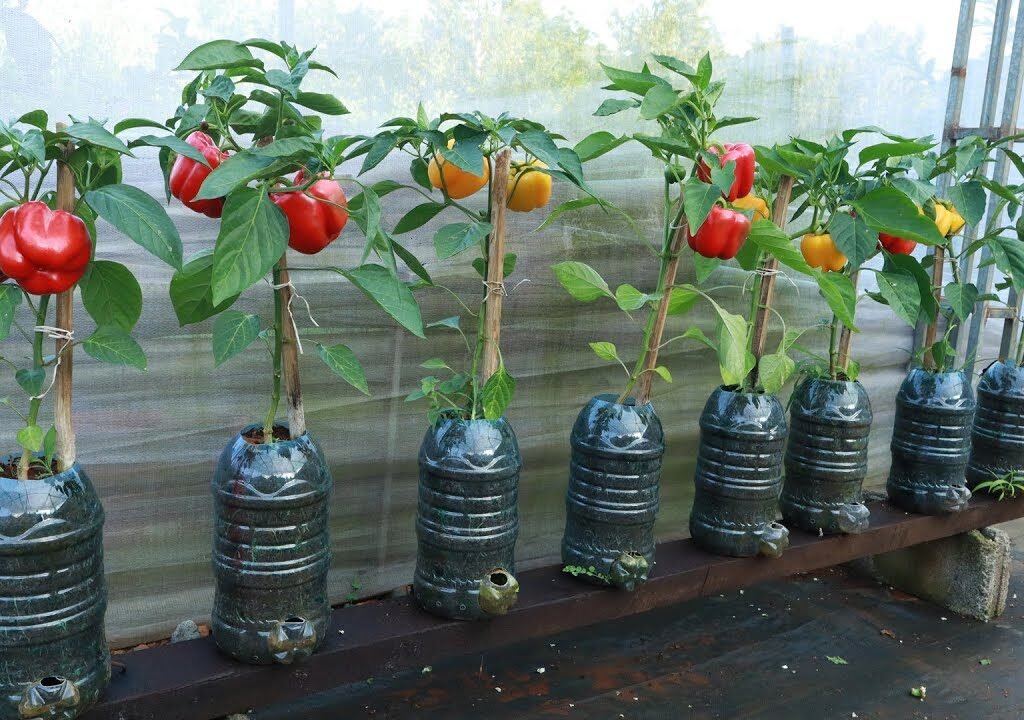
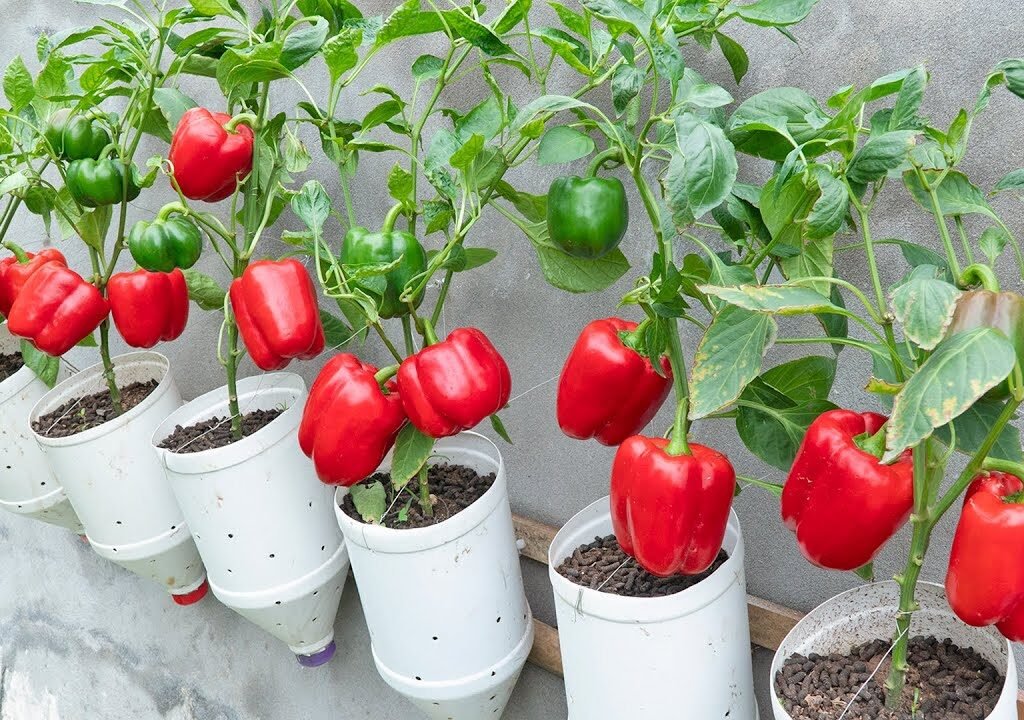
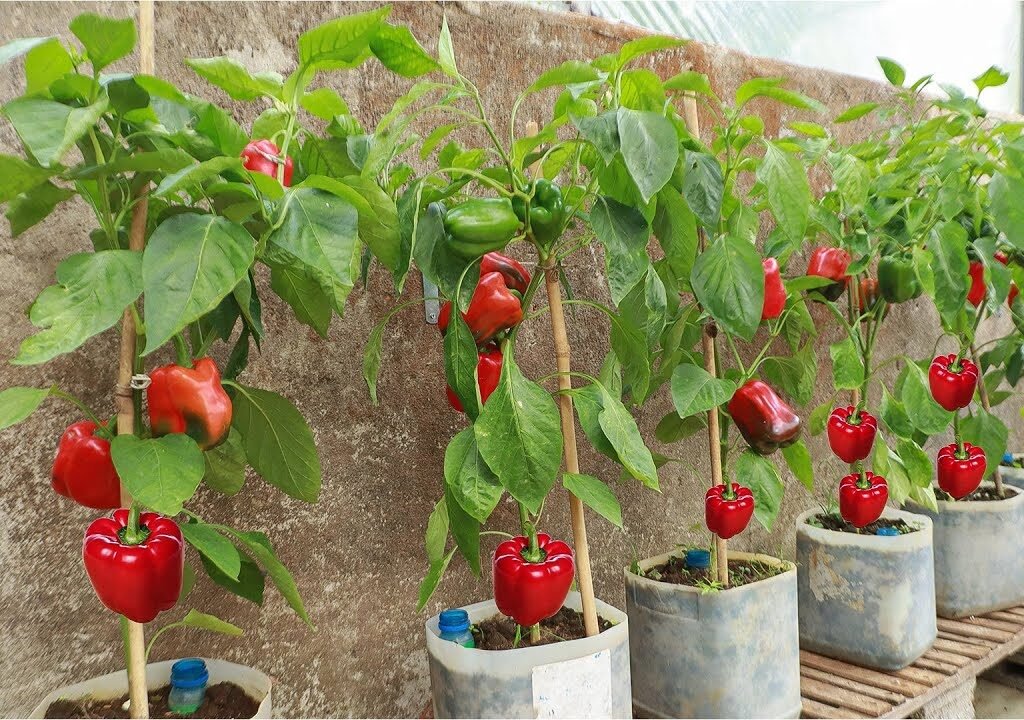
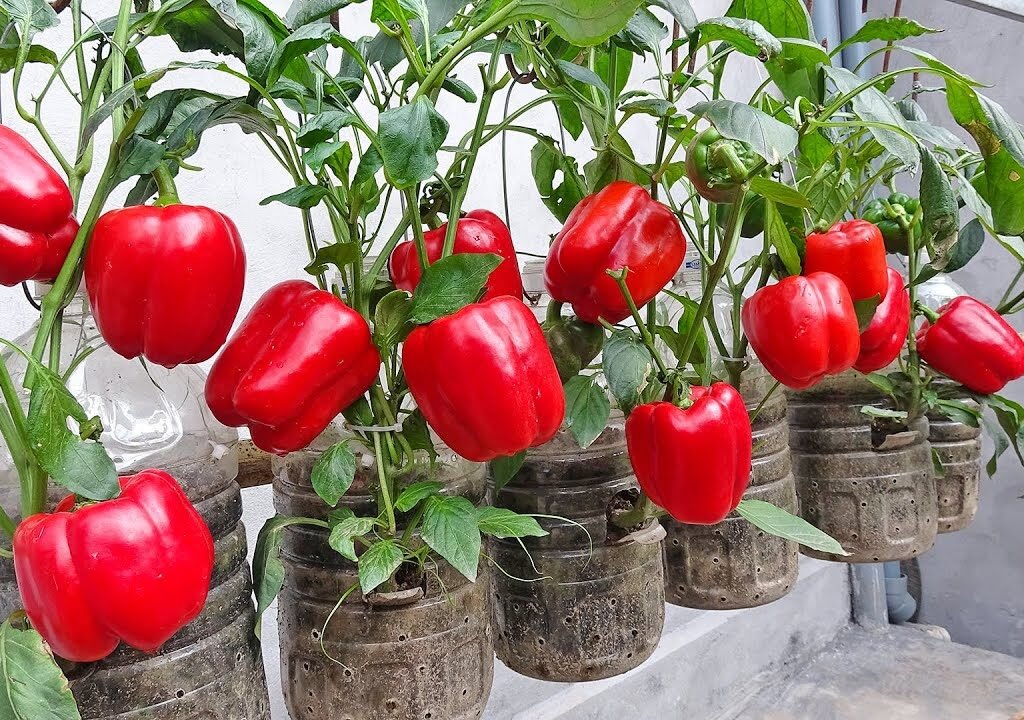
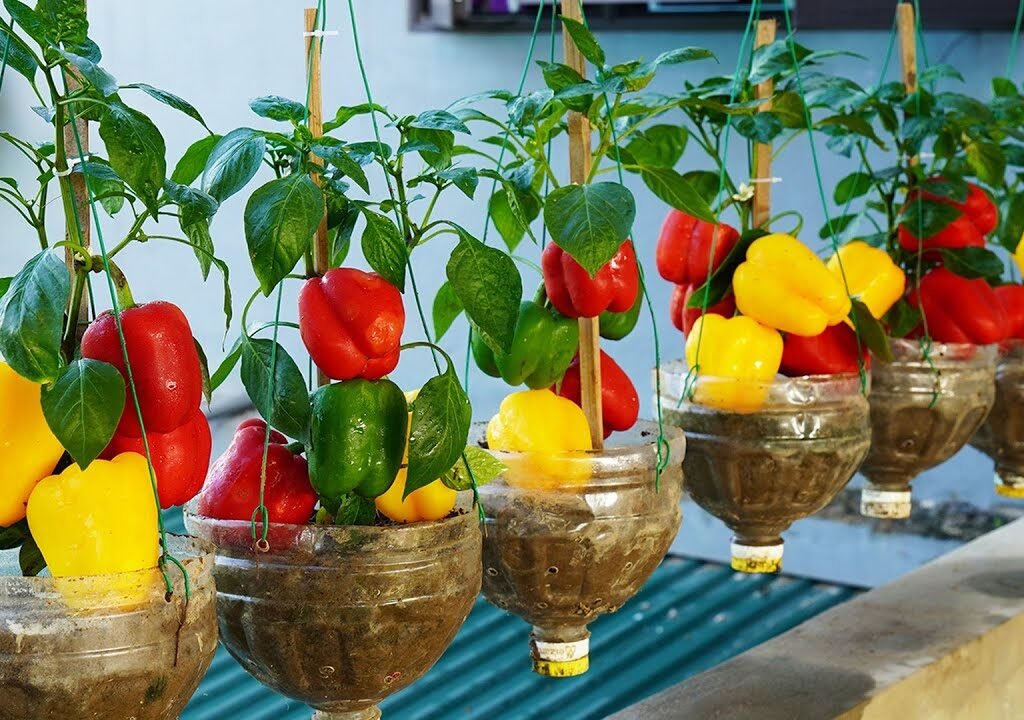
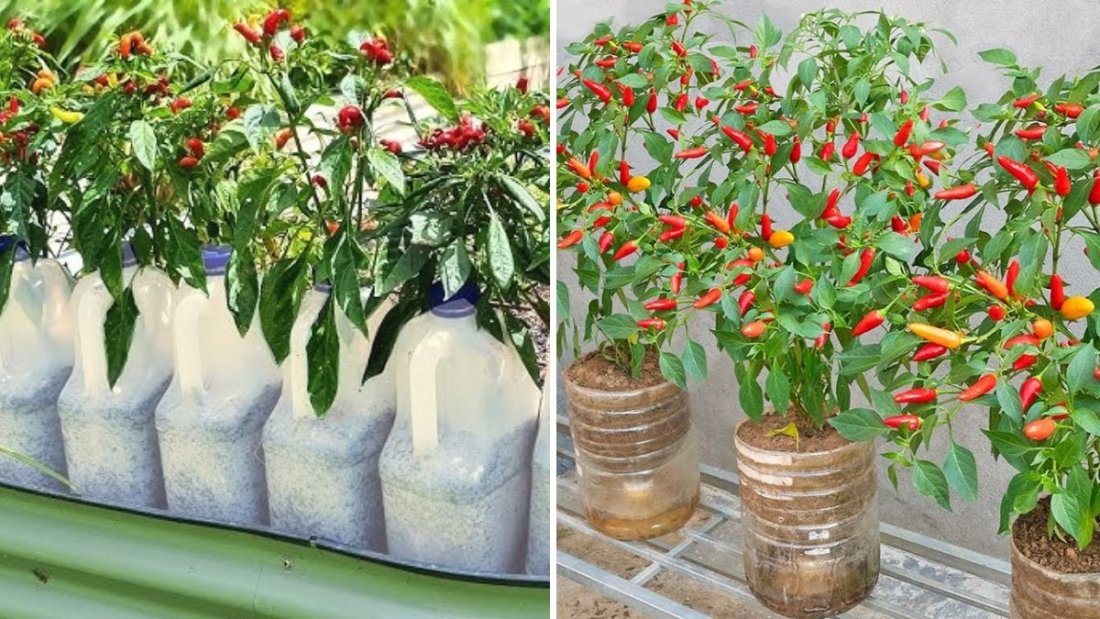
Amazing: Growing Bell Peppers in Recycled Plastic Bottles – A Surprisingly Effective Method for Home Gardening

Amazing: Growing Bell Peppers in Recycled Plastic Bottles – A Surprisingly Effective Method for Home Gardening

Bell peppers, also known as capsicum, are one of the most versatile and popular vegetables grown in home gardens. Their crisp texture, vibrant colors, and rich nutritional profile — including vitamins A, C, and antioxidants — make them a favorite in kitchens worldwide. Traditionally, bell peppers require garden space, nutrient-rich soil, and careful maintenance to thrive.

However, modern gardening techniques have introduced innovative ways to grow bell peppers in small spaces, using recycled materials like plastic bottles. This method is eco-friendly, cost-effective, and surprisingly effective, allowing anyone to grow healthy, high-yield bell pepper plants, even in apartments, balconies, or rooftops. In this blog, we explore step-by-step guidance on growing bell peppers in recycled plastic bottles, ensuring maximum yield and fruit quality.


Step 1: Selecting the Right Bell Pepper Varieties

Choosing the right variety is critical for container gardening success:

  • Compact Varieties: For bottle gardening, dwarf or bush-type bell peppers are ideal because they don’t require extensive space.
  • Color Preferences: Depending on your preference, choose red, yellow, orange, or green varieties. Some varieties change color as they ripen, giving you multiple harvest options.
  • High-Yield Varieties: Certain hybrids are bred for high fruit production, disease resistance, and uniform growth, perfect for limited spaces.

The right variety ensures strong plants, more fruits, and easier care.


Step 2: Preparing Recycled Plastic Bottles

Plastic bottles provide an inexpensive and reusable planting container, perfect for small-space gardening:

  • Bottle Size: Use 2–5 liter bottles depending on the size of the plant. Larger bottles support deeper root growth and better fruiting.
  • Drainage Holes: Drill 3–5 holes at the bottom to prevent waterlogging and root rot.
  • Aeration Holes: Optional small side holes improve airflow and prevent root suffocation.
  • Sunlight Protection: Transparent bottles may expose roots to sunlight; paint them or wrap them in cloth to prevent damage.
  • Placement: Arrange bottles vertically, hang them, or place them on shelves to maximize space efficiency.

Properly prepared bottles create a healthy micro-environment for bell pepper roots to thrive.


Step 3: Choosing the Right Growing Medium

Bell peppers thrive in well-draining, fertile soil:

  • Soil Mix: Combine garden soil, compost, and perlite or vermiculite to provide nutrients and aeration.
  • Organic Fertilizers: Add decomposed cow manure, vermicompost, or compost for slow-release nutrients.
  • Soil pH: Bell peppers prefer slightly acidic to neutral soil, ideally between pH 6.0 and 7.0.
  • Moisture Retention: The medium should retain sufficient moisture without waterlogging the roots.

A balanced medium promotes strong root growth and higher fruit production.


Step 4: Planting Seeds or Seedlings

Once bottles and soil are ready, it’s time to plant:

  • Seed Sowing: Fill bottles with soil, plant 2–3 seeds per bottle, and cover lightly with soil. Water gently to keep soil moist.
  • Transplanting Seedlings: If using nursery seedlings, dig a hole in the soil and place the seedling carefully, firming the soil around the roots.
  • Spacing: One plant per bottle is ideal for proper airflow and growth.
  • Light Requirements: Bell peppers need 6–8 hours of sunlight daily. Place bottles in sunny spots or supplement with grow lights if indoors.

Healthy seedlings are crucial for maximum fruiting and high yields.


Step 5: Watering Techniques

Watering is critical for bell pepper growth in bottles:

  • Consistent Moisture: Keep the soil evenly moist, avoiding overwatering or drought.
  • Bottom Watering: Water from the base to encourage deep root growth and reduce leaf disease risk.
  • Drainage: Ensure excess water can escape from the bottom holes to prevent root rot.
  • Frequency: Water every 2–3 days, adjusting according to climate, bottle size, and soil moisture.

Proper watering supports flowering, fruiting, and healthy leaf growth.


Step 6: Fertilization and Nutrient Management

Bell peppers are nutrient-demanding, especially when grown in containers:

  • Organic Fertilizers: Apply compost, vermicompost, or cow manure regularly.
  • Liquid Fertilizers: Use balanced NPK fertilizers or liquid fertilizers every 2–3 weeks for sustained growth.
  • Flowering and Fruiting Boosters: High phosphorus and potassium fertilizers encourage flowering and improve fruit size and quantity.
  • Micronutrients: Calcium prevents blossom-end rot, and magnesium ensures lush foliage.

Balanced fertilization leads to multiple fruits and a long harvest period.


Step 7: Supporting Bell Pepper Plants

Bottle-grown bell peppers may need support due to limited space and fruit weight:

  • Stakes or Bamboo Poles: Use stakes to keep plants upright and prevent stem breakage.
  • Pruning: Remove lower leaves and early flowers to direct plant energy toward fruit development.
  • Tying: Gently tie stems to stakes or supports for extra stability.

Supporting plants ensures maximum fruit production and healthier growth.


Step 8: Pollination Tips

Bell peppers are self-pollinating, but assistance can improve yield:

  • Manual Pollination: Tap flowers or use a small brush to transfer pollen.
  • Air Circulation: Good airflow helps flowers self-pollinate effectively.
  • Attract Pollinators: Place flowering plants nearby or allow natural insects if outdoors.

Proper pollination increases fruit set and improves overall yield.


Step 9: Pest and Disease Management

Bottled bell peppers are less prone to soil-borne diseases, but vigilance is still important:

  • Common Pests: Aphids, whiteflies, and spider mites.
  • Organic Controls: Neem oil, insecticidal soap, or introducing natural predators like ladybugs.
  • Disease Prevention: Avoid waterlogging, ensure proper spacing, and remove infected leaves promptly.
  • Monitoring: Check plants regularly for yellow leaves, spots, or unusual growth patterns.

Healthy, pest-free plants produce more fruits over a longer period.


Step 10: Flowering and Fruit Development

Bell peppers generally begin flowering 8–12 weeks after planting:

  • Flower Care: Avoid excessive nitrogen fertilizers during flowering to encourage fruit set.
  • Fruit Formation: Each flower can develop into a pepper; remove any damaged or deformed fruits early.
  • Continuous Harvest: Regular care ensures the plant keeps flowering and producing fruits for months.

Healthy flowers directly translate into multiple bell peppers per plant.


Step 11: Harvesting Bell Peppers

Proper harvesting ensures quality and continuous production:

  • Timing: Harvest peppers when they reach desired size and color. Green peppers are often harvested first; red or yellow peppers are sweeter and hotter.
  • Technique: Use scissors or gently twist peppers from the stem, leaving a small stem attached to prolong shelf life.
  • Frequency: Check plants every 2–3 days during peak production to encourage more flowering and fruiting.

Frequent harvesting ensures maximum yield and sustained plant health.


Step 12: Year-Round Harvest Tips

With proper care, bell peppers can provide fruits all year round:

  • Indoor Gardening: During winter or low-light periods, move bottles indoors or under grow lights.
  • Temperature Control: Bell peppers grow best at 20–28°C; avoid frost or extreme heat.
  • Regular Fertilization: Continue providing nutrients during all seasons to support growth.
  • Pruning and Plant Maintenance: Remove old leaves and small non-productive fruits to stimulate continuous growth.

By following these tips, gardeners can enjoy a continuous supply of fresh bell peppers year-round.


Step 13: Benefits of Growing Bell Peppers in Plastic Bottles

  • Eco-Friendly: Reuse plastic bottles, reducing waste.
  • Space-Efficient: Ideal for small apartments, balconies, and rooftops.
  • Cost-Effective: Avoid purchasing expensive pots.
  • Control Over Growth: Easier to manage water, nutrients, and pests.
  • High Yield: Proper care results in multiple fruits per plant.

This method combines sustainability, convenience, and productivity for home gardeners.


Conclusion

Growing bell peppers in recycled plastic bottles is a simple, effective, and environmentally friendly method for producing fresh, high-yield vegetables in limited spaces. By selecting the right varieties, preparing bottles, managing soil, watering, fertilization, supporting plants, and regular harvesting, anyone can enjoy a continuous supply of healthy bell peppers.

This approach not only reduces waste and costs but also empowers gardeners to grow their own food efficiently. With careful attention to pollination, pest control, and pruning, bottle-grown bell peppers can thrive just as well as those grown in traditional garden beds, often producing multiple harvests throughout the year.

Key Takeaway:
Recycled plastic bottles are a practical and surprisingly effective container for bell pepper cultivation, allowing gardeners to achieve maximum fruit production and year-round harvests with minimal space and resources.

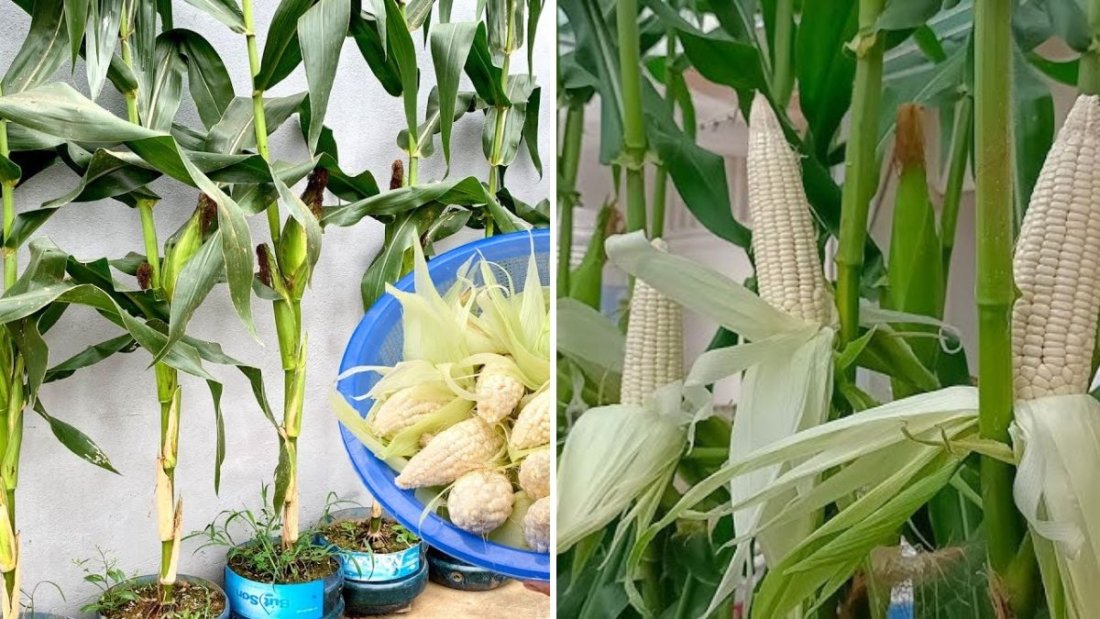
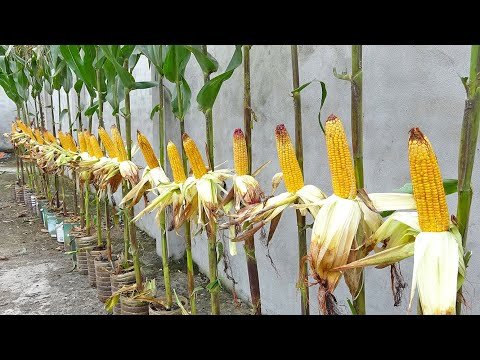
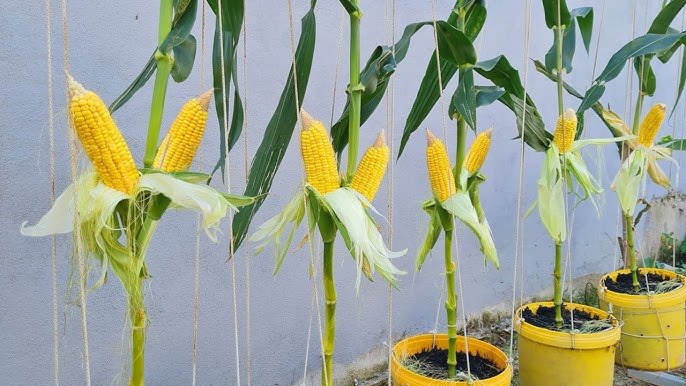
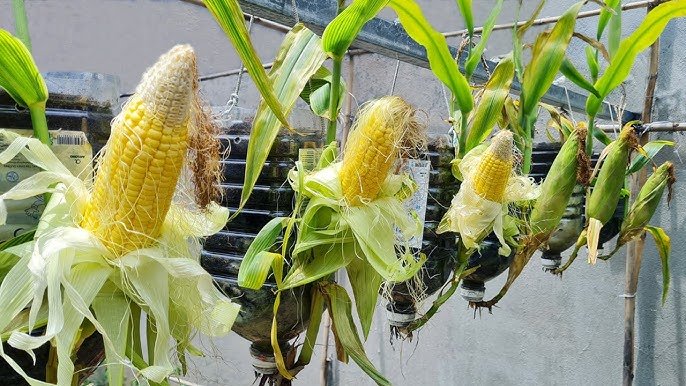
Growing Glutinous Corn in Plastic Bottles at Home: High Yield, Easy, and Eco-Friendly Method

Growing Glutinous Corn in Plastic Bottles at Home: High Yield, Easy, and Eco-Friendly Method

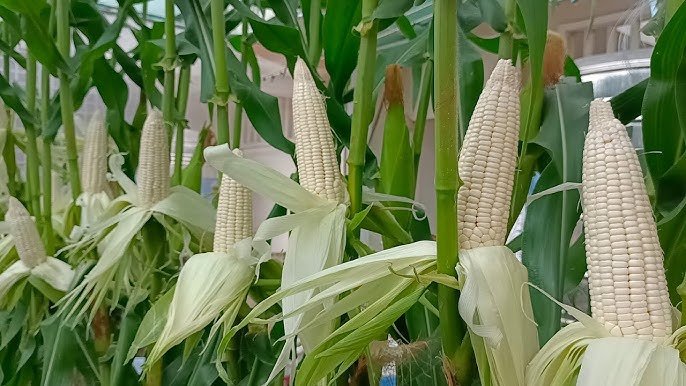
Have you ever thought about growing your own glutinous corn (sticky corn) at home, even without a large garden? It might sound impossible—but thanks to smart container gardening techniques, you can now grow this delicious, chewy, and nutrient-rich corn right in recycled plastic bottles! This innovative method is easy, space-saving, and sustainable, allowing anyone—even city dwellers—to enjoy fresh, homegrown corn.

In this article, we’ll take you step by step through how to grow glutinous corn in plastic bottles, from preparation to harvest. You’ll learn the best growing medium, watering routine, sunlight requirements, and harvesting tips to ensure a healthy, high-yield crop.


Why Grow Glutinous Corn in Plastic Bottles?

Glutinous corn, often called sticky corn or waxy corn, is a popular variety in many Asian cuisines. It has a soft, sticky texture and is perfect for boiling, grilling, or making desserts. Growing it at home has several benefits:

  1. Space Efficiency:
    Plastic bottles are compact, making them ideal for balconies, patios, or small gardens. You can hang or stack them vertically for maximum space use.
  2. Eco-Friendly Solution:
    By reusing old bottles, you reduce plastic waste and contribute to a more sustainable environment.
  3. Low Maintenance:
    Growing corn in bottles requires minimal soil, water, and fertilizer compared to traditional field cultivation.
  4. Year-Round Gardening:
    If you control the temperature and lighting conditions, you can grow glutinous corn almost any time of the year.

Step 1: Choosing and Preparing the Plastic Bottles

For growing corn, large plastic bottles (preferably 5-liter or bigger) are recommended. Follow these steps to prepare them:

  • Cut the bottle horizontally: Cut around the middle, leaving the top half as a funnel and the bottom as a base.
  • Create drainage holes: Make 4–6 small holes at the bottom to prevent waterlogging.
  • Add a water reservoir (optional): For a self-watering system, insert a small tube or cotton rope from the bottom to the top part to help wick moisture.
  • Clean thoroughly: Rinse the bottles with soap and water to remove any residues before planting.

Step 2: Preparing the Potting Mix

Glutinous corn needs nutrient-rich, well-drained soil for optimal growth. You can make your own mix using:

  • 50% garden soil or compost
  • 30% coco peat or rice husk
  • 20% perlite or sand for aeration

Mix in a handful of organic fertilizer or composted manure to boost initial nutrient levels. This combination ensures the roots get enough oxygen while retaining sufficient moisture.


Step 3: Germinating Glutinous Corn Seeds

Before planting, soak your glutinous corn seeds in warm water for 8–10 hours. This softens the seed coat and helps speed up germination.

Then:

  • Wrap them in a damp paper towel and place them in a warm, dark spot for 2–3 days.
  • Once small sprouts appear, they’re ready for planting.

This pre-germination step ensures a higher success rate and faster seedling growth.


Step 4: Planting the Seeds

Now that your bottles and soil are ready, it’s time to plant!

  1. Fill each bottle with the prepared soil mix, leaving about 3 cm from the top.
  2. Make 2–3 small holes (about 2–3 cm deep).
  3. Place one germinated seed per hole.
  4. Cover lightly with soil and water gently.

If you’re growing multiple bottles, space them 25–30 cm apart to allow air circulation and sunlight exposure.


Step 5: Providing Light and Temperature

Corn loves sunlight—it needs at least 6–8 hours of direct sunlight daily. If growing indoors, place your bottles near a south-facing window or use grow lights to supplement natural light.

Ideal temperature range:

  • Day: 25–32°C (77–90°F)
  • Night: 18–22°C (64–72°F)

Maintaining stable warmth ensures steady growth and healthy pollination later.


Step 6: Watering and Feeding

Because bottles have limited soil, watering consistency is key. Keep the soil moist but not soggy.

  • Water lightly every 1–2 days, depending on your climate.
  • Use a spray bottle or small watering can to avoid disturbing the roots.

For nutrients, apply a liquid organic fertilizer or compost tea every 10–15 days. Glutinous corn is a heavy feeder, so additional nitrogen early on helps promote leaf growth, while phosphorus and potassium during flowering enhance cob development.


Step 7: Pollination Techniques

Corn plants rely on wind pollination, but in container gardening, you might need to assist manually. When tassels (male flowers) appear at the top and silks (female flowers) emerge from the cob area:

  • Gently shake or tap the tassels over the silks to distribute pollen.
  • Repeat this process every morning for 3–4 days for better fertilization.

This step ensures your glutinous corn cobs develop fully and evenly.


Step 8: Pest and Disease Management

Even in containers, pests can sometimes attack your plants. Common problems include:

  • Aphids: Small insects that suck sap from leaves. Use neem oil spray or soapy water.
  • Corn earworms: These can burrow into cobs. Cover developing cobs with paper sleeves for protection.
  • Fungal diseases: Prevent by ensuring good airflow and avoiding waterlogged soil.

Keeping the growing area clean and rotating crops seasonally helps reduce disease buildup.


Step 9: Harvesting Glutinous Corn

Glutinous corn is usually ready for harvest 70–90 days after planting, depending on the variety.

Signs that your corn is ready:

  • Silks turn brown and dry out.
  • Kernels are full and plump when you gently press them.
  • The outer husk feels firm.

To harvest, twist or cut the cobs off carefully. Freshly harvested glutinous corn tastes sweetest when cooked immediately—either steamed, boiled, or grilled.


Step 10: Post-Harvest Processing and Use

After harvesting, you can:

  • Cook fresh: Steam or boil for 10–15 minutes for a soft, chewy texture.
  • Store: Keep unpeeled cobs in the refrigerator for up to 5 days.
  • Preserve: Blanch and freeze kernels for longer storage.

You can also save a few healthy kernels as seeds for your next planting cycle!


Eco-Friendly and Sustainable Benefits

Growing glutinous corn in plastic bottles isn’t just about convenience—it’s a step toward sustainable urban farming. You’re giving waste materials a new purpose and reducing dependency on store-bought vegetables.

Plus, this method is perfect for teaching kids and beginners about plant biology, recycling, and food self-sufficiency.


Final Thoughts

Growing glutinous corn in plastic bottles at home proves that innovation and sustainability can go hand in hand. With a few recycled bottles, good soil, and some sunlight, you can harvest multiple ears of fresh, sticky corn without needing a big farm.

It’s simple, rewarding, and eco-friendly—a small-scale agricultural revolution you can start today from your balcony or rooftop.

So grab some bottles, get your seeds ready, and start your mini glutinous corn farm today. You’ll be amazed at how much you can grow with just a few resources and a little care!

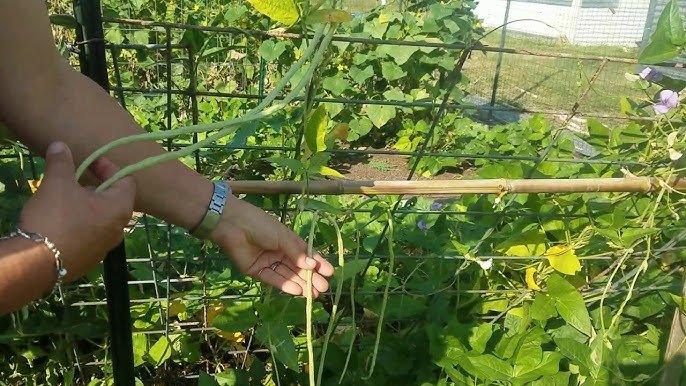
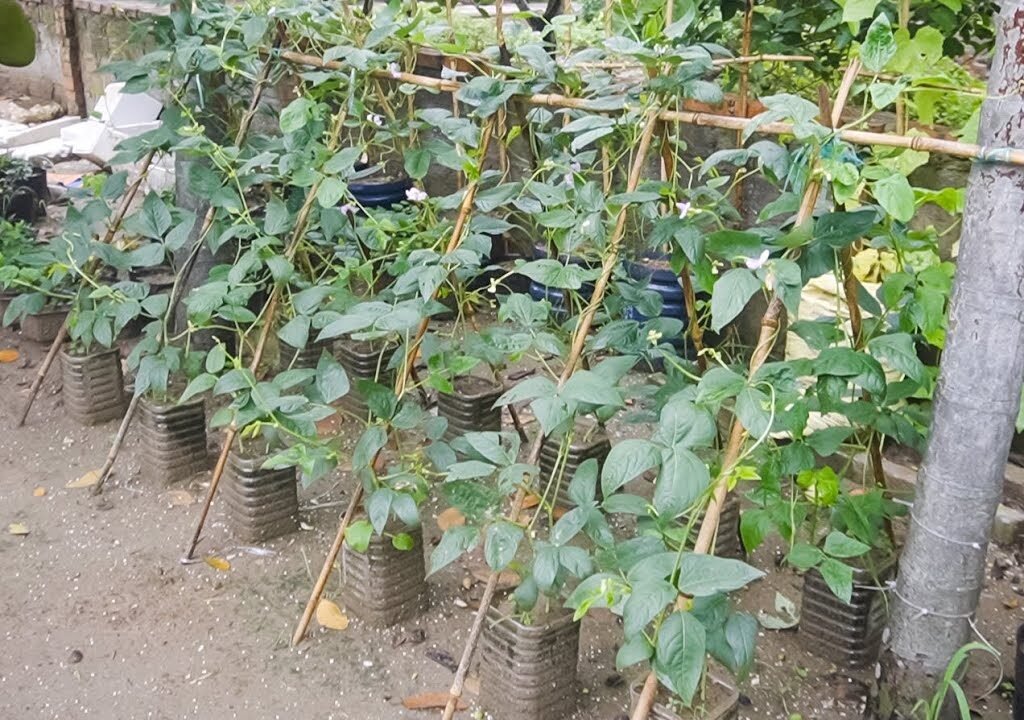
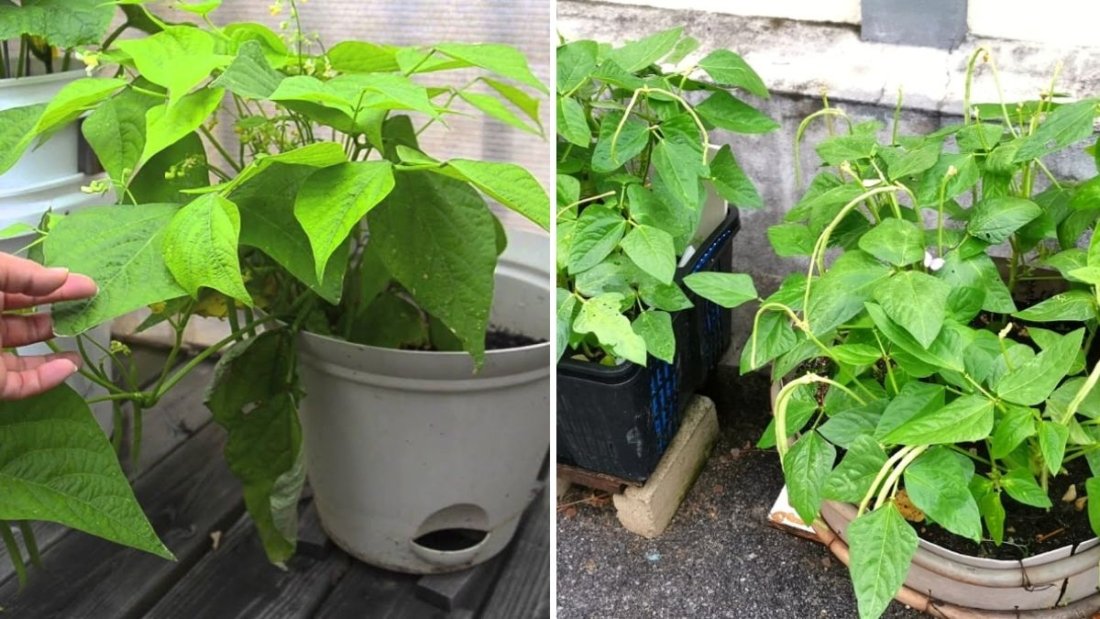
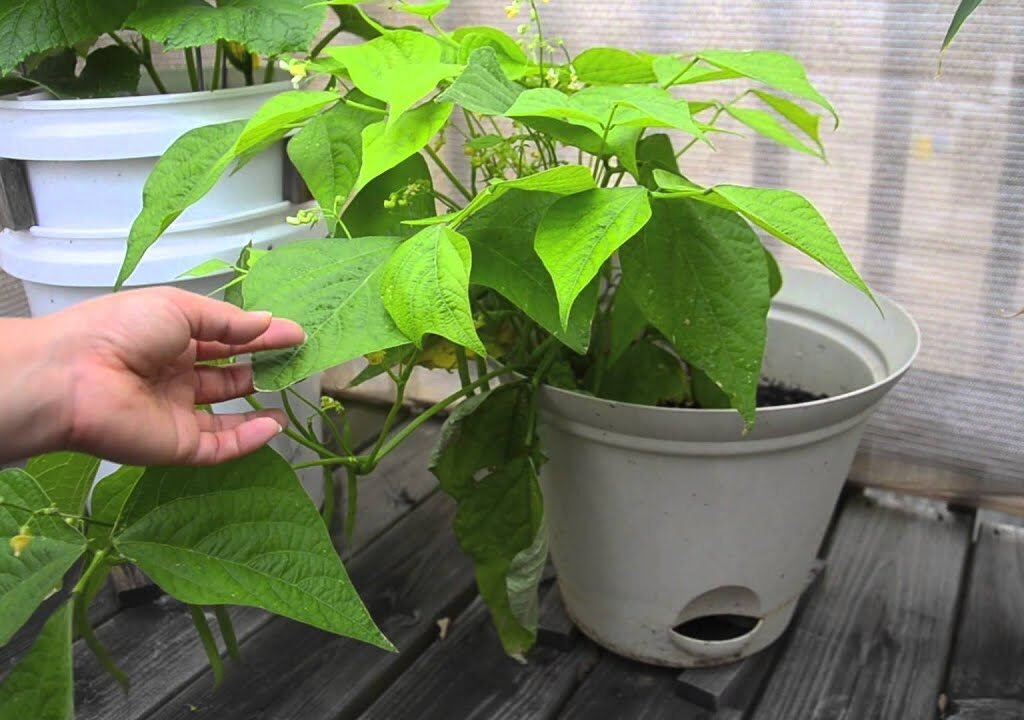
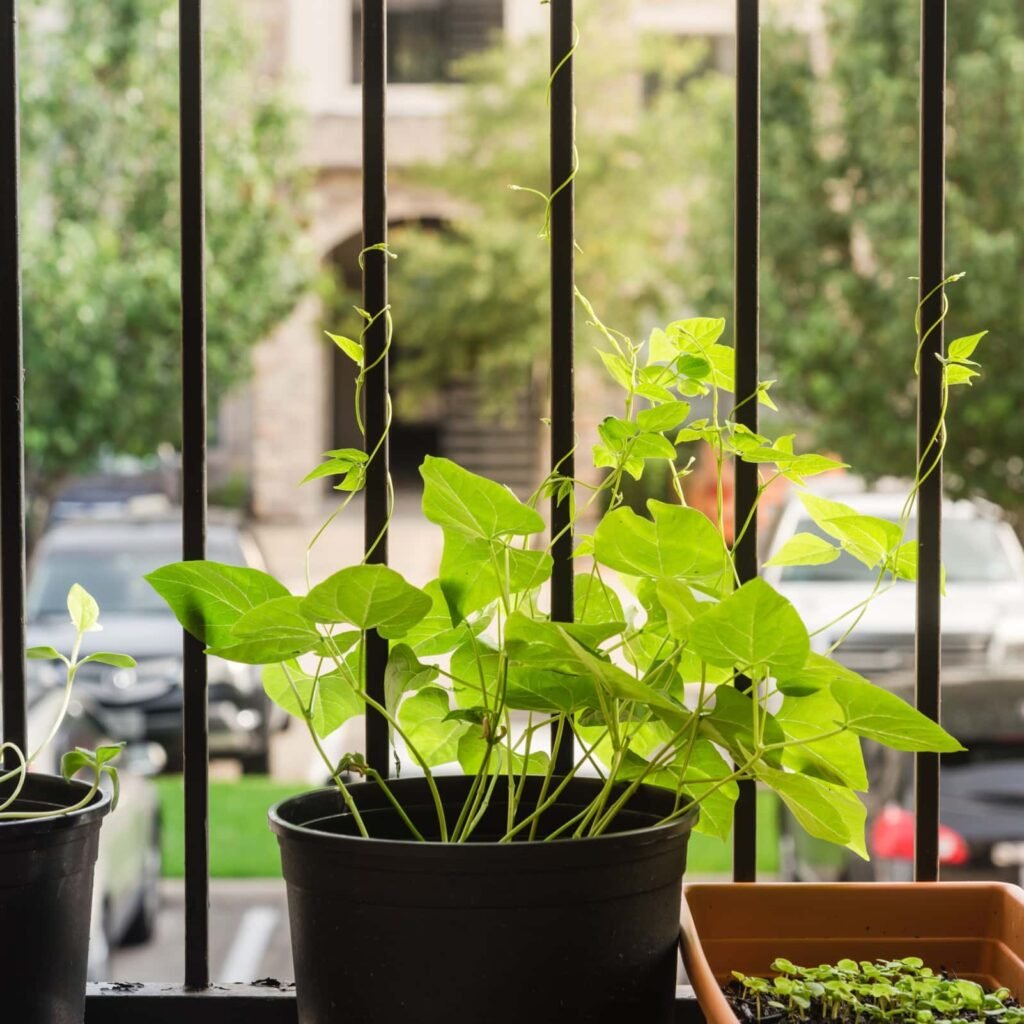
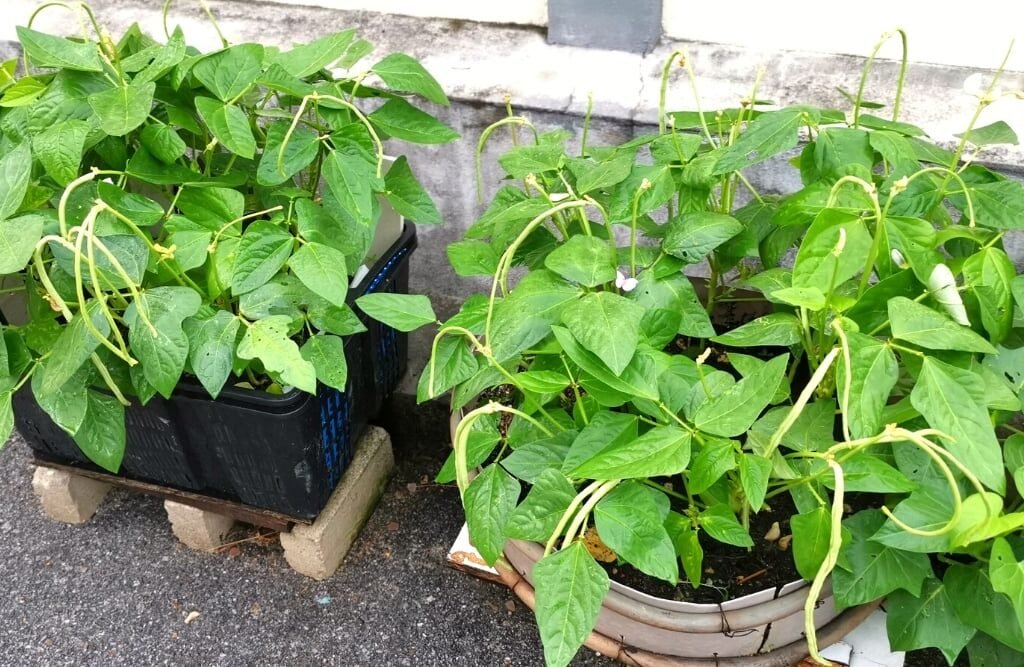
How to Grow Green Beans in Plastic Bottles: Fast Harvest in Just 45 Days

How to Grow Green Beans in Plastic Bottles: Fast Harvest in Just 45 Days

Growing your own vegetables doesn’t require a large backyard or expensive garden beds. With a little creativity and some recycled materials, you can grow healthy, delicious green beans right at home—even in small spaces! One of the most practical and eco-friendly ways to do this is by using plastic bottles.

In this article, we’ll explore how to grow green beans in plastic bottles and achieve a lush harvest in just 45 days. You’ll learn about the right setup, soil mix, watering routine, and helpful tips for maximizing yield. This method is perfect for balcony gardeners, urban dwellers, and anyone who wants to enjoy fresh homegrown beans year-round.


Why Grow Green Beans in Plastic Bottles?

Using plastic bottles to grow green beans is not only environmentally friendly but also surprisingly effective. Here’s why this method works so well:

  1. Eco-Friendly Recycling: It gives used plastic bottles a second life instead of sending them to landfills.
  2. Space-Saving Design: You can hang bottles vertically, place them on windowsills, or line them along a balcony railing.
  3. Excellent Drainage Control: You can easily customize the number of drainage holes to prevent waterlogging.
  4. Easy Mobility: Lightweight bottles can be moved around to catch the best sunlight.
  5. Low-Cost Gardening: All you need are a few bottles, seeds, and basic soil mix—no fancy tools required.

This technique makes gardening accessible to everyone, even if you live in an apartment or have limited outdoor space.


Step 1: Choose the Right Plastic Bottles

Start by selecting 2-liter or 5-liter plastic bottles—the type used for water or soft drinks. Make sure the bottles are clean and free from any residues.

  • Cutting the Bottle:
    Use scissors or a sharp knife to cut the top one-third off the bottle. This will create an open container for soil and allow plants to breathe.
  • Drainage Holes:
    Use a heated needle or nail to make 4–6 small holes at the bottom. Good drainage is essential to prevent root rot.
  • Optional: You can use the top part of the bottle inverted as a mini greenhouse cover to maintain humidity during germination.

Step 2: Prepare the Perfect Soil Mix

Green beans prefer light, well-draining soil that’s rich in organic matter. A good mix for bottle gardening includes:

  • 50% garden soil or compost
  • 30% coco peat or peat moss
  • 20% perlite or sand for aeration

Add a handful of organic compost or vermicompost to enrich the mix with essential nutrients. Avoid heavy clay soil—it can hold too much water and suffocate roots.

Pro Tip: Mix in some wood ash or bone meal to boost phosphorus and potassium, which promote flowering and pod development.


Step 3: Planting Green Bean Seeds

Once your bottles and soil are ready, it’s time to plant!

  1. Soak Seeds Overnight:
    Soaking green bean seeds in water for 6–8 hours helps them sprout faster.
  2. Planting Depth:
    Place 2–3 seeds about 1 inch deep in each bottle. Cover lightly with soil and water gently.
  3. Spacing:
    If you’re using multiple bottles, leave a few inches of space between them to allow air circulation and prevent fungal growth.

Keep the bottles in a warm, sunny spot—green beans love full sunlight, ideally 6–8 hours per day.


Step 4: Watering and Care Routine

Watering is key in bottle gardening because small containers dry out quickly. However, too much water can also cause root problems.

  • Watering Frequency:
    Check soil moisture daily. Water only when the top inch of soil feels dry.
  • Method:
    Pour water slowly to allow even absorption and prevent overflow.
  • Mulching:
    Adding a thin layer of dried leaves or straw helps retain moisture and keeps the soil cool.

Avoid letting water sit at the bottom of the bottle. Proper drainage ensures healthy roots and rapid growth.


Step 5: Providing Support for Vines

Most green bean varieties are climbers, and they’ll need something to climb on as they grow.

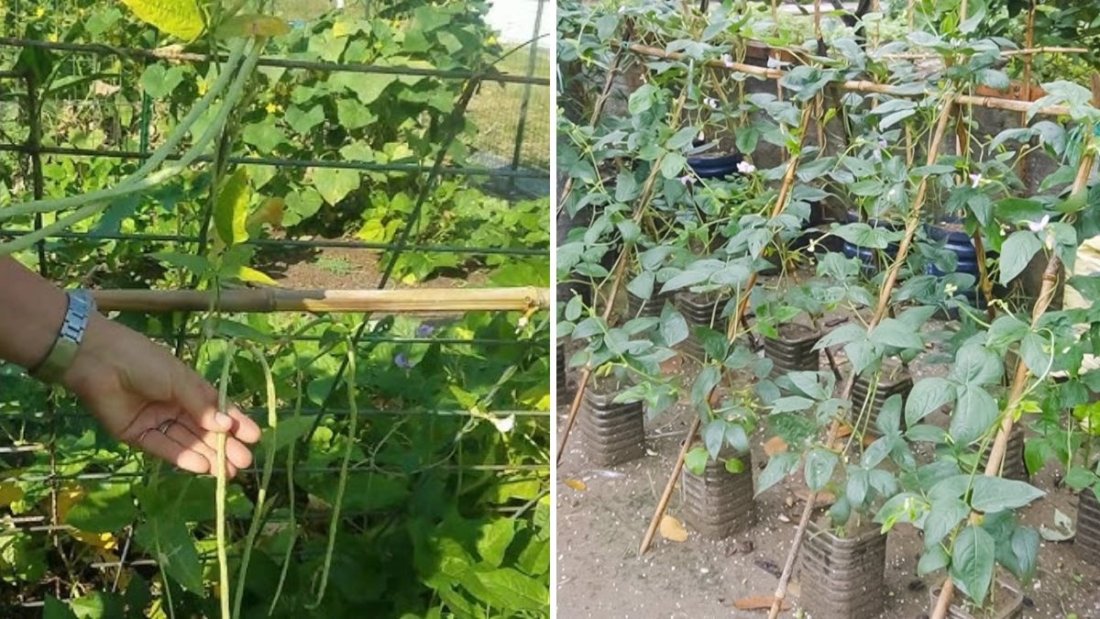
  • Insert thin bamboo sticks or wooden stakes into each bottle.
  • You can also tie strings or twine from the bottle to a balcony railing, fence, or hook above.
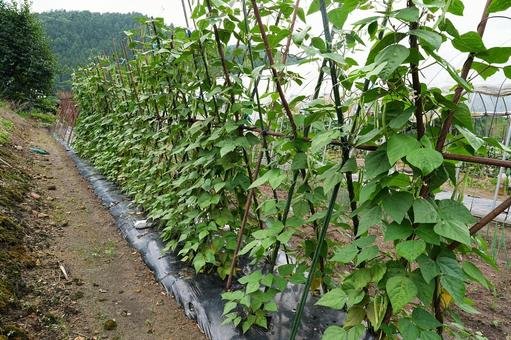
  • As the vines grow, gently guide them to climb upward by tying them loosely with soft string.

This vertical setup not only supports plant growth but also saves space and improves air circulation.


Step 6: Sunlight and Temperature

Green beans thrive in warm weather with daytime temperatures between 20°C and 30°C (68°F to 86°F).

  • Place the bottles in a sunny location—a south-facing balcony, terrace, or windowsill is ideal.
  • Rotate bottles occasionally to ensure even sunlight on all sides.

If the temperature drops too low, cover the plants at night using a plastic dome or light cloth to protect them from chill.


Step 7: Fertilizing for Fast Growth

Bottle-grown plants need regular feeding since nutrients are limited in small soil volumes.

  • Every 10–15 days: Apply a diluted liquid organic fertilizer such as compost tea, fish emulsion, or seaweed extract.
  • Avoid too much nitrogen: Excess nitrogen encourages leafy growth but reduces flower and pod formation.
  • When plants start flowering, switch to a fertilizer higher in phosphorus and potassium to boost yields.

Step 8: Managing Pests Naturally

Container gardens are less prone to pests, but you may still encounter a few problems like aphids or whiteflies.

  • Neem Oil Spray: Mix 1 teaspoon of neem oil with a few drops of liquid soap in 1 liter of water. Spray weekly to prevent infestations.
  • Garlic or Chili Spray: Acts as a natural deterrent for most insects.
  • Manual Removal: If you spot caterpillars or beetles, simply remove them by hand.

Healthy plants grown in clean bottles and nutrient-rich soil tend to resist pests better.


Step 9: Harvesting in Just 45 Days

With proper care, your green beans will be ready to harvest in about 40–45 days after planting!

Signs of readiness:

  • Pods are firm, crisp, and about 4–6 inches long.
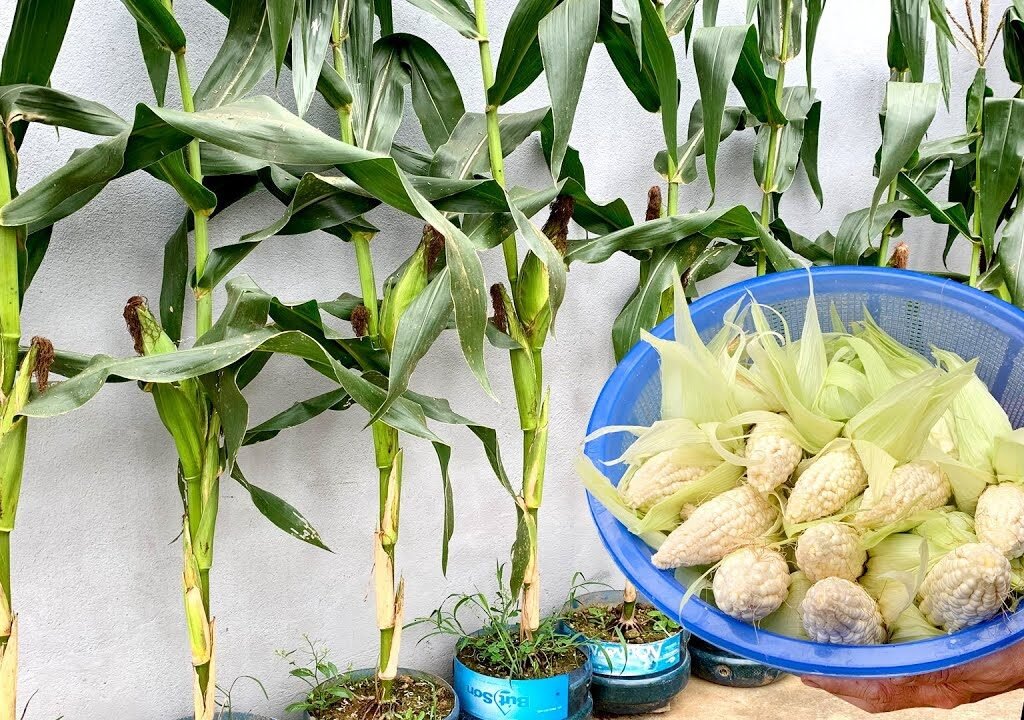
  • Harvest when beans are still tender for the best flavor.

Use scissors to cut the pods instead of pulling them by hand, which may damage the plant. Regular harvesting encourages more flower and pod production.

Pro Tip: The more you pick, the more beans your plant will produce!


Step 10: Reusing and Extending the Harvest

After harvesting, don’t throw away the soil. Instead:

  • Remove old roots and mix in fresh compost.
  • Reuse the same bottle to start a new batch of seeds.
  • Rotate crops occasionally—alternate between beans, lettuce, or herbs to keep the soil balanced.

You can grow several cycles of green beans each year, especially in warm or tropical climates.


Additional Tips for Success

  • Choose Compact Varieties: Look for bush-type or dwarf green beans—they grow well in bottles and need less space.
  • Avoid Overcrowding: Each bottle should host only one strong plant for maximum yield.
  • Monitor Growth Daily: Early attention to water, pests, and sunlight helps prevent problems before they start.
  • Label Bottles: If you’re experimenting with different bean types, label bottles to track which performs best.

Environmental Benefits of Bottle Gardening

Aside from producing fresh food, this method has positive environmental effects:

  • Reduces plastic waste and encourages recycling.
  • Decreases dependency on chemical fertilizers and packaging from store-bought vegetables.
  • Saves water through controlled watering.
  • Makes urban living greener and more sustainable.
It’s a small yet powerful way to contribute to the planet while enjoying the fruits (or rather, beans) of your labor.


Final Thoughts

Growing green beans in plastic bottles is an incredibly simple, cost-effective, and rewarding gardening project. In just 45 days, you can transform discarded bottles into thriving mini-gardens that provide crisp, nutritious beans for your table.

This technique proves that space and resources are never limitations when you have creativity and care for nature. Whether you’re a beginner or a seasoned gardener, bottle gardening offers endless possibilities—from beans to herbs, tomatoes, and even leafy greens.

So, grab a few plastic bottles, some green bean seeds, and start your eco-friendly gardening journey today. In just a month and a half, you’ll be amazed at the vibrant green vines and the fresh harvest right from your balcony or windowsill!

Revolutionize Your Home Garden: Automatic Watering & Vertical Vegetable Garden Ideas for a Bountiful Harvest

Revolutionize Your Home Garden: Automatic Watering & Vertical Vegetable Garden Ideas for a Bountiful Harvest

Gardening at home has never been easier or more efficient than it is today. With the advent of innovative techniques like vertical gardening and automatic watering systems, even those with limited space or busy schedules can enjoy fresh, home-grown vegetables year-round. Whether you live in a small apartment, have a modest backyard, or simply want to maximize your yield, these modern gardening solutions make it possible to grow a thriving vegetable garden with minimal effort.

Why Grow Vegetables at Home?

Home gardening has gained immense popularity in recent years, and for good reasons. Growing your own vegetables allows you to:

  1. Ensure Freshness and Nutrition: Nothing beats the taste and nutrition of vegetables picked fresh from your garden. Home-grown vegetables often retain more nutrients than store-bought produce that travels long distances.
  2. Save Money: Buying vegetables from the market every week can add up. Growing your own at home reduces grocery bills significantly.
  3. Control Chemicals and Pesticides: By managing your garden yourself, you can avoid harmful pesticides and chemicals, making your vegetables healthier and safer.
  4. Promote Sustainability: Growing your own vegetables reduces carbon footprints associated with food transportation and packaging.

Understanding Automatic Watering Systems

One of the biggest challenges in home gardening is consistent watering. Overwatering or underwatering can seriously affect plant growth, while daily manual watering can be time-consuming. This is where automatic watering systems come in handy.

Automatic watering systems are designed to deliver precise amounts of water directly to the plant roots. They come in various forms, including:

  • Drip Irrigation Systems: These systems deliver water slowly and directly to the plant’s roots, reducing water wastage and promoting healthy growth.
  • Self-Watering Containers: Perfect for balcony or indoor gardening, these containers store water in a reservoir and allow the plant to absorb it as needed.
  • Sprinkler or Soaker Hoses: These are ideal for larger gardens and can be set on timers for scheduled watering.

By using automatic watering, gardeners can ensure their plants are watered consistently, saving time and preventing stress on the plants due to irregular watering.

The Benefits of Vertical Vegetable Gardening

Space can be a limitation for many home gardeners, especially in urban areas. Vertical gardening provides a practical solution by allowing you to grow upwards instead of outwards. This method involves stacking planters, using wall-mounted containers, or creating tiered structures to grow vegetables.

Benefits of Vertical Gardening:

  1. Maximized Space: Vertical gardens are ideal for small balconies, patios, or limited yard space. You can grow a variety of vegetables without needing a large plot of land.
  2. Improved Air Circulation: Growing vegetables vertically reduces the risk of soil-borne diseases and improves air circulation around the plants.
  3. Ease of Maintenance: Vertical gardens make planting, watering, and harvesting easier as they reduce bending and reaching.
  4. Aesthetic Appeal: A vertical vegetable garden is not only functional but also adds a beautiful, green element to your home décor.

Planning Your Vertical Vegetable Garden

Before setting up your vertical vegetable garden, consider the following steps to ensure success:

  1. Choose the Right Vegetables: Leafy greens like lettuce, spinach, and kale, along with herbs such as basil, mint, and coriander, are perfect for vertical gardens. Other vegetables like cherry tomatoes, peppers, and beans can also thrive in vertical setups.
  2. Select Appropriate Containers: You can use hanging pots, stacked planters, wooden pallets, or even recycled plastic bottles to build a vertical garden. Ensure the containers have proper drainage.
  3. Positioning: Place your vertical garden in a location that receives adequate sunlight, ideally 4-6 hours of direct sunlight per day.
  4. Soil and Fertilizer: Use a light, nutrient-rich potting mix and supplement it with organic fertilizers to keep your plants healthy.

Integrating Automatic Watering with Vertical Gardens

Combining vertical gardening with automatic watering systems can make vegetable cultivation incredibly efficient. Drip irrigation systems can be customized to feed each level of your vertical garden, ensuring all plants receive the right amount of water. Self-watering planters work exceptionally well for herbs and smaller vegetables in stacked containers.

Tips for Effective Integration:

  • Check Water Flow: Ensure water reaches all levels evenly. You may need to adjust tubing or add emitters.
  • Monitor Moisture Levels: Even with automatic watering, periodically check soil moisture to prevent overwatering or drying out.
  • Use Timers: Set timers to water your garden at optimal times, such as early morning or late evening, to minimize evaporation.

Maintenance and Care

Even with automatic systems and vertical setups, regular maintenance is key for a productive garden.

  1. Pruning and Harvesting: Regularly prune plants to encourage growth and remove any dead or yellowing leaves. Harvest vegetables promptly to promote continued production.
  2. Pest Control: Monitor your garden for pests and diseases. Use organic pesticides or natural remedies when necessary.
  3. Nutrient Management: Fertilize periodically to replenish essential nutrients in the soil. Organic compost or liquid fertilizers are great options.
  4. Support Structures: For climbing plants like beans or tomatoes, ensure you provide support such as trellises or stakes to keep them upright and healthy.

Popular Vegetables for Vertical Gardening

Some of the best vegetables for vertical gardening include:

  • Leafy Greens: Spinach, lettuce, kale, Swiss chard
  • Herbs: Basil, mint, coriander, parsley
  • Fruiting Vegetables: Cherry tomatoes, peppers, cucumbers
  • Climbers: Beans, peas, small pumpkins

These vegetables adapt well to container life, thrive with limited soil, and are ideal for home gardeners who want high yields in small spaces.

Advantages of Year-Round Vegetable Gardening

By adopting vertical gardening and automatic watering, you can grow vegetables year-round, irrespective of seasons. Indoor setups with grow lights or shaded outdoor balconies can extend growing seasons. This ensures a consistent supply of fresh vegetables, reduces dependence on supermarkets, and makes your meals healthier and more sustainable.

Final Thoughts

Growing vegetables at home is no longer just a hobby; it’s a practical and rewarding lifestyle choice. Vertical gardens combined with automatic watering systems are transforming how urban dwellers cultivate their food. Not only do these systems save time and water, but they also help maximize space, boost productivity, and ensure your vegetables remain fresh and nutritious.

Whether you are a beginner or an experienced gardener, integrating these modern techniques into your home garden can lead to abundant harvests, healthier meals, and a greener living environment. Start small, experiment with different setups, and soon you’ll enjoy the benefits of a thriving home-grown vegetable garden all year round.

Tips for Growing Chili in Plastic Bottles: Year-Round Harvest and Maximum Fruit Production

Tips for Growing Chili in Plastic Bottles: Year-Round Harvest and Maximum Fruit Production

Chili peppers are one of the most popular vegetables worldwide, loved for their heat, flavor, and versatility in cooking. From spicy curries to sauces and pickles, chilies enhance the taste of countless dishes. Growing your own chili plants is rewarding, and with modern container gardening techniques, you can achieve bountiful harvests even in small spaces.

One of the most innovative and space-saving methods is growing chilies in plastic bottles. This method allows gardeners to cultivate chili plants on balconies, rooftops, or small urban gardens while controlling soil, water, and nutrients efficiently. With proper care, you can even achieve year-round harvests with multiple fruits per plant. In this blog post, we will explore step-by-step tips for growing chilies in plastic bottles, ensuring high yields and continuous fruiting.


Step 1: Choosing the Right Chili Variety

The first step in successful chili cultivation is selecting a suitable variety:

  • Small-Space Varieties: Choose compact chili types that thrive in containers, such as cayenne, jalapeño, or bird’s eye chili.
  • High-Yield Varieties: Some hybrid varieties are bred for prolific fruiting and continuous flowering, making them ideal for year-round harvests.
  • Heat Level: Decide if you prefer mild, medium, or hot chilies for your personal use or market demand.

Selecting the right variety ensures healthier plants and a higher number of fruits.


Step 2: Preparing Plastic Bottles for Planting

Plastic bottles are an excellent alternative to traditional pots because they are cheap, lightweight, and easy to manage. Here’s how to prepare them:

  • Bottle Selection: Use 2–5 liter bottles depending on plant size. Transparent bottles can be painted or wrapped to prevent root light exposure.
  • Drainage Holes: Drill or punch 3–5 holes at the bottom for proper drainage.
  • Aeration Holes: Optional small side holes improve air circulation for roots.
  • Bottle Placement: Use vertical arrangements, hanging setups, or horizontal racks to maximize space.

Properly prepared bottles create an ideal micro-environment for chili roots to grow healthily.


Step 3: Choosing the Right Growing Medium

Chilies need well-draining, fertile soil to thrive:

  • Soil Mix: A mix of garden soil, compost, and perlite or vermiculite provides nutrients and aeration.
  • Organic Matter: Adding decomposed manure or organic fertilizer improves fertility and fruiting.
  • pH Level: Chilies prefer slightly acidic to neutral soil (pH 6.0–7.0).
  • Moisture Retention: The growing medium should retain moisture but not waterlog roots.

A well-prepared medium ensures strong root development and a higher number of fruits per plant.


Step 4: Planting Chili Seeds or Seedlings

Once bottles and soil are ready, you can plant your chilies:

  • Seed Sowing: Fill bottles with soil and sow 2–3 seeds per bottle. Cover lightly with soil and water gently.
  • Seedling Transplant: If using nursery-grown seedlings, dig a hole in the soil and place the seedling carefully, firming the soil around the roots.
  • Spacing: For better air circulation and growth, avoid overcrowding by using one plant per bottle.
  • Initial Care: Keep bottles in a sunny spot or under grow lights, ensuring 6–8 hours of light daily.

Starting strong plants increases the chances of abundant fruiting later.


Step 5: Watering Techniques

Proper watering is critical for fruit production and year-round growth:

  • Consistent Moisture: Keep soil consistently moist but not soggy. Overwatering may cause root rot, while under-watering can stunt growth.
  • Bottom Watering: Watering from the bottle bottom encourages deep root growth and reduces leaf diseases.
  • Drainage Management: Ensure excess water drains freely to prevent waterlogging.
  • Frequency: Depending on climate, watering every 2–3 days may be sufficient; adjust during hot or dry periods.

Consistent moisture promotes flowering and fruit set, leading to higher yields.


Step 6: Fertilization and Nutrient Management

Chilies are nutrient-demanding plants, especially when grown in containers:

  • Organic Fertilizers: Compost, vermicompost, or cow manure provides slow-release nutrients.
  • Liquid Fertilizers: Apply diluted liquid fertilizers weekly to provide nitrogen, phosphorus, potassium, and trace minerals.
  • Fruit Boosters: High potassium fertilizers during flowering and fruiting enhance fruit size and quantity.
  • Micronutrients: Calcium and magnesium are important to prevent blossom-end rot and improve fruit quality.

Balanced nutrition ensures multiple flowers turn into healthy, juicy chilies.


Step 7: Supporting Chili Plants

Container-grown chilies may require support as they grow:

  • Stakes or Bamboo Poles: Provide vertical support to prevent stems from bending or breaking under the weight of fruits.
  • String or Cage Support: Use a small cage or tie stems gently to stakes for better growth.
  • Pruning: Remove lower leaves and early small fruits to direct energy toward main branches and increase yield.

Supporting plants reduces stress and ensures maximum fruit production.


Step 8: Pollination Tips

Chilies can self-pollinate, but helping them can improve fruit set:

  • Manual Pollination: Tap flowers gently or use a small brush to transfer pollen.
  • Air Circulation: Adequate airflow helps natural pollination.
  • Attract Pollinators: For outdoor bottles, flowers nearby or visiting bees increase pollination efficiency.

Better pollination leads to more fruits and a longer harvesting period.


Step 9: Pest and Disease Management

Chilies are prone to pests and diseases, but growing in bottles reduces many risks:

  • Common Pests: Aphids, whiteflies, spider mites, and thrips.
  • Control Methods: Use neem oil, insecticidal soap, or introduce natural predators.
  • Disease Prevention: Avoid overwatering, ensure proper spacing, and remove affected leaves promptly.
  • Monitoring: Regularly check for yellowing leaves, spots, or pests to prevent infestations from spreading.

Effective management ensures healthy plants with multiple fruiting cycles.


Step 10: Harvesting Chilies

Harvesting at the right time is crucial for flavor and continued production:

  • Timing: Green chilies can be harvested when they reach the desired size; leave some to ripen into red for sweeter, hotter chilies.
  • Technique: Use scissors or gently twist peppers off the plant to avoid damaging stems.
  • Frequency: Regular harvesting encourages new flowering and fruiting.
  • Continuous Yield: By harvesting multiple times per week, you can achieve a year-round supply.

Frequent, careful harvesting maximizes the total number of fruits per plant.


Step 11: Maximizing Year-Round Harvest

With proper care, you can enjoy chili harvests throughout the year:

  • Indoor Growing: During cold months, bring bottles indoors near sunny windows or under grow lights.
  • Temperature Management: Maintain 20–28°C for optimal growth.
  • Extended Fertilization: Provide regular nutrients to sustain flowering and fruiting cycles.
  • Pruning and Plant Care: Remove old leaves and early fruits to allow continuous new growth.

Year-round care ensures a constant supply of fresh chilies for cooking or sale.


Step 12: Benefits of Growing Chilies in Plastic Bottles

This method offers multiple advantages:

  • Space Efficiency: Ideal for balconies, rooftops, and small urban gardens.
  • Cost-Effective: Reuse plastic bottles as containers instead of buying pots.
  • Pest Reduction: Controlled environment reduces exposure to soil-borne diseases.
  • Water and Nutrient Efficiency: Easier to manage water and fertilizer in a confined space.
  • High Yield: Proper care produces multiple fruits per plant throughout the year.

Plastic bottle gardening is an innovative way to grow chilies sustainably and efficiently.


Step 13: Conclusion

Growing chilies in plastic bottles is a simple, effective, and space-saving technique that allows gardeners to enjoy fresh, home-grown chili peppers year-round. By following proper steps — from selecting high-quality seeds and preparing bottles to watering, fertilization, pollination, and harvesting — anyone can produce abundant chili yields even in limited space.

Regular care, proper nutrient management, pest monitoring, and continuous harvesting are the keys to maximum fruit production. This method not only saves space and money but also provides organic, flavorful chilies for your kitchen or market.

Key Takeaway:
With innovation, consistent care, and attention to detail, growing chilies in plastic bottles can yield multiple harvests year-round, offering fresh, healthy, and delicious peppers at your fingertips.