
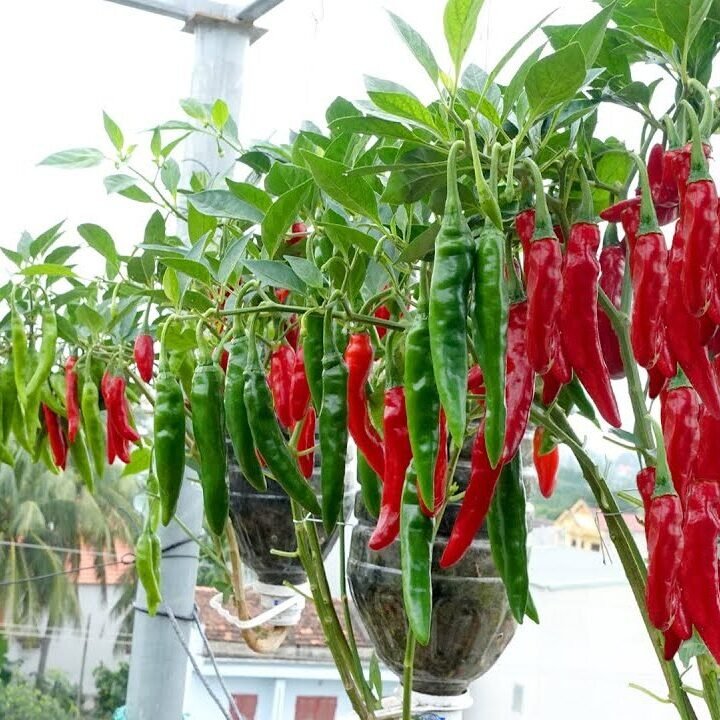
Chili peppers are one of the most popular vegetables worldwide, loved for their heat, flavor, and versatility in cooking. From spicy curries to sauces and pickles, chilies enhance the taste of countless dishes. Growing your own chili plants is rewarding, and with modern container gardening techniques, you can achieve bountiful harvests even in small spaces.
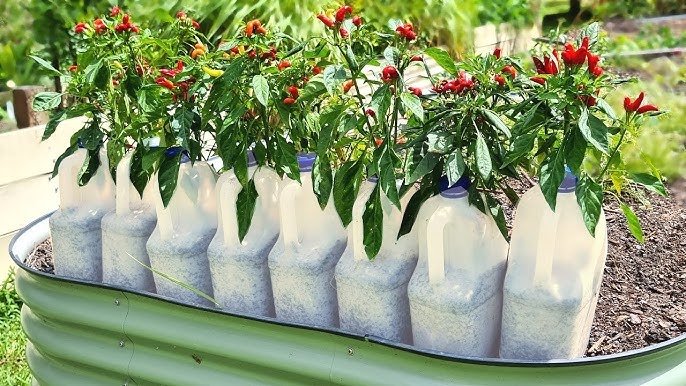
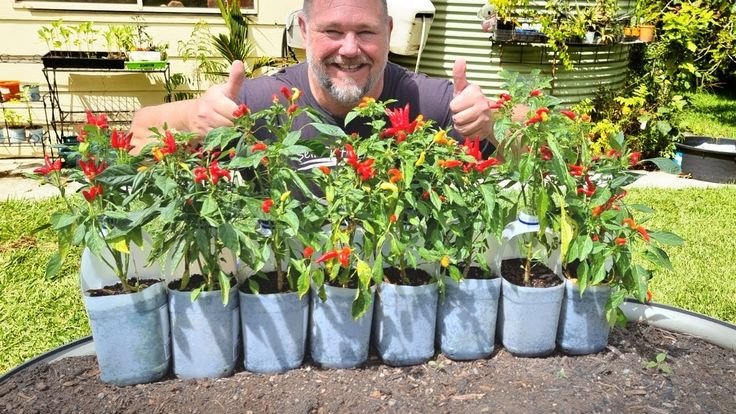
One of the most innovative and space-saving methods is growing chilies in plastic bottles. This method allows gardeners to cultivate chili plants on balconies, rooftops, or small urban gardens while controlling soil, water, and nutrients efficiently. With proper care, you can even achieve year-round harvests with multiple fruits per plant. In this blog post, we will explore step-by-step tips for growing chilies in plastic bottles, ensuring high yields and continuous fruiting.
Step 1: Choosing the Right Chili Variety
The first step in successful chili cultivation is selecting a suitable variety:
- Small-Space Varieties: Choose compact chili types that thrive in containers, such as cayenne, jalapeño, or bird’s eye chili.
- High-Yield Varieties: Some hybrid varieties are bred for prolific fruiting and continuous flowering, making them ideal for year-round harvests.
- Heat Level: Decide if you prefer mild, medium, or hot chilies for your personal use or market demand.
Selecting the right variety ensures healthier plants and a higher number of fruits.
Step 2: Preparing Plastic Bottles for Planting
Plastic bottles are an excellent alternative to traditional pots because they are cheap, lightweight, and easy to manage. Here’s how to prepare them:
- Bottle Selection: Use 2–5 liter bottles depending on plant size. Transparent bottles can be painted or wrapped to prevent root light exposure.
- Drainage Holes: Drill or punch 3–5 holes at the bottom for proper drainage.
- Aeration Holes: Optional small side holes improve air circulation for roots.
- Bottle Placement: Use vertical arrangements, hanging setups, or horizontal racks to maximize space.
Properly prepared bottles create an ideal micro-environment for chili roots to grow healthily.
Step 3: Choosing the Right Growing Medium

Chilies need well-draining, fertile soil to thrive:
- Soil Mix: A mix of garden soil, compost, and perlite or vermiculite provides nutrients and aeration.
- Organic Matter: Adding decomposed manure or organic fertilizer improves fertility and fruiting.
- pH Level: Chilies prefer slightly acidic to neutral soil (pH 6.0–7.0).
- Moisture Retention: The growing medium should retain moisture but not waterlog roots.
A well-prepared medium ensures strong root development and a higher number of fruits per plant.
Step 4: Planting Chili Seeds or Seedlings
Once bottles and soil are ready, you can plant your chilies:
- Seed Sowing: Fill bottles with soil and sow 2–3 seeds per bottle. Cover lightly with soil and water gently.
- Seedling Transplant: If using nursery-grown seedlings, dig a hole in the soil and place the seedling carefully, firming the soil around the roots.
- Spacing: For better air circulation and growth, avoid overcrowding by using one plant per bottle.
- Initial Care: Keep bottles in a sunny spot or under grow lights, ensuring 6–8 hours of light daily.
Starting strong plants increases the chances of abundant fruiting later.
Step 5: Watering Techniques
Proper watering is critical for fruit production and year-round growth:
- Consistent Moisture: Keep soil consistently moist but not soggy. Overwatering may cause root rot, while under-watering can stunt growth.
- Bottom Watering: Watering from the bottle bottom encourages deep root growth and reduces leaf diseases.
- Drainage Management: Ensure excess water drains freely to prevent waterlogging.
- Frequency: Depending on climate, watering every 2–3 days may be sufficient; adjust during hot or dry periods.
Consistent moisture promotes flowering and fruit set, leading to higher yields.
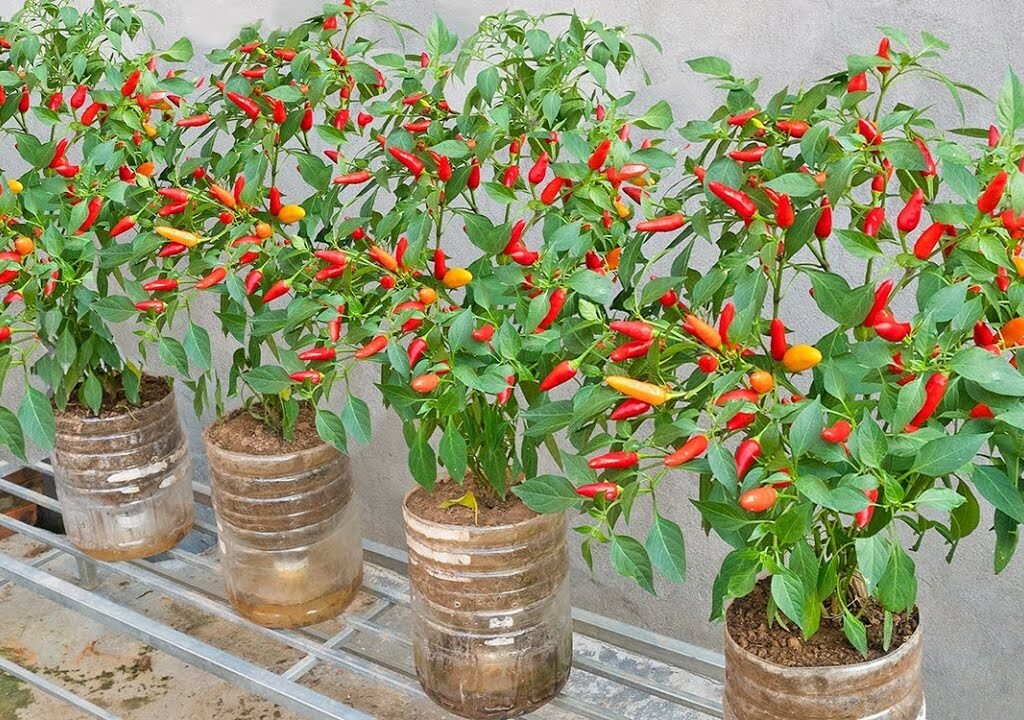
Step 6: Fertilization and Nutrient Management
Chilies are nutrient-demanding plants, especially when grown in containers:
- Organic Fertilizers: Compost, vermicompost, or cow manure provides slow-release nutrients.
- Liquid Fertilizers: Apply diluted liquid fertilizers weekly to provide nitrogen, phosphorus, potassium, and trace minerals.
- Fruit Boosters: High potassium fertilizers during flowering and fruiting enhance fruit size and quantity.
- Micronutrients: Calcium and magnesium are important to prevent blossom-end rot and improve fruit quality.
Balanced nutrition ensures multiple flowers turn into healthy, juicy chilies.
Step 7: Supporting Chili Plants
Container-grown chilies may require support as they grow:
- Stakes or Bamboo Poles: Provide vertical support to prevent stems from bending or breaking under the weight of fruits.
- String or Cage Support: Use a small cage or tie stems gently to stakes for better growth.
- Pruning: Remove lower leaves and early small fruits to direct energy toward main branches and increase yield.
Supporting plants reduces stress and ensures maximum fruit production.
Step 8: Pollination Tips
Chilies can self-pollinate, but helping them can improve fruit set:
- Manual Pollination: Tap flowers gently or use a small brush to transfer pollen.
- Air Circulation: Adequate airflow helps natural pollination.
- Attract Pollinators: For outdoor bottles, flowers nearby or visiting bees increase pollination efficiency.
Better pollination leads to more fruits and a longer harvesting period.
Step 9: Pest and Disease Management
Chilies are prone to pests and diseases, but growing in bottles reduces many risks:
- Common Pests: Aphids, whiteflies, spider mites, and thrips.
- Control Methods: Use neem oil, insecticidal soap, or introduce natural predators.
- Disease Prevention: Avoid overwatering, ensure proper spacing, and remove affected leaves promptly.
- Monitoring: Regularly check for yellowing leaves, spots, or pests to prevent infestations from spreading.
Effective management ensures healthy plants with multiple fruiting cycles.
Step 10: Harvesting Chilies
Harvesting at the right time is crucial for flavor and continued production:
- Timing: Green chilies can be harvested when they reach the desired size; leave some to ripen into red for sweeter, hotter chilies.
- Technique: Use scissors or gently twist peppers off the plant to avoid damaging stems.
- Frequency: Regular harvesting encourages new flowering and fruiting.
- Continuous Yield: By harvesting multiple times per week, you can achieve a year-round supply.
Frequent, careful harvesting maximizes the total number of fruits per plant.
Step 11: Maximizing Year-Round Harvest
With proper care, you can enjoy chili harvests throughout the year:
- Indoor Growing: During cold months, bring bottles indoors near sunny windows or under grow lights.
- Temperature Management: Maintain 20–28°C for optimal growth.
- Extended Fertilization: Provide regular nutrients to sustain flowering and fruiting cycles.
- Pruning and Plant Care: Remove old leaves and early fruits to allow continuous new growth.
Year-round care ensures a constant supply of fresh chilies for cooking or sale.
Step 12: Benefits of Growing Chilies in Plastic Bottles
This method offers multiple advantages:

- Space Efficiency: Ideal for balconies, rooftops, and small urban gardens.
- Cost-Effective: Reuse plastic bottles as containers instead of buying pots.
- Pest Reduction: Controlled environment reduces exposure to soil-borne diseases.
- Water and Nutrient Efficiency: Easier to manage water and fertilizer in a confined space.
- High Yield: Proper care produces multiple fruits per plant throughout the year.
Plastic bottle gardening is an innovative way to grow chilies sustainably and efficiently.
Step 13: Conclusion
Growing chilies in plastic bottles is a simple, effective, and space-saving technique that allows gardeners to enjoy fresh, home-grown chili peppers year-round. By following proper steps — from selecting high-quality seeds and preparing bottles to watering, fertilization, pollination, and harvesting — anyone can produce abundant chili yields even in limited space.
Regular care, proper nutrient management, pest monitoring, and continuous harvesting are the keys to maximum fruit production. This method not only saves space and money but also provides organic, flavorful chilies for your kitchen or market.
Key Takeaway:
With innovation, consistent care, and attention to detail, growing chilies in plastic bottles can yield multiple harvests year-round, offering fresh, healthy, and delicious peppers at your fingertips.
Leave A Comment