Tomatoes are one of the most versatile and beloved vegetables worldwide. They are not only delicious but also packed with vitamins, antioxidants, and nutrients that boost immunity and support overall health. Fresh, homegrown tomatoes have a flavor and aroma that store-bought ones can’t match.
However, many people believe that growing tomatoes requires a large garden or expensive equipment. The good news is, you can grow tomatoes easily at home using simple sacks. This method is cost-effective, space-saving, and highly productive, making it ideal for beginners and urban gardeners alike.
Inspired by the YouTube video “Use sacks to grow Tomatoes at home, easy and inexpensive”, this article provides a step-by-step guide to growing healthy, juicy tomatoes in sacks. From seed selection to harvesting, you’ll learn how to enjoy fresh, flavorful tomatoes right at home.
Why Grow Tomatoes in Sacks?
Using sacks for tomato cultivation offers several advantages:
- Space-Saving: Ideal for terraces, balconies, and small backyards.
- Cost-Effective: No expensive planters or garden beds needed.
- Easy Maintenance: Minimal soil preparation and easy watering.
- Higher Yield: Controlled soil and nutrients encourage healthy growth.
- Clean Harvest: Tubers and fruits grow off the ground, reducing pests and diseases.
This method allows you to grow tomatoes efficiently without a traditional garden.
Step 1: Choosing the Right Tomato Variety
The key to a successful harvest starts with selecting the right variety. Some varieties are better suited for sack cultivation:

- Cherry Tomatoes: Small, sweet, and prolific; ideal for containers.
- Roma Tomatoes: Medium-sized, perfect for sauces and salads.
- Beefsteak Tomatoes: Large, juicy, and flavorful; great for sandwiches.
- Hybrid Varieties: Disease-resistant and high-yielding.
Choose seeds or saplings from a trusted nursery to ensure healthy, vigorous plants.
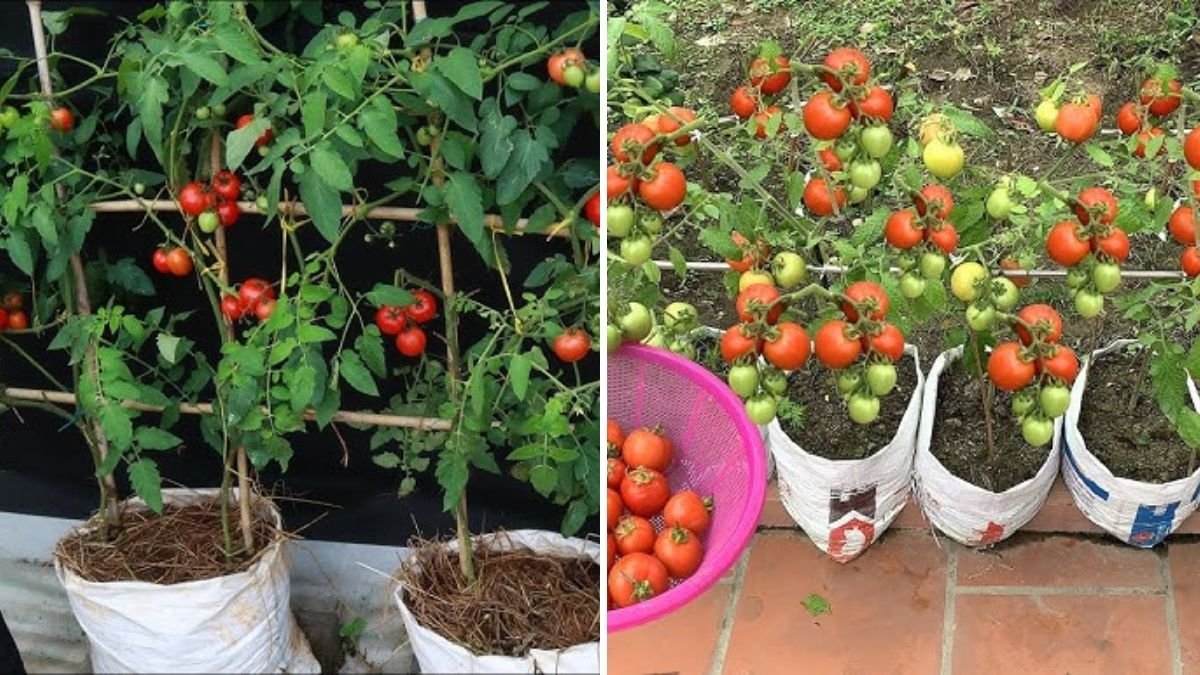
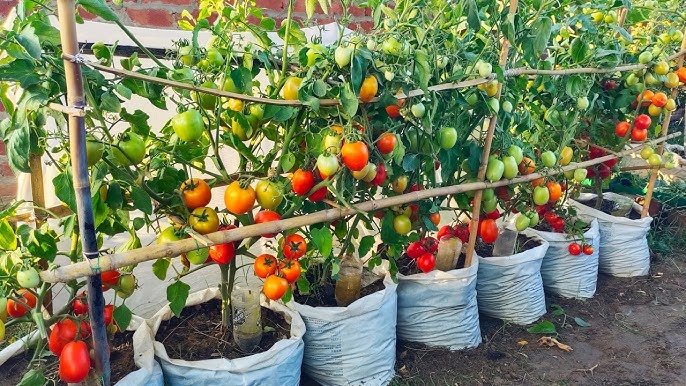
Step 2: Selecting the Right Sack
Choosing the right sack is essential for healthy root development and drainage:
- Material: Strong, durable, and breathable fabric sacks are ideal.
- Size: 20–30 liters capacity for one plant; larger sacks for multiple plants.
- Drainage: Make holes at the bottom to prevent waterlogging and root rot.
Using sacks allows easy mobility—move plants to sunny spots or protected areas as needed.
Step 3: Preparing the Soil
Tomatoes thrive in nutrient-rich, well-draining soil. Proper soil preparation ensures strong growth and higher yields.
Recommended Soil Mix:
- 40% garden soil or composted soil
- 30% well-rotted organic matter (cow dung, vermicompost)
- 20% cocopeat or peat moss for moisture retention
- 10% sand or perlite for drainage
Optional Additions:

- Bone meal for strong roots
- Crushed eggshell powder for calcium
- Neem cake or ash for pest prevention
Mix thoroughly before filling the sack to create a fertile, loose medium for tomato roots.
Step 4: Planting Tomato Seeds or Saplings
Depending on your choice, you can plant seeds or young seedlings:
For Seeds:
- Sow 2–3 seeds per sack in shallow holes about ½ inch deep.
- Cover lightly with soil and water gently.
- Germination occurs within 7–10 days under optimal conditions.
For Seedlings:
- Make a hole in the soil large enough to accommodate the root ball.
- Place the sapling and cover with soil, pressing gently around the base.
- Water immediately after planting.
Ensure one healthy plant per sack to allow ample space for root and fruit development.
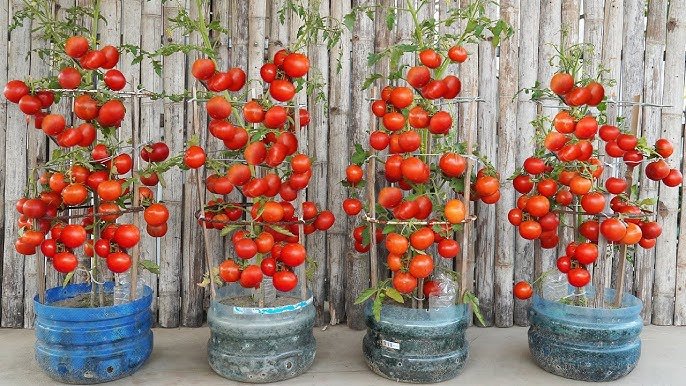
Step 5: Providing Support for Tomato Plants
Tomatoes are vine-like and need support to grow upright:

- Use stakes, bamboo sticks, or trellises.
- Tie the main stem loosely with soft cloth or string.
- Support encourages better airflow, sunlight exposure, and fruit production.
Vertical growth also prevents fruits from touching the ground, reducing the risk of rot.
Step 6: Watering Your Tomato Plants
Consistent watering is essential for juicy, tender tomatoes:
- Water 2–3 times a week, more during hot weather.
- Keep the soil evenly moist, avoiding overwatering.
- Mulch with straw or dry leaves to retain moisture and control temperature.
Proper watering ensures healthy growth and abundant fruiting.
Step 7: Fertilization for High Yield
Tomatoes are heavy feeders, requiring regular nutrients for optimal growth:
- Use organic fertilizers like vermicompost tea or cow dung slurry every 10–15 days.
- Side-dress with potash-rich materials such as banana peel powder to boost flowering and fruiting.
- Avoid excessive nitrogen; it promotes leaves but reduces fruit production.
Well-fertilized plants produce more flowers and larger, flavorful fruits.
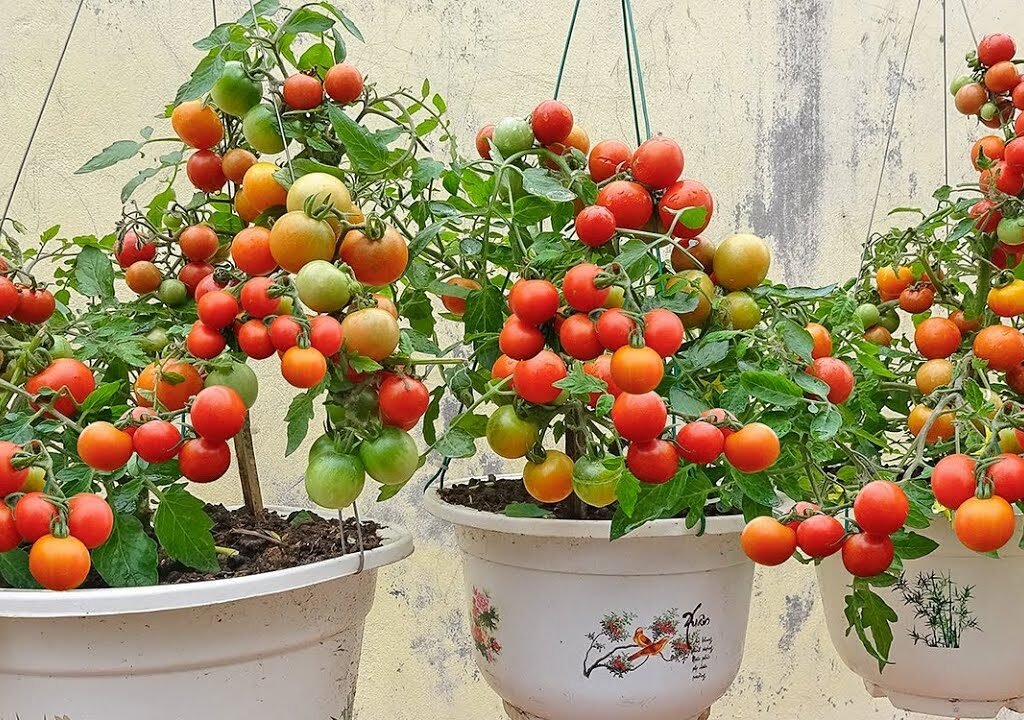
Step 8: Sunlight and Temperature Requirements
Tomatoes need warm climates and adequate sunlight:

- Provide 6–8 hours of sunlight daily.
- Protect young plants from strong afternoon sun in very hot regions.
- Moderate temperatures (20–30°C / 68–86°F) encourage flowering and fruit setting.
Adequate sunlight ensures healthy growth and sweeter tomatoes.
Step 9: Pollination Tips
Tomato flowers need pollination for fruit production:
- Bees and other pollinators naturally transfer pollen from male to female flowers.
- In areas with low pollinator activity, gently shake flowers or use a small brush to transfer pollen.
- Proper pollination ensures higher fruit set and increased yield.
Regular monitoring of flowers boosts overall productivity.
Step 10: Pest and Disease Management
Even in sacks, tomatoes can face pests and diseases:
| Problem | Solution |
|---|---|
| Aphids | Spray neem oil weekly |
| Whiteflies | Use organic insecticidal soap |
| Fungal diseases | Ensure good airflow and avoid wetting leaves |
| Blossom-end rot | Provide consistent watering and calcium-rich soil |
Organic care ensures healthy, chemical-free fruits for your family.
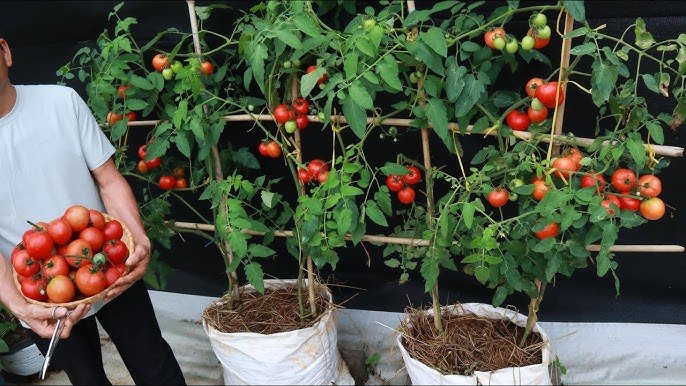
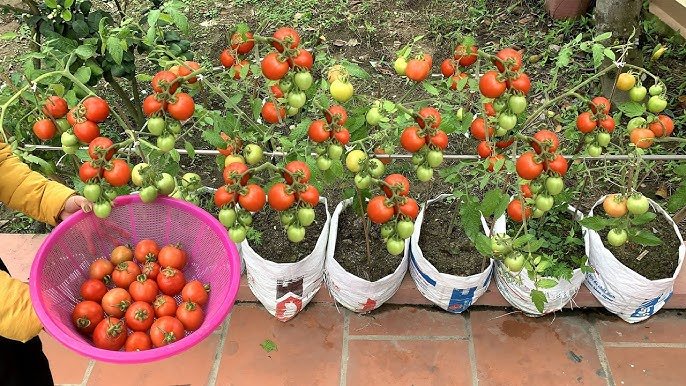
Step 11: Harvesting Tomatoes
The most rewarding step is harvesting your homegrown tomatoes:

- Cherry tomatoes: Ready in 50–60 days.
- Medium to large varieties: Harvest after 70–90 days, when the fruits are firm and fully colored.
- Pick fruits regularly to encourage continuous flowering and fruiting.
Homegrown tomatoes are juicy, flavorful, and far superior to store-bought ones.
Step 12: Tips for Continuous Tomato Harvest
- Succession Planting: Plant new seeds or saplings every 2–3 weeks.
- Pruning: Remove excess leaves and old stems to improve airflow and sunlight exposure.
- Soil Enrichment: Add compost or organic matter after each harvest.
- Companion Planting: Plant basil, marigold, or spinach nearby to enhance growth and reduce pests.
Following these tips ensures a steady supply of fresh, healthy tomatoes all season long.
Conclusion: Grow Delicious Tomatoes Easily in Sacks
Growing tomatoes in sacks is easy, inexpensive, and highly productive. With proper seed selection, fertile soil, watering, support, and care, you can enjoy fresh, juicy, and nutrient-rich tomatoes right at home.
Whether you live on a terrace, balcony, or small backyard, sack gardening allows anyone to grow beautiful, abundant tomatoes without a traditional garden. Start today and experience the satisfaction of harvesting your own homegrown tomatoes — fresh, healthy, and bursting with flavor!
Leave A Comment