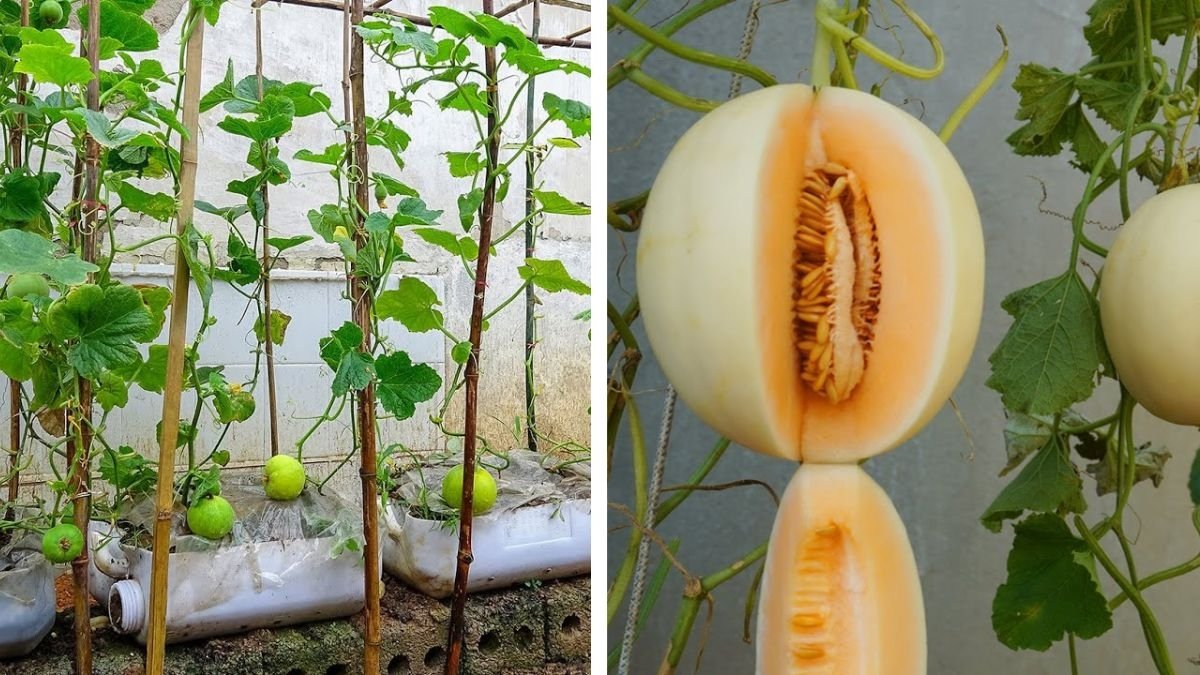
Honeydew melons are prized for their smooth rind, pale green flesh, and refreshingly sweet flavor. While most people associate growing melons with sprawling garden plots, you can actually grow honeydew melons right in plastic containers — even on your patio, balcony, or terrace. With the right techniques, you can enjoy a bountiful harvest of juicy, homegrown melons that rival any store-bought variety.
In this comprehensive guide, we’ll show you how to grow honeydew melons in plastic containers — from seed to harvest — with tips to ensure your fruits are sweet, large, and full of flavor.
1. Why Grow Honeydew Melons in Containers?
Container gardening offers several unique benefits, especially for fruiting plants like melons:
- Space-saving: Ideal for small patios, balconies, or rooftops.
- Mobility: Containers can be moved to maximize sunlight exposure.
- Pest control: Growing in pots helps avoid soil-borne diseases and pests.
- Soil control: You can tailor the soil mix for the best nutrition and drainage.
Honeydew melons thrive in warm conditions and, with proper care, produce full-sized fruits even in containers. All you need is the right setup and consistent attention to watering, sunlight, and nutrients.
2. Choosing the Right Honeydew Variety for Containers
Not all melon varieties are suitable for container gardening, so it’s best to choose compact or bush-type cultivars that grow well in limited space.
Here are some excellent varieties for container growing:
- Honey Brew: Compact vines with sweet, juicy fruits; perfect for containers.
- Honey Orange: Produces orange-fleshed melons with rich sweetness.
- Green Flesh Honeydew: Traditional type with high sugar content and smooth skin.
- Mini Dew: A smaller, faster-maturing melon ideal for small pots or balconies.
Selecting the right variety ensures vigorous growth and high-quality fruits even in confined spaces.
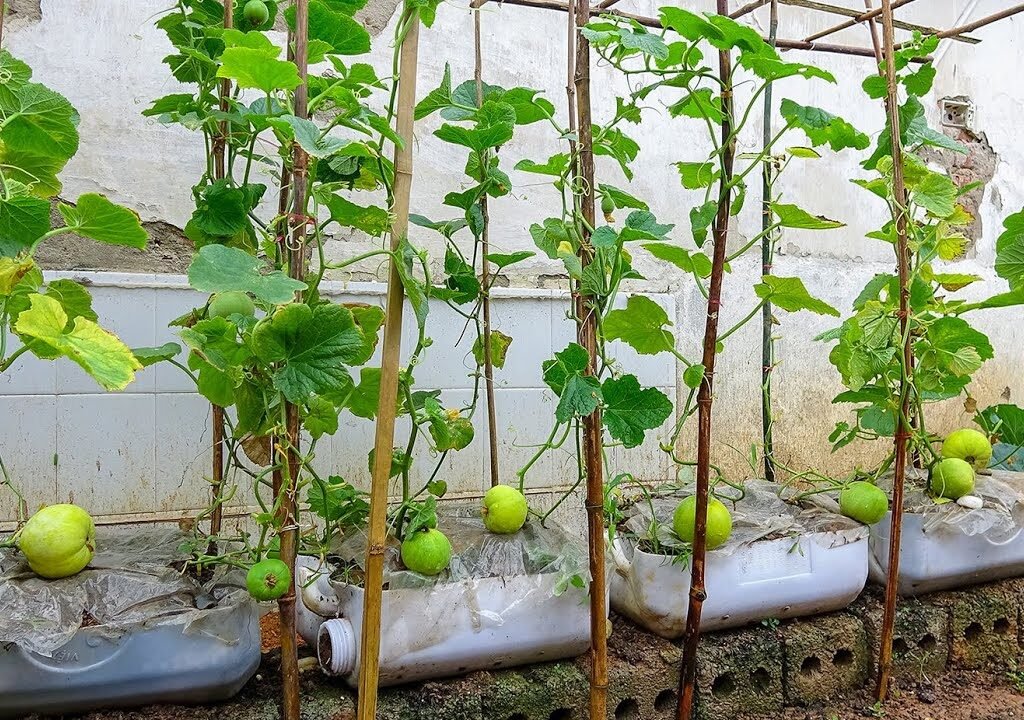
3. Selecting the Perfect Plastic Container
Choosing the right container is crucial for healthy melon growth and fruit size.
Container Requirements:
- Size: At least 20–25 gallons (75–90 liters) capacity; around 18–24 inches deep.
- Material: Use thick, food-safe plastic containers or grow bags. Plastic retains warmth — great for heat-loving melons.
- Drainage: Ensure several holes at the bottom to prevent waterlogging.
You can repurpose old paint buckets, storage tubs, or any large plastic container, as long as they have good drainage and enough depth for root development.
4. Preparing the Ideal Soil Mix
Honeydew melons thrive in fertile, well-draining, and slightly sandy soil. The right mix helps roots grow deeply and keeps the plant well-fed throughout its life.
Recommended Soil Mix:
- 40% high-quality potting mix or garden soil
- 30% organic compost or well-rotted cow manure
- 20% coco peat or peat moss (for moisture retention)
- 10% perlite or coarse sand (for aeration and drainage)
Add a handful of bone meal or slow-release organic fertilizer before planting to boost nutrient content. A slightly acidic to neutral pH of 6.0–7.0 is ideal.
5. Starting Honeydew Melon from Seeds
Honeydew melons grow well from seeds, and starting them directly in containers avoids transplant shock.
Steps for Seed Starting:
- Fill your plastic container with the prepared soil mix, leaving 2 inches from the top.
- Sow 2–3 seeds in the center, about 1 inch deep.
- Water gently and keep the soil consistently moist (not soggy).
- Place the container in a warm, sunny location.
Seeds usually germinate within 5–10 days when the soil temperature is around 75–90°F (24–32°C). Once seedlings have two sets of true leaves, thin out the weaker ones, leaving the strongest plant.
If you live in a cooler region, you can start seeds indoors 3–4 weeks before the last frost and transplant them once the weather warms up.
6. Sunlight and Temperature Requirements
Honeydew melons are sun-loving plants that need at least 8–10 hours of direct sunlight each day.
Place your container in the sunniest spot — ideally facing south or west. These plants prefer warm weather and perform best in temperatures between 70°F and 90°F (21°C–32°C).
If you’re growing them in cooler conditions, use black containers to absorb heat or cover them with a transparent plastic sheet to maintain warmth during early growth.
7. Watering Honeydew Melons in Containers
Proper watering is one of the most important aspects of growing honeydew in containers. Since pots dry out faster than garden soil, you need to maintain consistent moisture without overwatering.
Watering Tips:
- Water deeply 2–3 times a week, depending on temperature and humidity.
- Keep soil moist, especially during flowering and fruit formation.
- Avoid overhead watering — always water near the base of the plant.
- Use mulch (like straw, dried leaves, or coco husk) on top of the soil to retain moisture.
When fruits start ripening, reduce watering slightly to enhance sweetness and prevent splitting.
8. Fertilizing for Big, Sweet Fruits
Container-grown honeydew melons depend on you for all their nutrients, so regular feeding is essential for lush vines and flavorful fruits.
Fertilizing Schedule:
- 2 weeks after germination: Apply a balanced fertilizer (10-10-10 NPK) or liquid compost tea.
- Before flowering: Switch to a low-nitrogen, high-phosphorus fertilizer (5-10-10) to promote blossoms and fruit set.
- During fruiting: Feed every 2–3 weeks with liquid seaweed extract or potassium-rich organic fertilizer for sweetness and fruit size.
Avoid over-fertilizing with nitrogen once fruits start forming, as it can lead to excessive vine growth with fewer melons.
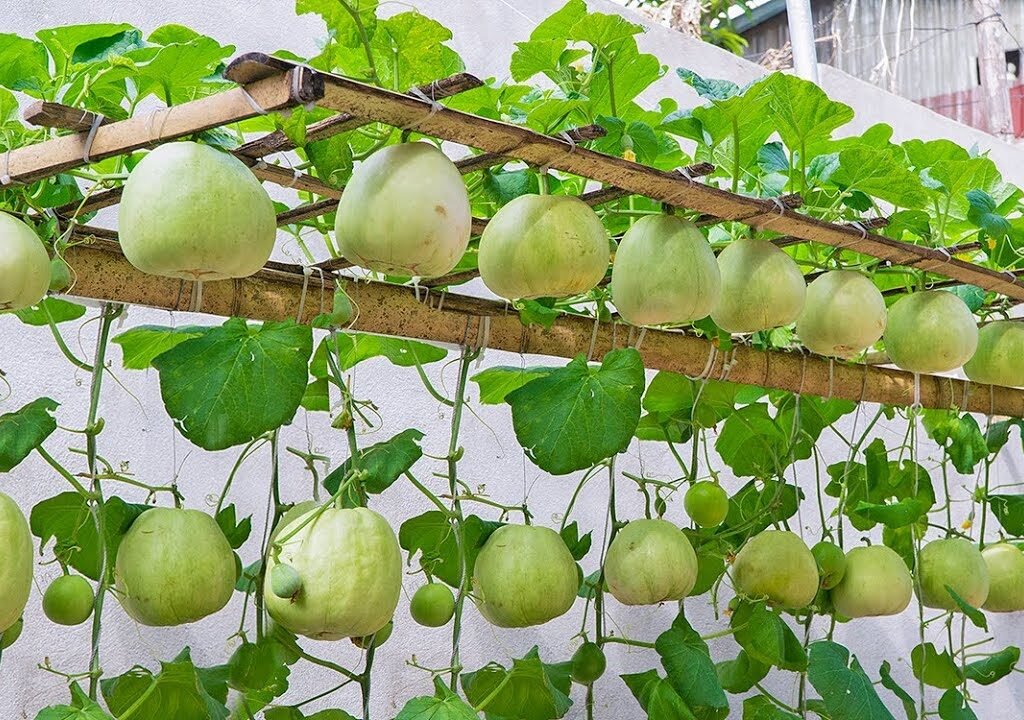
9. Supporting and Training the Vines
Honeydew vines can grow long, so proper support helps save space and prevents fruit rot.
Vertical Training:
- Install a sturdy trellis, netting, or bamboo frame beside the container.
- Gently train vines upward as they grow by tying them loosely with soft twine.
- When fruits begin to form, use fabric slings or mesh bags to cradle and support them — this prevents the stem from snapping and ensures uniform shape.
Vertical growing also improves airflow, reduces pest issues, and makes harvesting easier.
10. Pollination: Key to Fruit Development
Honeydew melons produce both male and female flowers. Pollination is crucial for fruit set, and since you’re growing in containers, hand-pollination may sometimes be necessary.
How to Hand-Pollinate:
- Identify male flowers (on thin stems) and female flowers (with a small fruit swelling at the base).
- Pick a male flower and gently brush its pollen onto the center of the female flower.
- Do this early in the morning when flowers are fully open.
If successful, you’ll notice the tiny fruit behind the female flower begin to enlarge within a few days.
11. Common Pests and Diseases
Container gardening minimizes many pest problems, but a few common ones can still appear:
- Aphids: Spray with diluted neem oil or insecticidal soap.
- Spider mites: Keep humidity up and spray water mist occasionally.
- Powdery mildew: Avoid wetting leaves and ensure good air circulation.
- Whiteflies: Use sticky traps or neem oil spray.
Regularly inspect leaves and vines for early signs of pests. Healthy, well-fed plants are more resistant to diseases.
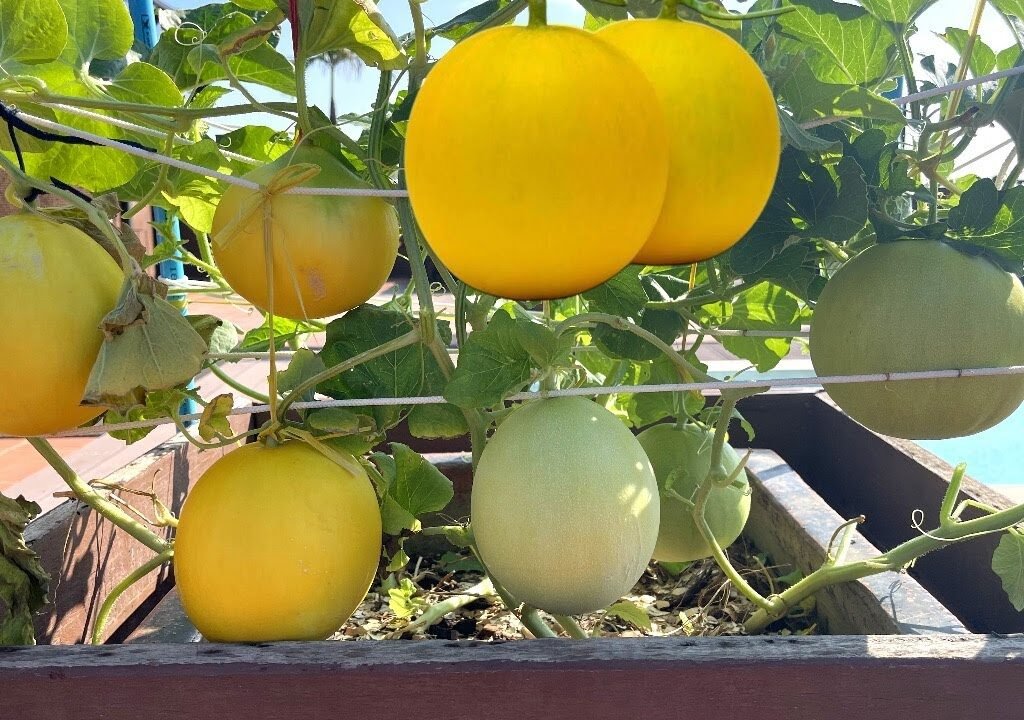
12. Harvesting Honeydew Melons
The best part of growing honeydew is harvesting your sweet, aromatic fruits. But how do you know they’re ready?
Here are key signs of ripeness:
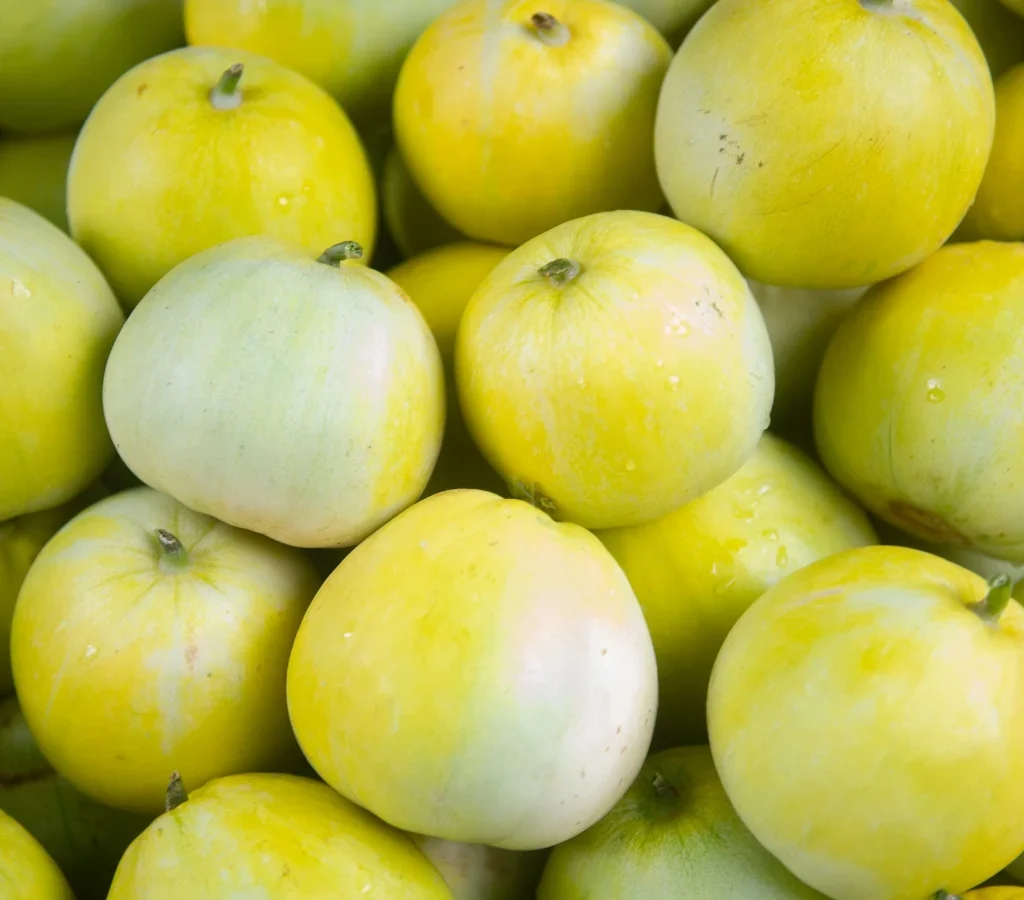
- The rind color changes from green to creamy yellow or pale ivory.
- The stem near the fruit becomes slightly dry and may crack or loosen easily (“full slip” stage).
- The skin feels slightly waxy, not glossy.
- A sweet fragrance develops at the blossom end of the melon.
Use a clean knife or pruning shears to cut the fruit from the vine, leaving a short stem attached. Handle melons gently to avoid bruising.
13. Storing and Enjoying Your Harvest
After harvesting, allow your honeydew to ripen for a few days at room temperature for the best flavor. Once ripe, store it in the refrigerator for up to a week.
Slice it up for a refreshing snack, blend it into smoothies, or serve it with mint and lime for a light summer treat.
14. Additional Tips for Success
To ensure your honeydew plants thrive and produce large, flavorful fruits, keep these extra tips in mind:

- Rotate the container every few days for even sunlight exposure.
- Use companion plants like marigolds or basil nearby to repel pests naturally.
- Prune excess vines and leaves so the plant directs energy toward fruit development.
- Limit to 2–3 fruits per plant for larger, sweeter melons.
- Use warm water for irrigation to avoid temperature shock in hot conditions.
15. Growing Honeydew Year After Year
Once your first crop finishes, clean your container thoroughly, refresh the soil with compost, and prepare for the next planting cycle. Rotating crops or changing the soil helps prevent diseases and nutrient depletion.
With each season, you’ll gain experience, and your harvests will get even better — bigger fruits, stronger plants, and sweeter flavor.
Conclusion
Growing honeydew melons in plastic containers is an incredibly rewarding gardening project. With just a bit of effort and care, you can harvest sweet, large, and flavorful fruits right on your balcony or patio.
By choosing the right variety, ensuring proper sunlight, watering wisely, and giving your vines the nutrients they need, you’ll enjoy homegrown honeydews that burst with natural sweetness.
So, grab a large plastic container, plant your seeds, and watch your garden transform into a melon paradise — because there’s nothing quite like the taste of fresh honeydew you’ve grown yourself!
Leave A Comment