The ground cherry — also known as Physalis, husk cherry, or golden berry — is one of gardening’s most delightful surprises. Tucked inside a papery husk, these small, golden fruits taste like a tropical mix of pineapple, mango, and tomato. Growing ground cherries from seed is not only easy but also deeply rewarding for home gardeners who love experimenting with unique, flavorful crops.
Inspired by the video “How to Grow Ground Cherry from Seeds to Sprout,” this in-depth guide walks you through every step of growing ground cherries from tiny seeds to healthy, thriving sprouts — ready for transplant and eventual fruiting. Whether you’re new to gardening or a seasoned grower seeking to expand your edible collection, this post will help you master the process with confidence.
What Are Ground Cherries?

Ground cherries (Physalis pruinosa or Physalis peruviana) belong to the nightshade family (Solanaceae) — the same family as tomatoes, tomatillos, and peppers. Despite their name, they’re not true cherries; rather, they’re small, round fruits encased in a delicate, lantern-like husk that dries and turns papery as the fruit ripens.
Native to the Americas, ground cherries have been grown for centuries for their sweet, tangy flavor and nutritional value — rich in vitamins A, C, and antioxidants. They’re incredibly versatile in the kitchen too, perfect for snacking fresh, making jams, adding to salads, or even baking into pies.
Why You Should Grow Ground Cherries
Before diving into the “how,” it’s worth knowing why ground cherries are worth your time and effort:
- Unique flavor: A tropical sweetness unlike any other garden fruit.
- Long harvest season: Produces fruit continuously through summer into early fall.
- Compact and hardy: Great for small gardens, raised beds, or containers.
- Self-pollinating: You only need one plant to get fruit.
- Low maintenance: Once established, they require little care and resist most pests.
With all these benefits, it’s no wonder more gardeners are discovering the charm of this little golden treasure.
Step 1: Selecting Ground Cherry Seeds
Start with high-quality seeds from a reputable source. There are several varieties of ground cherries, including:
- Aunt Molly’s Ground Cherry: Popular heirloom variety known for its sweet flavor and heavy yield.
- Cape Gooseberry (Physalis peruviana): Larger fruit, often grown in warmer climates.
- Cossack Pineapple: Noted for its tropical, pineapple-like flavor.
Choose a variety suited to your local growing conditions — Aunt Molly’s is particularly adaptable to temperate climates.
Step 2: Preparing for Seed Starting
Ground cherry seeds are tiny — similar in size to tomato seeds — and need a warm, consistent environment to germinate. Here’s what you’ll need:
- Seed trays or small pots
- Seed-starting mix (light, well-draining, sterile medium)
- Spray bottle for watering
- Plastic dome or humidity cover
- Grow lights or a bright, sunny windowsill
Since ground cherries are warm-season plants, it’s best to start seeds indoors 6–8 weeks before your last expected frost.
Step 3: Sowing the Seeds
- Fill your seed trays or pots with a moistened seed-starting mix.
- Sow the seeds on the surface — they need light to germinate, so cover them only lightly with a thin layer (⅛ inch) of soil or vermiculite.
- Mist gently with water using a spray bottle. Avoid heavy watering, which can displace the seeds.
- Cover with a humidity dome or plastic wrap to maintain moisture.
- Place the trays in a warm spot — ideally between 75–85°F (24–29°C).
Ground cherry seeds can take 7–14 days to sprout, sometimes longer if the temperature fluctuates. Patience is key!
Pro Tip: Use Bottom Heat for Better Germination
A seedling heat mat placed under your trays can greatly improve germination rates by keeping soil temperatures steady. Once the seeds sprout, remove the cover and move them under grow lights or near a sunny window.
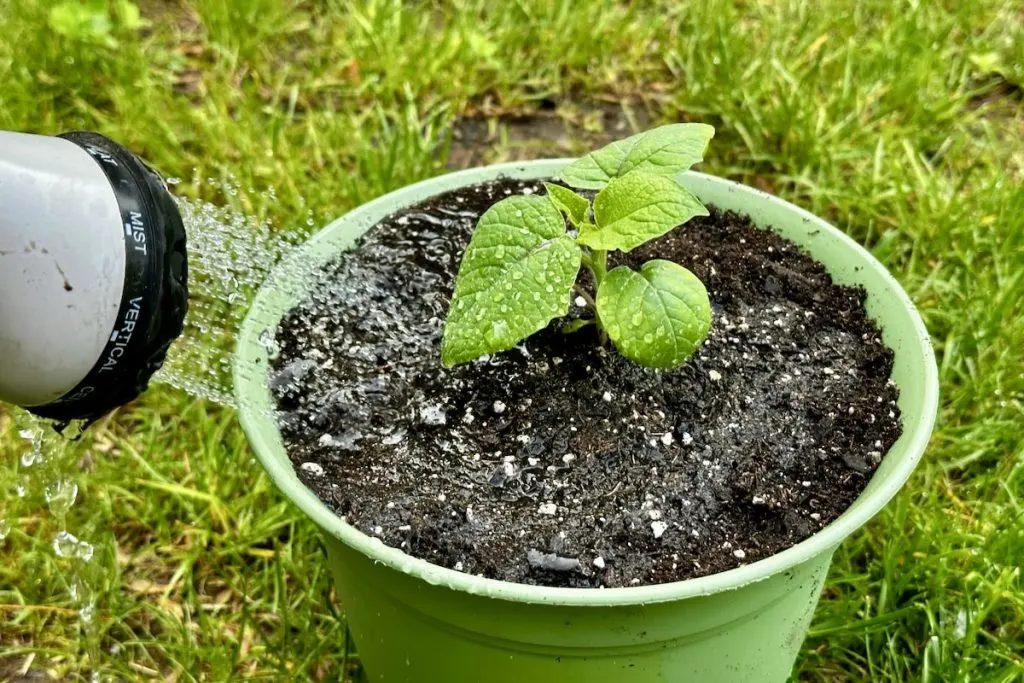
Step 4: Caring for Ground Cherry Seedlings
When your ground cherry seeds begin to sprout, it’s time to give them consistent care to ensure strong growth.
- Light: Provide at least 14–16 hours of light daily. Grow lights work best for indoor seedlings.
- Water: Keep soil slightly moist but not soggy. Overwatering is a common cause of damping-off disease.
- Airflow: Use a small fan or gently brush the seedlings daily to promote sturdy stems.
- Temperature: Maintain around 70°F (21°C) during the day and slightly cooler at night.
After about 2–3 weeks, the seedlings will develop their first true leaves (the second set after the cotyledons). This is the perfect time to thin them out if necessary, leaving only the strongest plants.
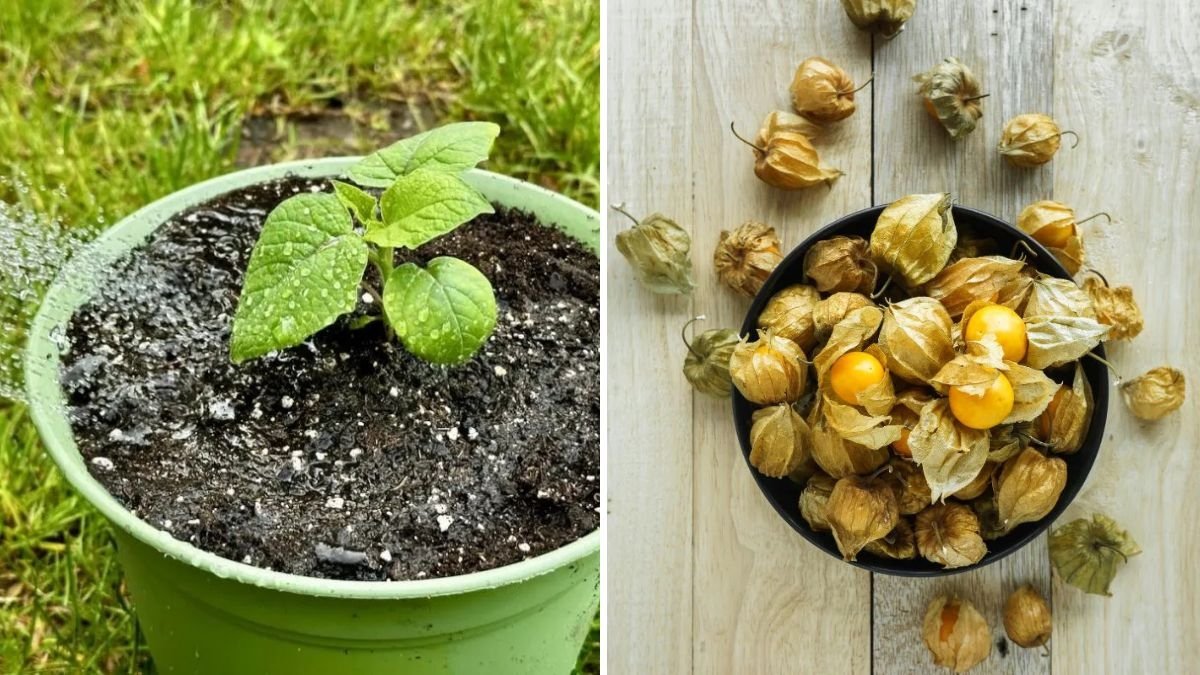
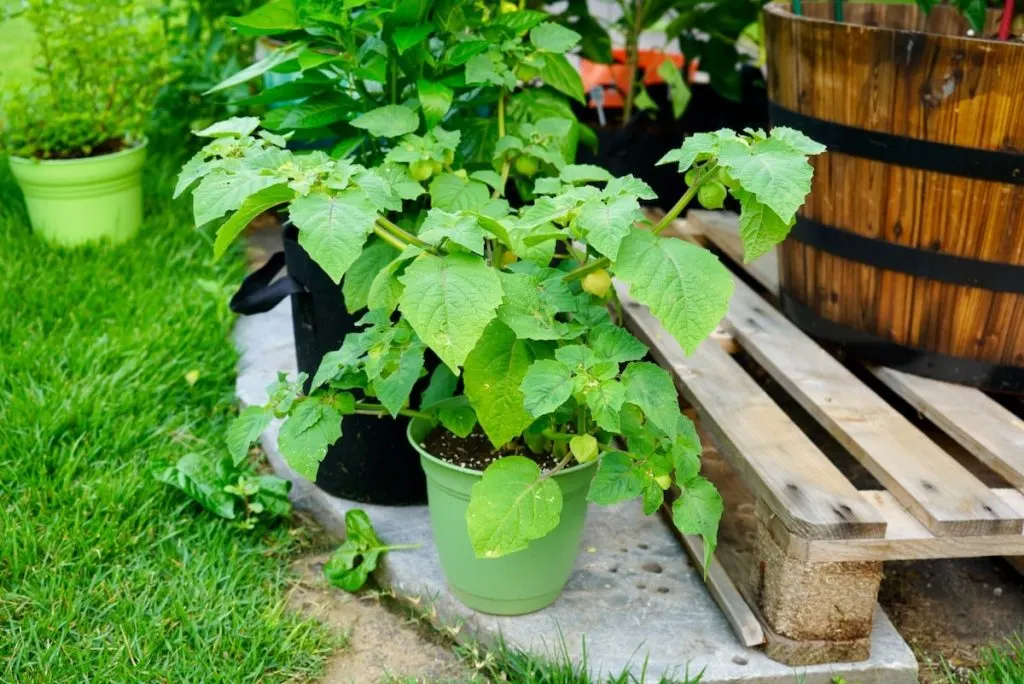
Step 5: Transplanting to Larger Pots or the Garden
Once your seedlings are 4–6 inches tall and the outdoor temperatures are consistently above 60°F (15°C), it’s time to transplant.
Hardening Off
Before moving seedlings outdoors permanently, gradually acclimate them to outside conditions over 7–10 days:
- Place them outside for a few hours each day in partial shade.
- Gradually increase sun exposure and reduce watering frequency.
- Bring them in at night if temperatures drop.
This process strengthens the plants and reduces transplant shock.
Planting Outdoors
Choose a sunny location with well-drained, slightly sandy soil. Ground cherries prefer soil with a pH between 6.0 and 6.8.
- Space plants 2–3 feet apart — they sprawl like tomatoes.
- Bury them deeply, up to the first set of leaves, to encourage strong root growth.
- Water thoroughly after planting.
You can also grow ground cherries in large containers (minimum 5 gallons) with drainage holes. This is ideal for urban gardens or patios.
Step 6: Ground Cherry Plant Care
Once transplanted, your ground cherry plants require only basic care. Here’s how to keep them healthy:
Watering
Water regularly, keeping the soil evenly moist — but not waterlogged. Deep watering encourages deep roots, making the plant more drought-tolerant later.
Fertilizing
Ground cherries aren’t heavy feeders. A balanced organic fertilizer (10-10-10) once a month or compost-rich soil will provide enough nutrients. Avoid excess nitrogen, which can promote leafy growth over fruiting.
Mulching
Apply straw or shredded leaves around the base to retain moisture, suppress weeds, and keep fallen fruit clean.
Pruning
Minimal pruning is needed. You can trim lower leaves to improve air circulation and prevent fungal issues, but avoid heavy pruning — the sprawling growth habit helps the plant support fruit production.
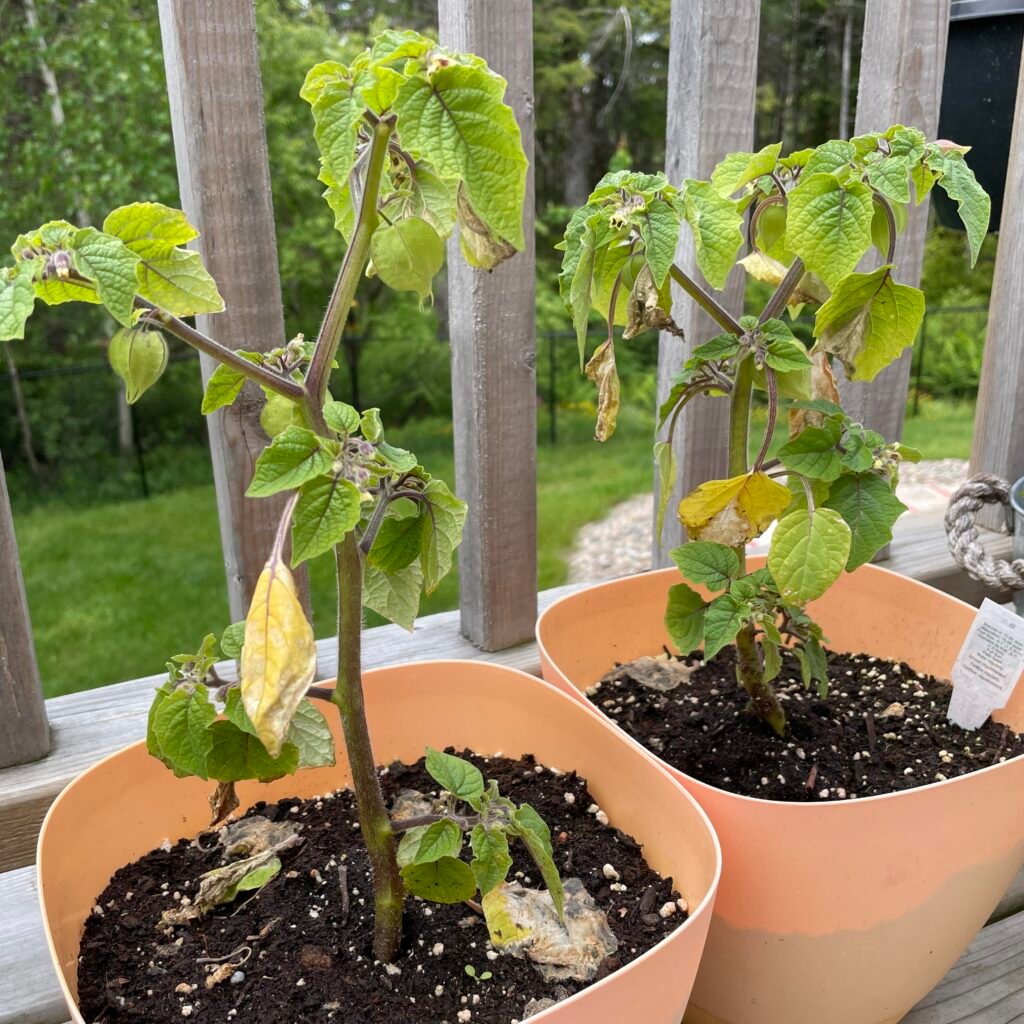
Step 7: Pollination and Fruiting
Ground cherries are self-pollinating, meaning a single plant can produce fruit. However, having two or more plants increases yield and improves pollination.
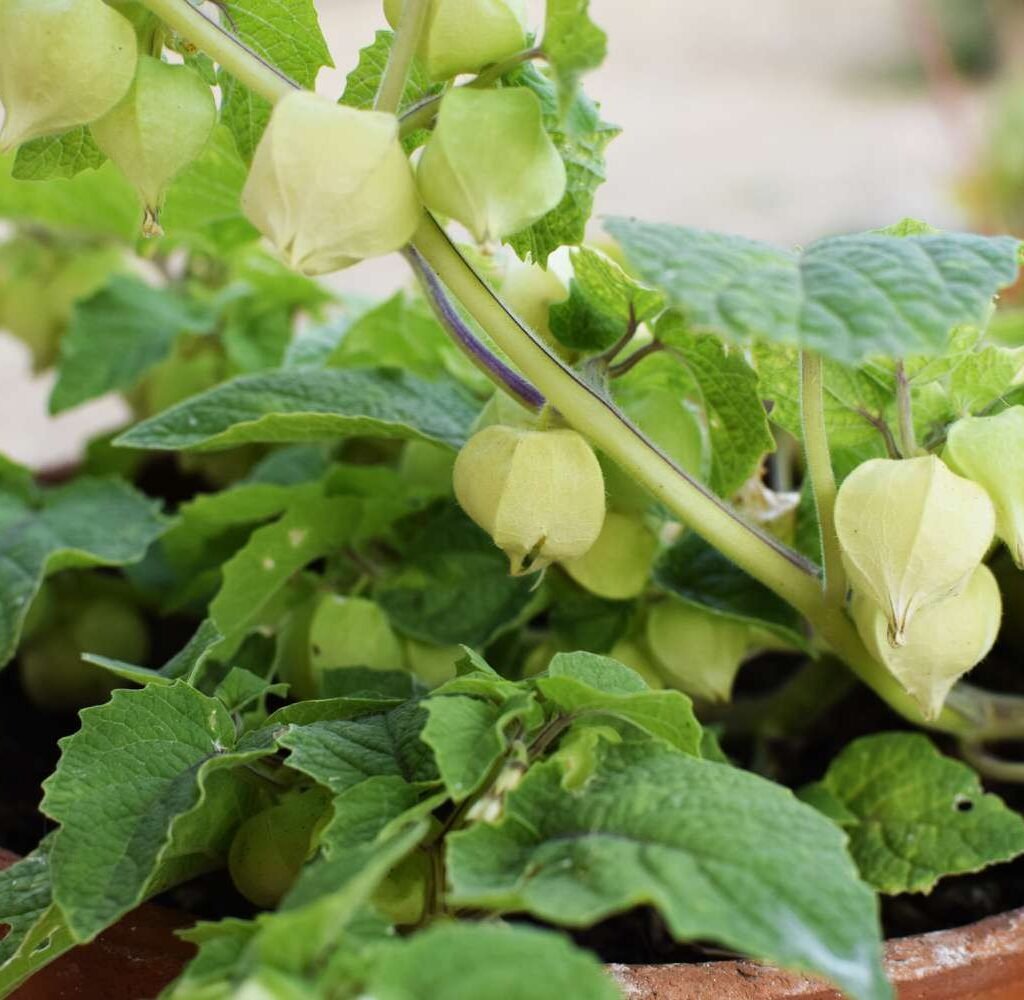
Bees and pollinators love the small yellow flowers that appear 60–70 days after transplanting. Once pollinated, each flower turns into a small green husk that slowly dries and turns beige as the fruit ripens inside.
Step 8: Harvesting Ground Cherries
The best part of growing ground cherries is harvest time!
You’ll know they’re ready when the husk turns tan and papery and the fruit drops naturally to the ground — hence the name “ground cherry.” The ripe fruit inside will be golden-yellow and sweet.
Simply pick the fallen fruits from the ground and remove the husks. Store them in a cool, dry place — they can last for several weeks when left in their husks, which act as a natural protective wrapper.
Step 9: Enjoying Your Harvest
Ground cherries are deliciously versatile. You can enjoy them:
- Fresh: As a snack or added to fruit salads.
- In jams and preserves: Their natural pectin makes for great homemade jam.
- Baked: In pies, tarts, and muffins for a sweet-tart flavor.
- Dried: For a raisin-like texture and taste.
- Savory dishes: Mixed into salsas, chutneys, or paired with cheese.
Their balance of sweetness and tang makes them one of the most unique fruits you can grow in your garden.
Common Pests and Problems
Ground cherries are relatively pest-free, but you might encounter:
- Aphids: Control with neem oil or insecticidal soap.
- Flea beetles: Use row covers or organic sprays early in the season.
- Cutworms: Protect seedlings with collars or mulch barriers.
- Excess moisture issues: Avoid overwatering to prevent fungal rot.
Regular inspection and maintaining good airflow around plants help keep issues minimal.
Final Thoughts: The Joy of Growing Ground Cherries from Seed
Growing ground cherries from seed to sprout is a deeply satisfying gardening experience. These golden treasures reward your patience with a steady supply of flavorful fruits wrapped in nature’s own packaging.
From the first delicate sprout to the final harvest, ground cherries remind us that the best garden rewards often come from small, simple beginnings. With warmth, light, and a bit of care, your garden can be filled with these sweet, sun-kissed jewels — a true treat for both the eyes and the taste buds.

So, grab a packet of seeds, start them indoors, and get ready to grow your own ground cherry garden — one golden berry at a time.
Leave A Comment