Growing your own food at home is one of the most satisfying experiences — and few crops are as rewarding as sugar snap peas. These crunchy, sweet, and versatile vegetables can be grown easily in containers, making them perfect for gardeners with limited space. Whether you live in an apartment, have a small patio, or just want to add some greenery to your balcony, this complete guide to growing sugar snap peas in containers from seed to harvest will help you enjoy fresh, flavorful pods all season long.
Let’s dive into everything you need to know — from choosing the right container and soil to caring for your plants and maximizing your harvest.
Why Grow Sugar Snap Peas in Containers?
Sugar snap peas are one of the most beginner-friendly crops you can grow. Unlike some vegetables, they thrive in cool weather, require minimal maintenance, and grow beautifully in pots or planters.
Here are a few reasons to grow them in containers:
- Space-saving: You don’t need a garden bed — just a sunny balcony or deck.
- Pest control: Container-grown peas are less susceptible to ground pests.
- Easier maintenance: Containers allow better control over soil quality and drainage.
- Perfect for early crops: Peas prefer cool weather and can be one of your first spring plantings.
With the right setup, you can enjoy baskets full of crisp, sweet pods — even in small urban spaces.
Step 1: Choosing the Right Variety
Before planting, it’s important to choose the right type of sugar snap pea for container growing. Some varieties grow tall and need more support, while others are compact and ideal for pots.
Best sugar snap pea varieties for containers:
- Sugar Ann: A dwarf, bush-type pea that grows about 2 feet tall and matures early.
- Cascadia: Compact, high-yielding, and resistant to common diseases.
- Sugar Daddy: Stringless pods and strong plants ideal for containers.
- Super Sugar Snap: Classic sweet flavor and great pod size, though needs trellising.
Compact or bush varieties are best for smaller spaces, but if you have room for a trellis or netting, taller varieties will reward you with larger harvests.
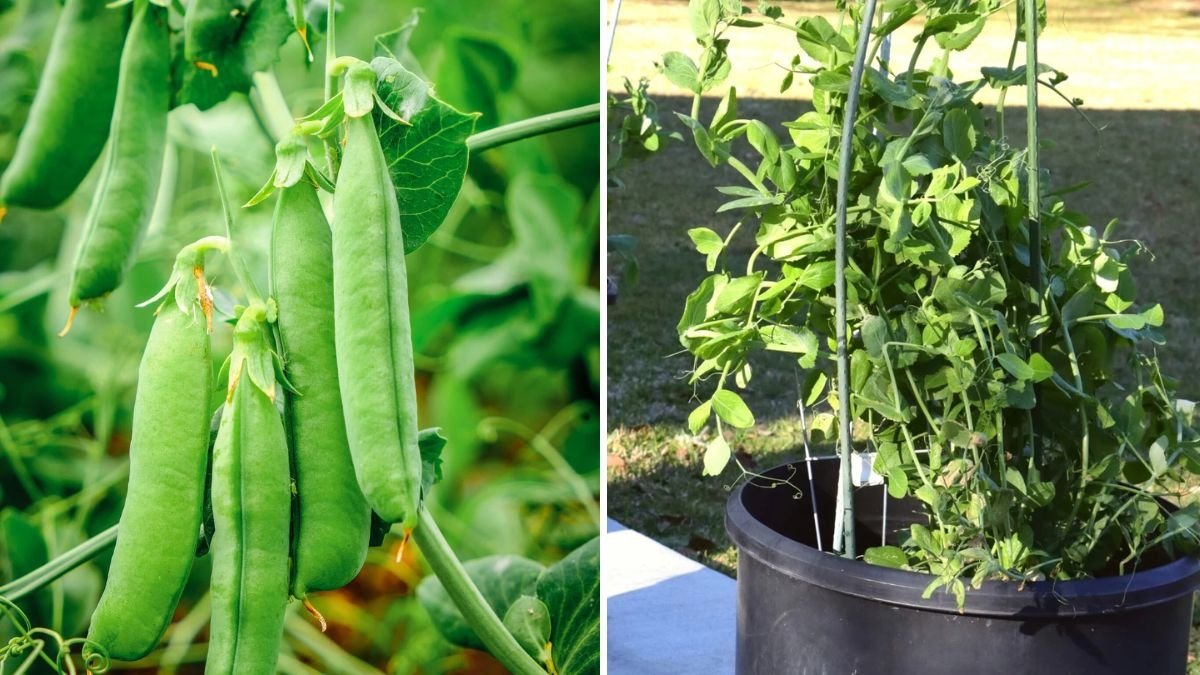
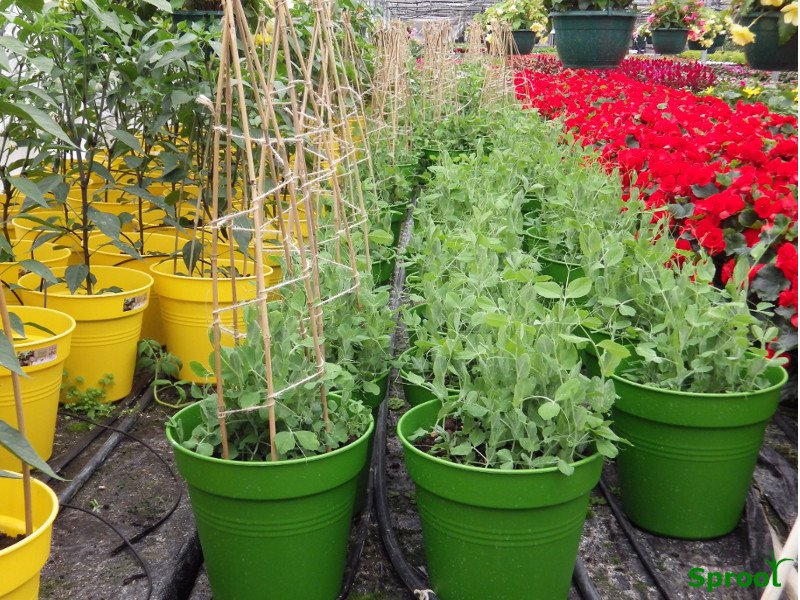
Step 2: Selecting the Perfect Container
Container choice can make or break your sugar snap pea success. Peas need enough depth for root growth and good drainage to prevent rot.
Ideal container features:
- Depth: At least 12 inches deep for healthy root development.
- Width: The wider the better — aim for a 12–16 inch diameter pot.
- Material: Plastic, ceramic, grow bags, or even wooden boxes work well.
- Drainage: Ensure your pot has several drainage holes at the bottom.
If you’re growing vining varieties, position your container where you can attach a trellis or support system.
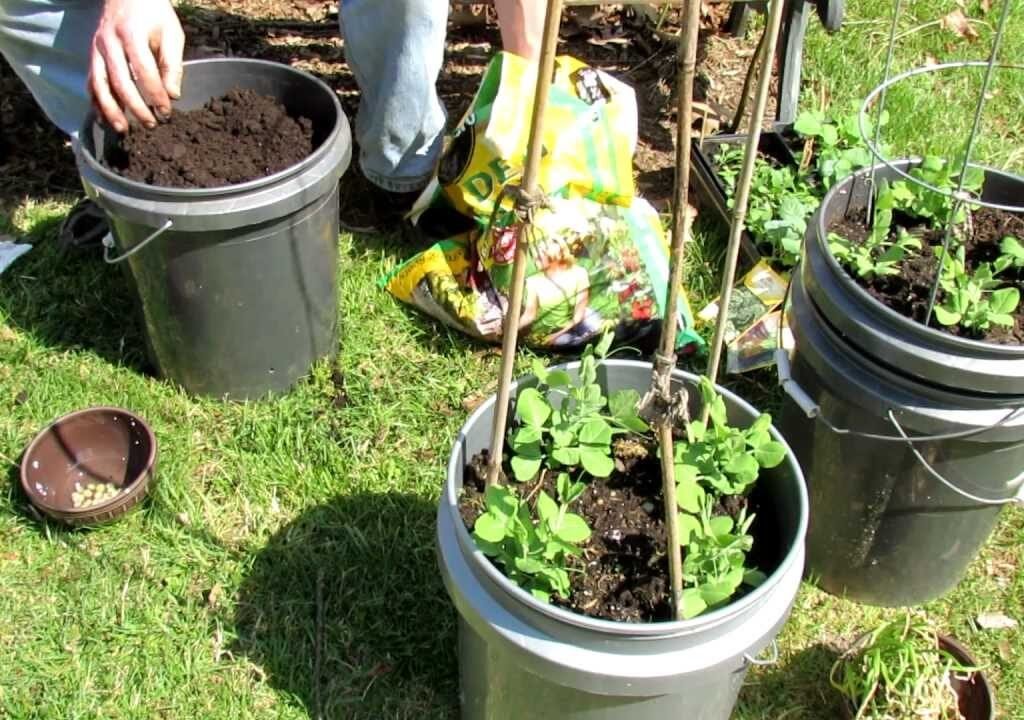
Step 3: Preparing the Right Soil Mix
Sugar snap peas thrive in loamy, well-draining soil that’s rich in organic matter. Container-grown plants depend entirely on the soil mix you provide, so getting it right is essential.
Best soil mix for sugar snap peas:
- 1 part garden soil or potting mix
- 1 part compost or well-rotted manure
- 1 part perlite or coco peat for improved drainage
Make sure the mix stays loose and airy — compacted soil restricts root growth. Peas prefer a slightly acidic to neutral pH (6.0–7.5). You can sprinkle a handful of bone meal into the mix to boost phosphorus, which helps with root and flower development.
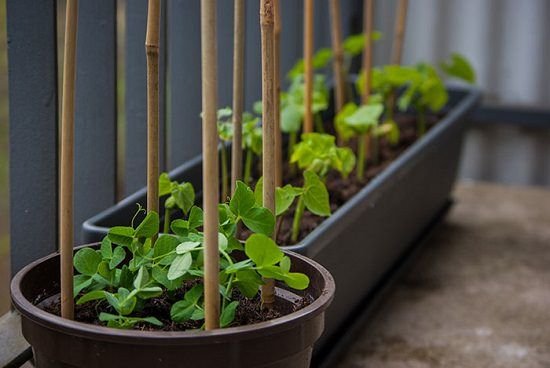
Step 4: Planting Sugar Snap Peas from Seed
One of the best things about sugar snap peas is that they grow quickly and easily from seed — no need for transplants.
When to plant:
- For spring crops: 4–6 weeks before your last expected frost date.
- For fall crops: 8–10 weeks before the first frost.
Planting steps:
- Soak the seeds for 6–8 hours in lukewarm water to speed up germination.
- Fill your container with prepared soil mix, leaving about an inch of space at the top.
- Plant seeds 1 inch deep and 2 inches apart.
- Lightly water after planting to moisten the soil.
Keep the soil evenly moist until the seeds germinate, which usually takes 7–10 days.
Step 5: Providing Proper Support
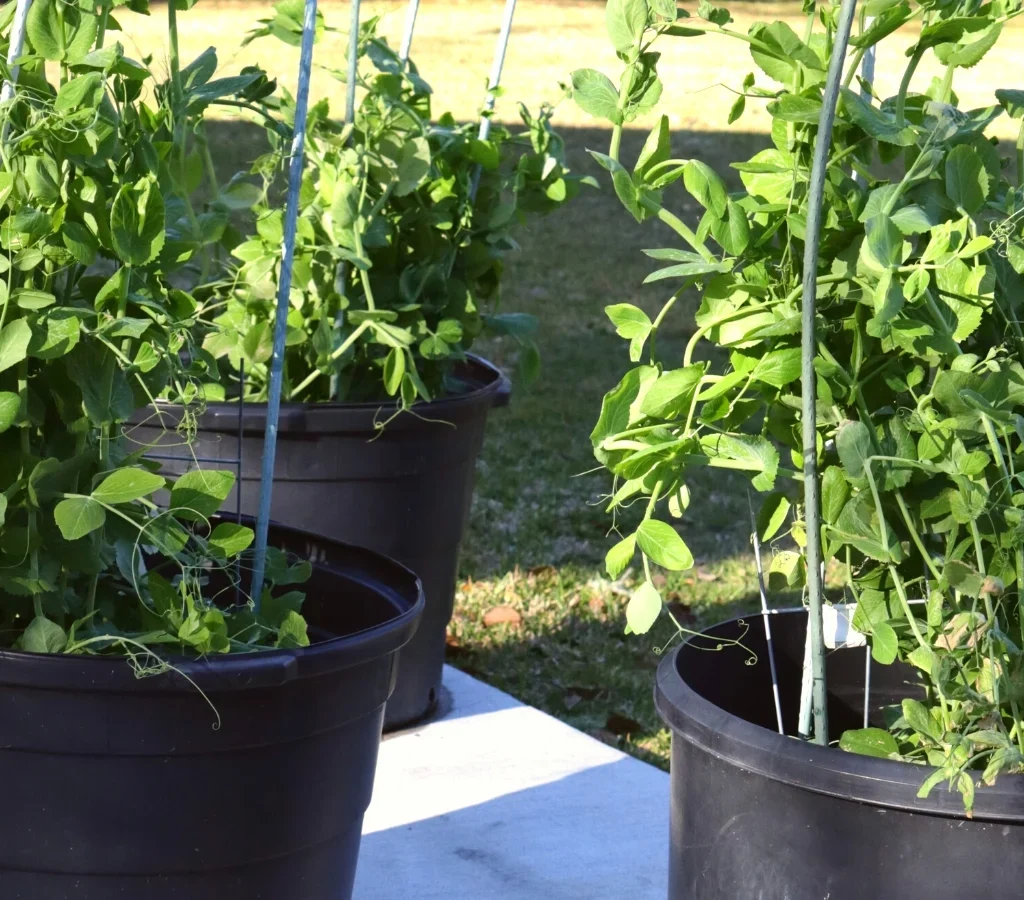
Even compact pea varieties benefit from some form of support, as it keeps vines upright, improves airflow, and makes harvesting easier.
Support options:
- Trellis: Insert a small A-frame or vertical trellis in the container at planting time.
- Netting: Stretch lightweight garden netting above the container.
- Stakes and strings: Place bamboo stakes and tie soft twine between them for vines to climb.
Install support immediately after planting, so you don’t disturb the roots later. Peas have delicate tendrils that latch onto nearby structures naturally.
Step 6: Watering and Fertilizing
Proper watering is key to a healthy pea crop. Because containers dry out faster than ground soil, you’ll need to check moisture levels regularly.
Watering tips:
- Keep the soil evenly moist, not soggy.
- Water deeply 2–3 times per week, depending on weather.
- Avoid letting the soil dry out completely — it can stunt growth.
- Use mulch (straw, leaves, or coco husk) to retain moisture and regulate temperature.
Fertilizing tips:
- Sugar snap peas don’t need much fertilizer because they fix nitrogen naturally.
- Mix compost or worm castings into the soil at planting.
- During flowering, apply a light feeding of compost tea or liquid seaweed fertilizer to encourage pod formation.
- Avoid high-nitrogen fertilizers; they promote leafy growth instead of pods.
Step 7: Sunlight and Temperature Requirements
Sugar snap peas love cool weather and plenty of sunlight.
Ideal conditions:
- Sunlight: 6–8 hours per day.
- Temperature: 55°F–75°F (13°C–24°C).
- Partial shade: In hot climates, provide afternoon shade to prevent heat stress.
Containers can heat up quickly, so keep them in a spot with morning sun and light afternoon shade if temperatures climb above 80°F (27°C).
Step 8: Pest and Disease Control
Container-grown peas are generally healthy, but a few pests and diseases can appear if conditions aren’t right.
Common pests:
- Aphids: Control with neem oil spray or insecticidal soap.
- Slugs and snails: Use crushed eggshells or copper tape around containers.
- Pea weevils: Use floating row covers early in the season.
Common diseases:
- Powdery mildew: Avoid overhead watering and ensure good air circulation.
- Root rot: Prevent by using well-draining soil and not overwatering.
Rotate crops each season and clean your containers before reusing them to prevent disease buildup.
Step 9: Flowering and Pollination
Sugar snap peas produce delicate white flowers before forming pods. They are self-pollinating, so you don’t need to rely on insects, though bees can help improve yield.
During flowering:
- Keep soil moisture consistent.
- Avoid disturbing the plants.
- Don’t let them dry out — moisture stress can cause flowers to drop prematurely.
Within a week or two of flowering, small pods will start to appear.
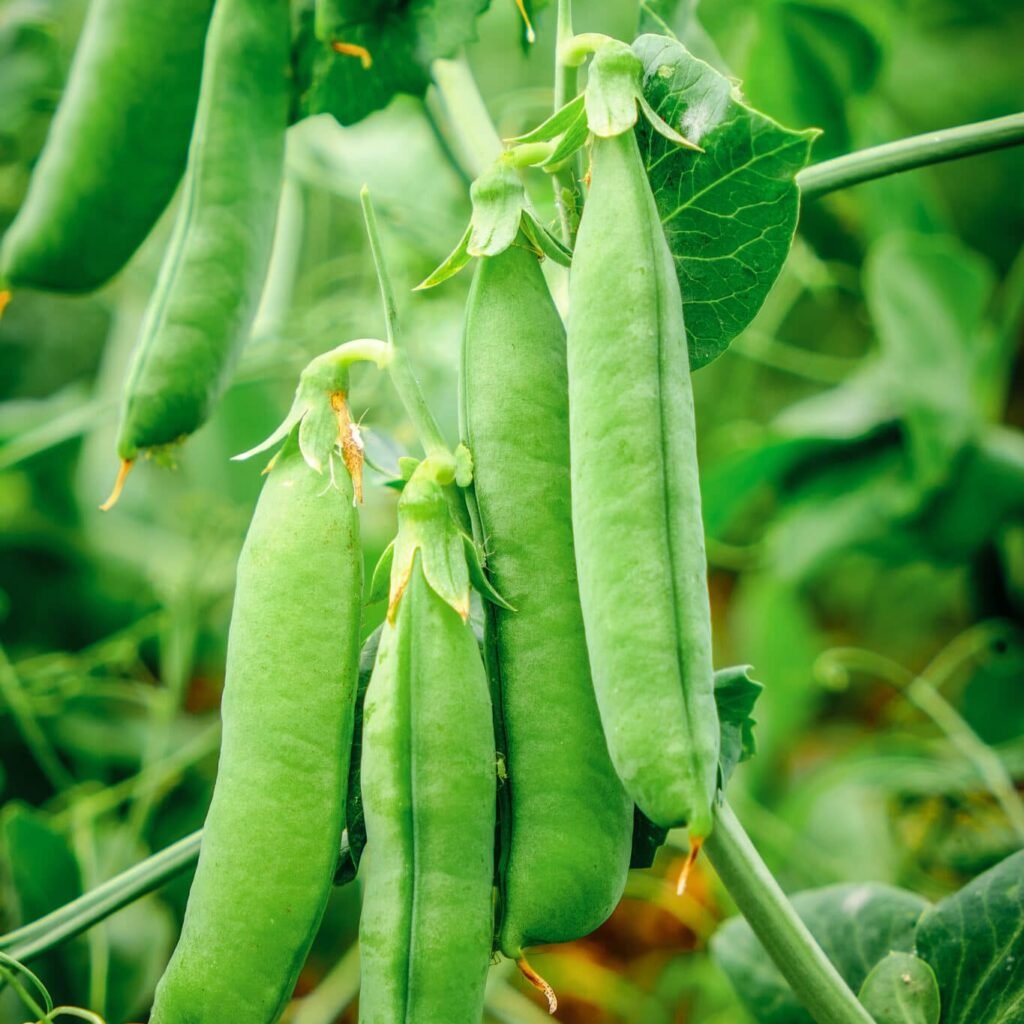
Step 10: Harvesting Sugar Snap Peas
The best part of growing peas is harvesting those crisp, sweet pods. The timing of your harvest will determine the flavor and tenderness of your peas.
When to harvest:
- Pods are ready 60–70 days after planting.
- Pick when pods are bright green, plump, and smooth, but before the peas inside harden.
- Harvest in the morning, when sugar content is highest.
How to harvest:
- Use one hand to hold the vine and gently pull pods with the other hand.
- Check every 1–2 days — frequent harvesting encourages more pod production.
If you leave mature pods on the plant too long, it signals the plant to stop producing new ones. Regular picking keeps it productive.
Step 11: Post-Harvest Care and Storage
Sugar snap peas taste best when eaten fresh, but you can store or preserve them easily.
Storage tips:
- Keep freshly harvested peas in a perforated bag in the refrigerator for up to 5 days.
- For longer storage, blanch pods for 2 minutes, cool in ice water, and freeze them in airtight bags.
- Frozen peas retain most of their sweetness and nutrients.
Step 12: Saving Seeds for the Next Season
Saving seeds is easy and ensures you can regrow your favorite variety next year.
How to save seeds:
- Let a few pods mature fully on the vine until they turn brown and dry.
- Pick and open the pods to remove seeds.
- Dry the seeds completely and store them in an airtight container in a cool, dark place.
Seed-saving helps preserve strong, disease-resistant genetics for future crops.
Bonus Tips for Bigger and Sweeter Harvests
- Plant early: Cooler weather results in sweeter pods.
- Mulch well: Helps regulate soil temperature and moisture.
- Harvest often: Picking regularly encourages more production.
- Provide airflow: Prevent fungal diseases by spacing plants properly.
- Use companion planting: Grow peas alongside lettuce, carrots, or radishes — they make great companions.
Final Thoughts
Growing sugar snap peas in containers is one of the easiest and most rewarding ways to enjoy homegrown vegetables. With a little attention to soil quality, sunlight, and watering, you can enjoy an abundance of sweet, crunchy pods right from your balcony or patio.
From sowing the first seed to harvesting handfuls of fresh pods, every step brings you closer to a delicious, nutritious reward. Follow these steps carefully, and soon you’ll be savoring your very own crop of container-grown sugar snap peas — fresh, organic, and bursting with sweetness.
Leave A Comment