How to Plant and Grow Edamame (Soybeans) Step-by-Step: Your Complete Home Gardening Guide

How to Plant and Grow Edamame (Soybeans) Step-by-Step: Your Complete Home Gardening Guide

Edamame, also known as young soybeans, is a protein-rich, delicious, and nutrient-packed crop that’s surprisingly easy to grow right at home. These bright green pods are not only a popular snack in Asian cuisine but also an excellent source of plant-based protein, fiber, and essential vitamins. Whether you’re a health enthusiast, a gardener looking for something new, or simply someone who loves fresh, organic produce, growing edamame can be an exciting and rewarding experience.

In this detailed guide, you’ll learn how to plant, grow, and harvest edamame step by step—from preparing your soil to enjoying your first harvest. By the end, you’ll see just how simple it is to grow your own soybeans at home, whether in the garden, raised beds, or containers.


What is Edamame?

Edamame is the Japanese term for immature soybeans harvested before they harden. Unlike dried soybeans used for making tofu or soy milk, edamame is enjoyed fresh, steamed, or boiled in the pod.

These beans are:

  • High in protein and fiber
  • Rich in antioxidants and essential amino acids
  • A great meat substitute for vegetarians and vegans
  • Low in calories but very filling

Growing edamame gives you access to this superfood straight from your garden, ensuring freshness and quality.


Step 1: Choosing the Right Variety

Before you start planting, it’s important to select the right variety of soybeans for your region and growing conditions.

Popular Edamame Varieties:

  • Midori Giant: Known for large pods and a high yield.
  • Envy: Early maturing and great for cooler climates.
  • Butterbean: Compact growth, ideal for containers.
  • Sayamusume: A flavorful and tender variety for home gardens.

Tip: Choose an early-maturing variety if you live in a region with a short growing season. Most edamame varieties mature in 70–90 days.


Step 2: Preparing the Soil

Edamame grows best in loose, well-draining, and nutrient-rich soil. These plants thrive in slightly acidic to neutral soil with a pH between 6.0 and 6.8.

Ideal soil mix for garden beds:

  • 50% garden soil
  • 30% compost or aged manure
  • 20% sand or coco peat for drainage

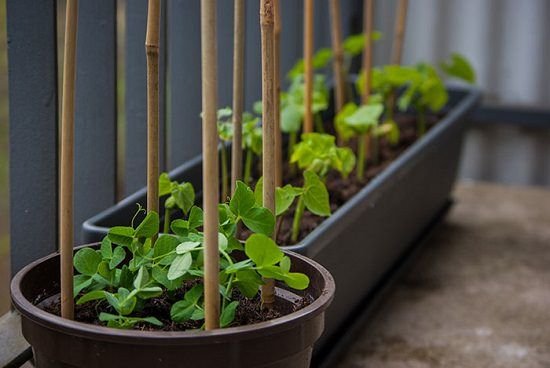
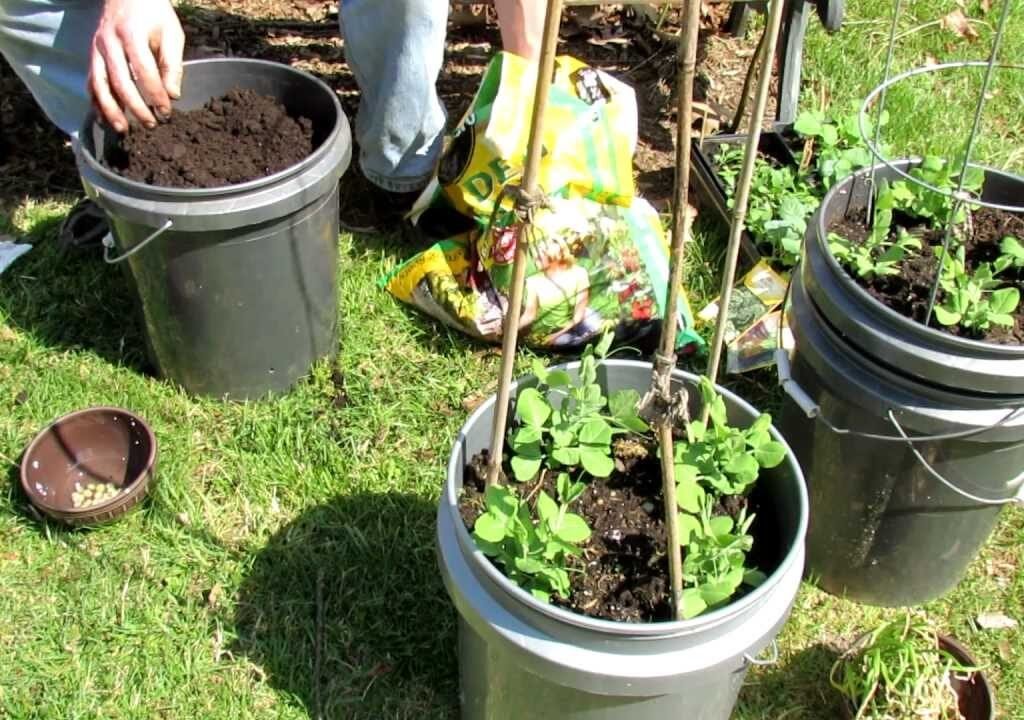
If you’re planting in containers, use a 12–14-inch deep pot or grow bag filled with the same mix.

Pro Tip: Before planting, work in organic compost or worm castings to improve soil fertility. Avoid nitrogen-heavy fertilizers since soybeans naturally fix nitrogen from the air through their roots.


Step 3: Choosing the Perfect Location

Edamame loves warmth and sunlight. Choose a location that receives 6–8 hours of full sunlight daily.

  • Temperature Range: 20°C to 30°C (68°F to 86°F)
  • Avoid Frost: Soybeans are sensitive to cold. Wait until after the last frost before planting outdoors.
  • Indoor Start: In cooler regions, start seeds indoors 2–3 weeks before the last frost and transplant once the weather warms.

Step 4: Planting Edamame Seeds

Once your soil and location are ready, it’s time to plant your edamame seeds!

Step-by-step planting guide:

  1. Soak the seeds in warm water for 8–10 hours before planting to soften the seed coat and speed up germination.
  2. Plant the seeds 1–1.5 inches deep and 3–4 inches apart in rows spaced about 18–24 inches apart.
  3. Water the soil gently after planting to keep it moist but not soggy.
  4. If planting in containers, plant 2–3 seeds per pot and thin to the healthiest plant after germination.

Germination Time: Seeds usually sprout within 5–7 days under warm conditions.


Step 5: Caring for Growing Edamame Plants

Edamame plants are relatively low-maintenance, but they need consistent moisture and care during the growing season.

Watering:

  • Keep the soil evenly moist, especially during flowering and pod development.
  • Water deeply 2–3 times a week rather than shallow watering daily.
  • Avoid overwatering to prevent root rot.

Mulching:

Add a layer of straw, dried leaves, or compost around the plants to retain soil moisture and suppress weeds.

Fertilizing:

Because soybeans fix nitrogen naturally, they don’t need heavy fertilization. However, you can give them a boost by applying:

  • Compost tea or organic seaweed fertilizer every 3–4 weeks.
  • A small amount of potassium- or phosphorus-rich fertilizer during the flowering stage.

Weeding:

Keep the area weed-free during early growth. Once the plants mature, their dense canopy will naturally shade out most weeds.


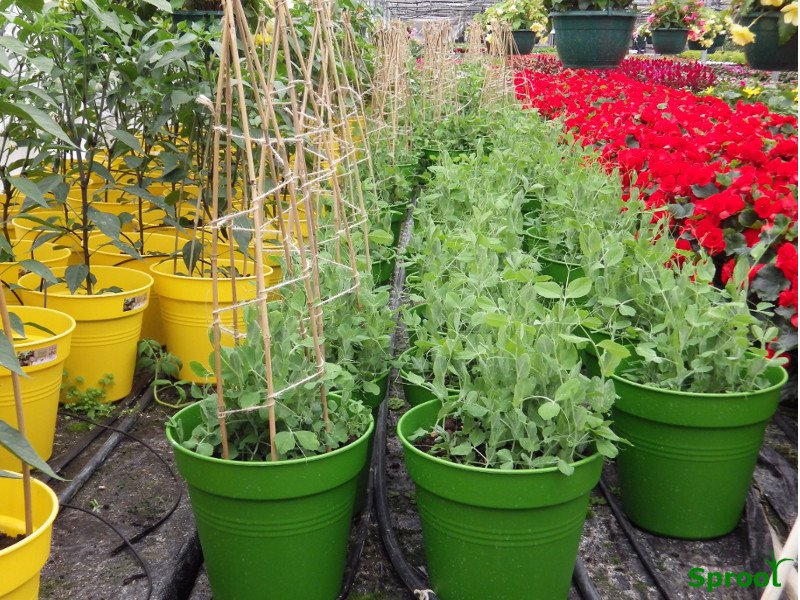
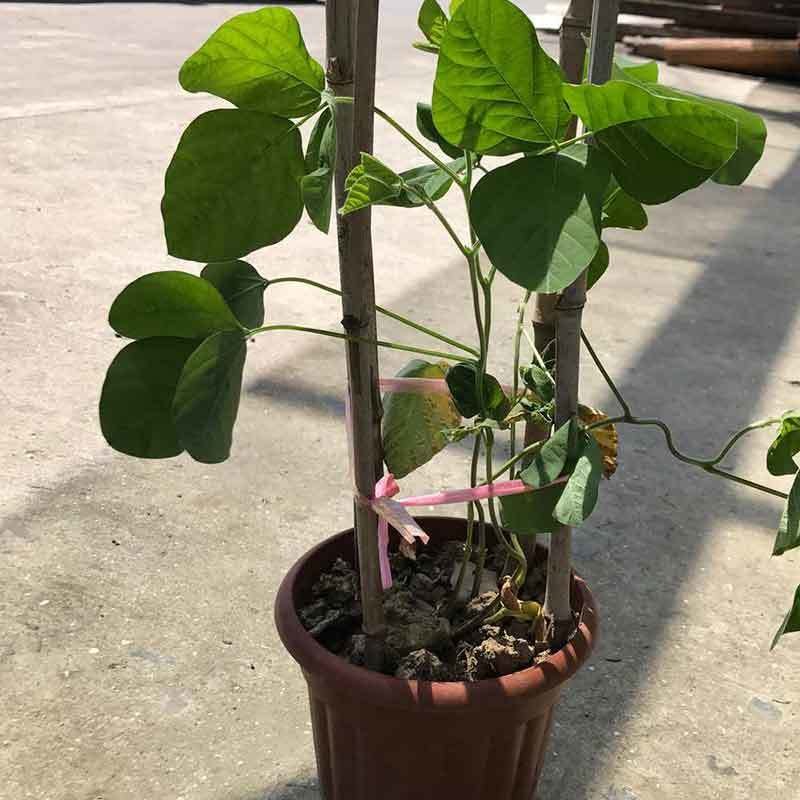
Step 6: Supporting and Spacing

Edamame plants are usually bushy and don’t require staking or support. However, in windy areas, adding a small stake can prevent the plants from bending over.

If growing in containers, ensure each plant has enough room—one healthy plant per 12-inch pot works perfectly.


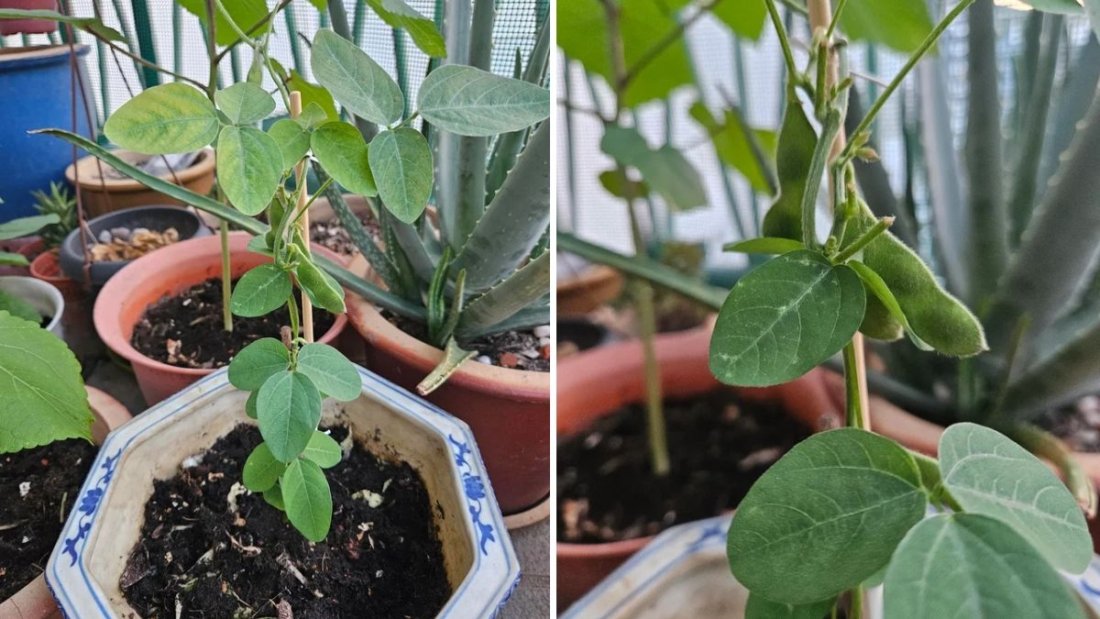
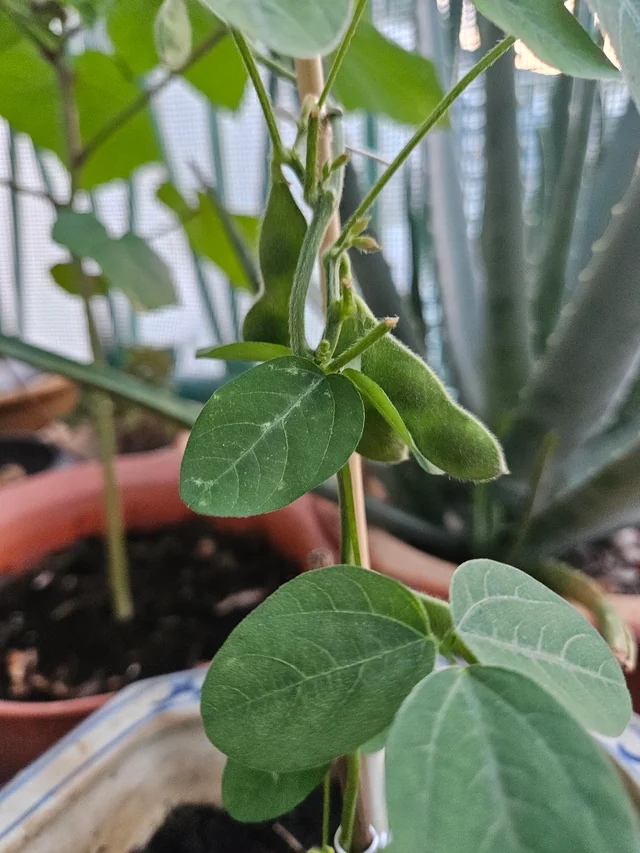
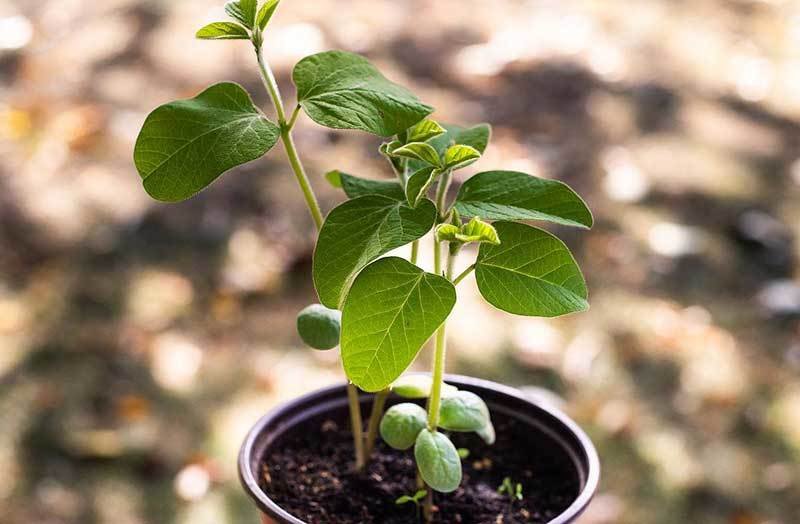
Step 7: Flowering and Pod Formation

Around 35–45 days after planting, your edamame plants will start producing small white or purple flowers. These are the precursors to pods!

During this time:

  • Keep watering consistently—dry spells can reduce pod formation.
  • Avoid disturbing the roots.
  • Continue using organic fertilizers if needed.

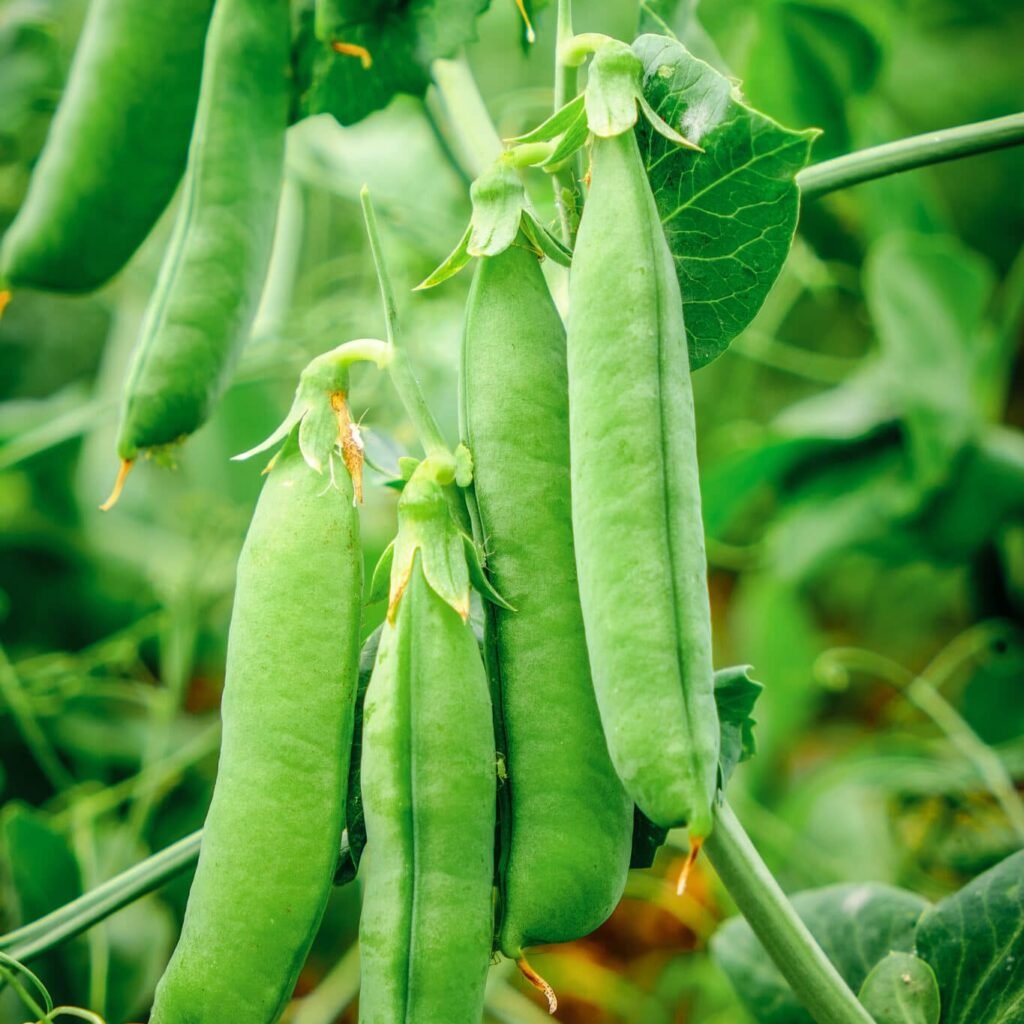
After flowering, small green pods will start appearing. Each pod usually contains 2–3 beans, and they’ll grow larger over the next few weeks.


Step 8: Common Problems and Natural Solutions

While edamame is relatively hardy, you might encounter a few challenges.

1. Pests:

  • Aphids & Spider Mites: Spray neem oil or soapy water once a week.
  • Caterpillars: Handpick them or use organic Bt spray.

2. Diseases:

  • Root Rot or Mold: Avoid overwatering and ensure good drainage.
  • Powdery Mildew: Improve air circulation and avoid overhead watering.

3. Poor Pod Formation:
This usually happens due to low sunlight or inconsistent watering. Ensure your plants get enough light and steady moisture.


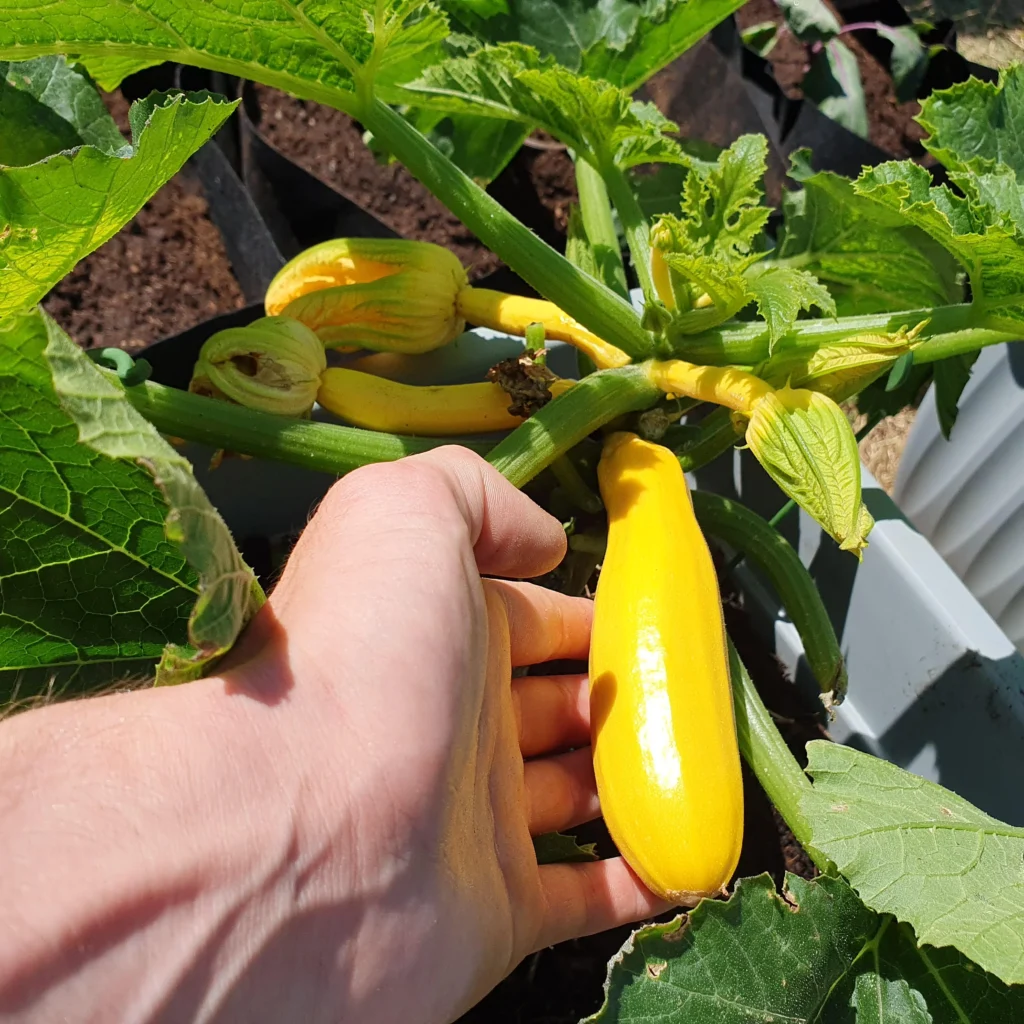
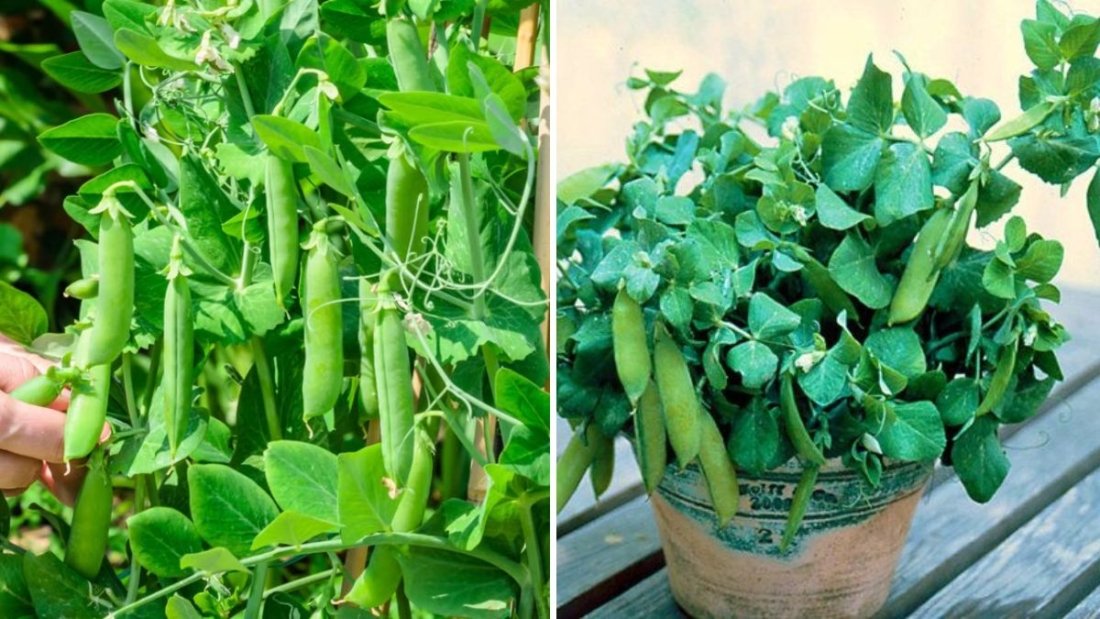
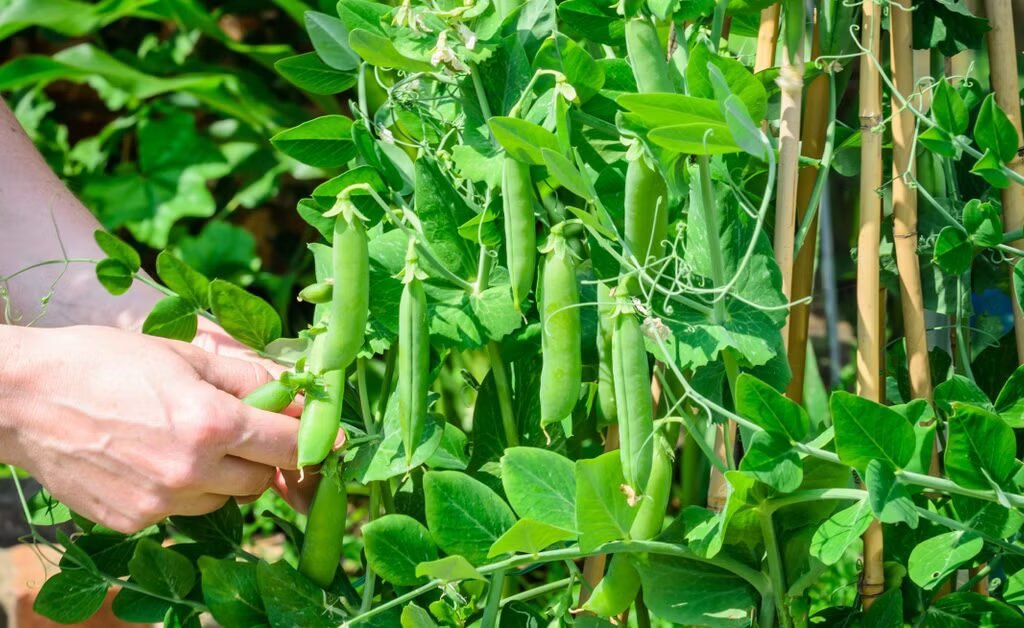
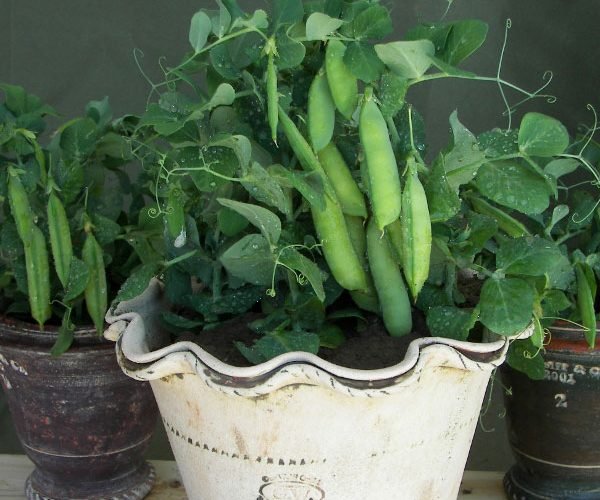
Step 9: Harvesting Your Edamame

The most exciting stage—harvesting your soybeans!

When to harvest:

  • Edamame is typically ready 70–90 days after planting.
  • Harvest when pods are bright green, plump, and firm to the touch.
  • The leaves may start to turn slightly yellow—this is a good sign!
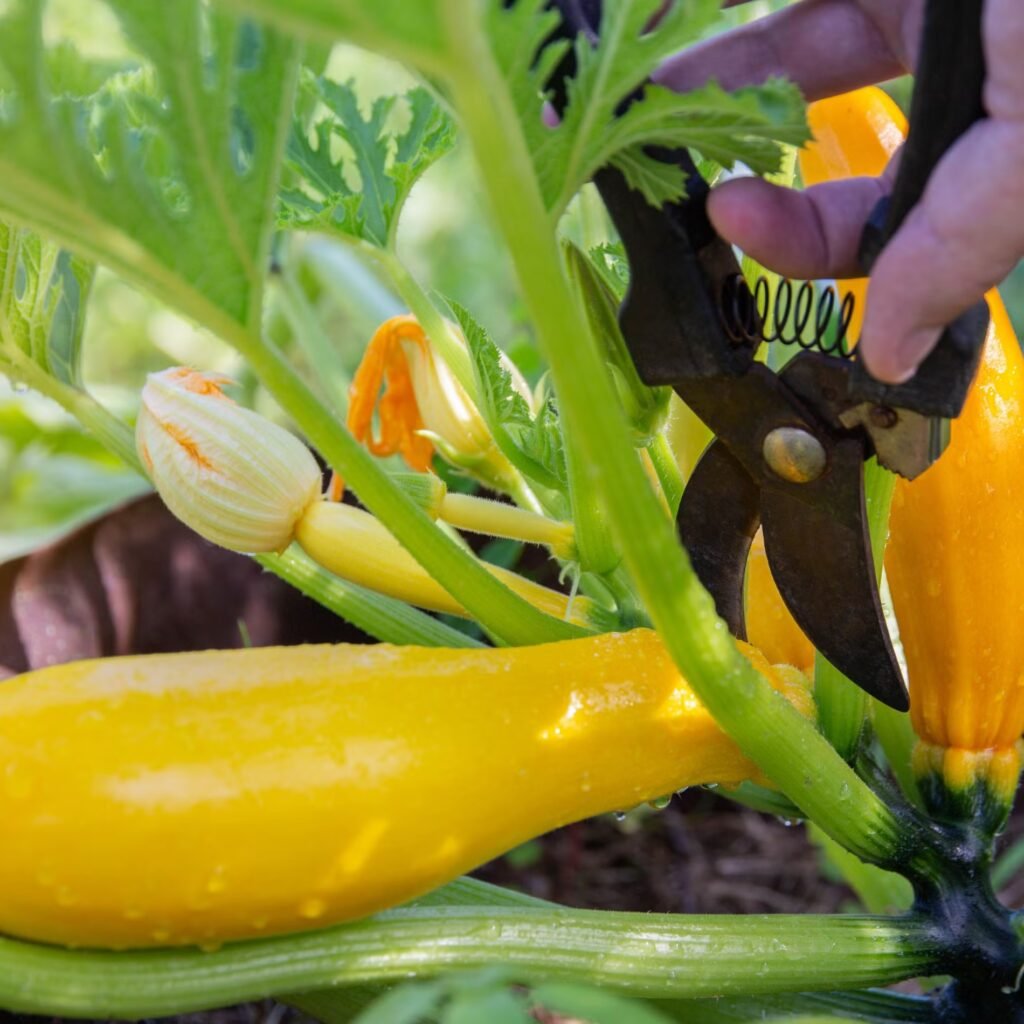
How to harvest:

  • Use scissors or garden shears to snip off the pods rather than pulling them.
  • You can harvest the entire plant or just the pods as they mature.

If you leave them too long, the pods will dry and turn brown, which means the beans are entering the mature soybean stage—not ideal for edamame eating.


Step 10: Preparing and Storing Edamame

Once harvested, your edamame can be enjoyed fresh or stored for later use.

To prepare fresh edamame:

  1. Wash the pods thoroughly.
  2. Boil them in salted water for 5–7 minutes until tender.
  3. Drain, sprinkle with sea salt, and enjoy!

To store:

  • Refrigerate fresh edamame for up to 3–5 days.
  • For long-term storage, blanch pods in boiling water for 3 minutes, cool quickly, and freeze in airtight bags. They’ll last up to 6 months.

Step 11: Saving Seeds for Next Season

If you want to grow edamame again, let a few pods mature fully on the plant until they turn brown and dry.

  • Harvest these dried pods and remove the beans.
  • Store them in a cool, dry place inside paper envelopes or glass jars.
  • These seeds will remain viable for the next 2–3 years.

Health Benefits of Fresh Edamame

Homegrown edamame isn’t just delicious—it’s one of the healthiest foods you can eat.

Here are some of its top benefits:

  • High in protein: Perfect for vegetarians and vegans.
  • Rich in fiber: Aids digestion and supports weight control.
  • Packed with vitamins and minerals: Especially folate, iron, magnesium, and vitamin K.
  • Heart-healthy: Helps lower cholesterol and supports cardiovascular health.
  • Bone strength: Contains calcium and isoflavones that promote bone density.

Adding fresh edamame to your diet supports a balanced, nutrient-rich lifestyle.


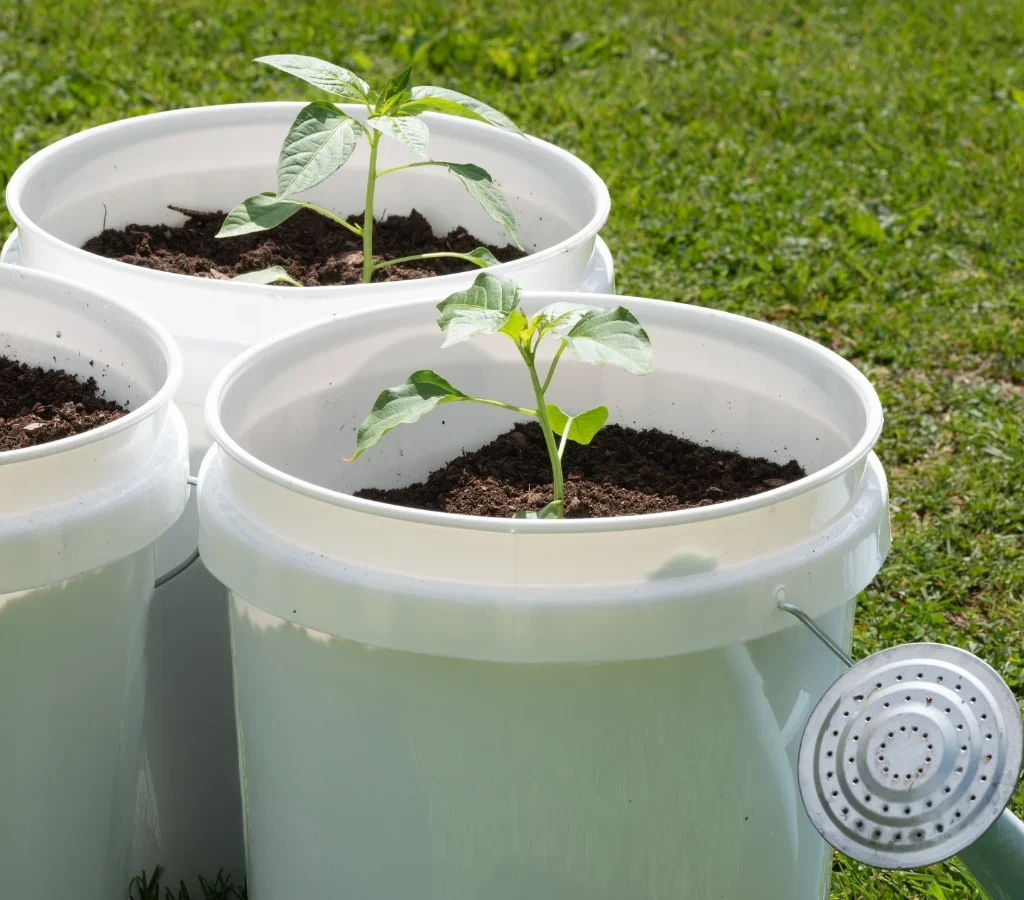
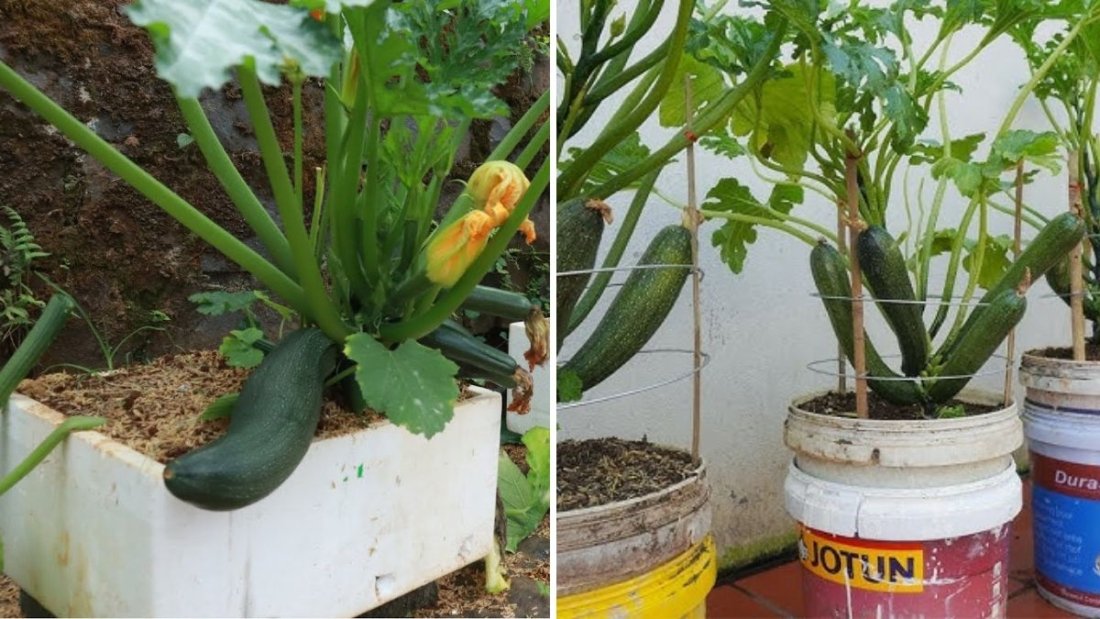
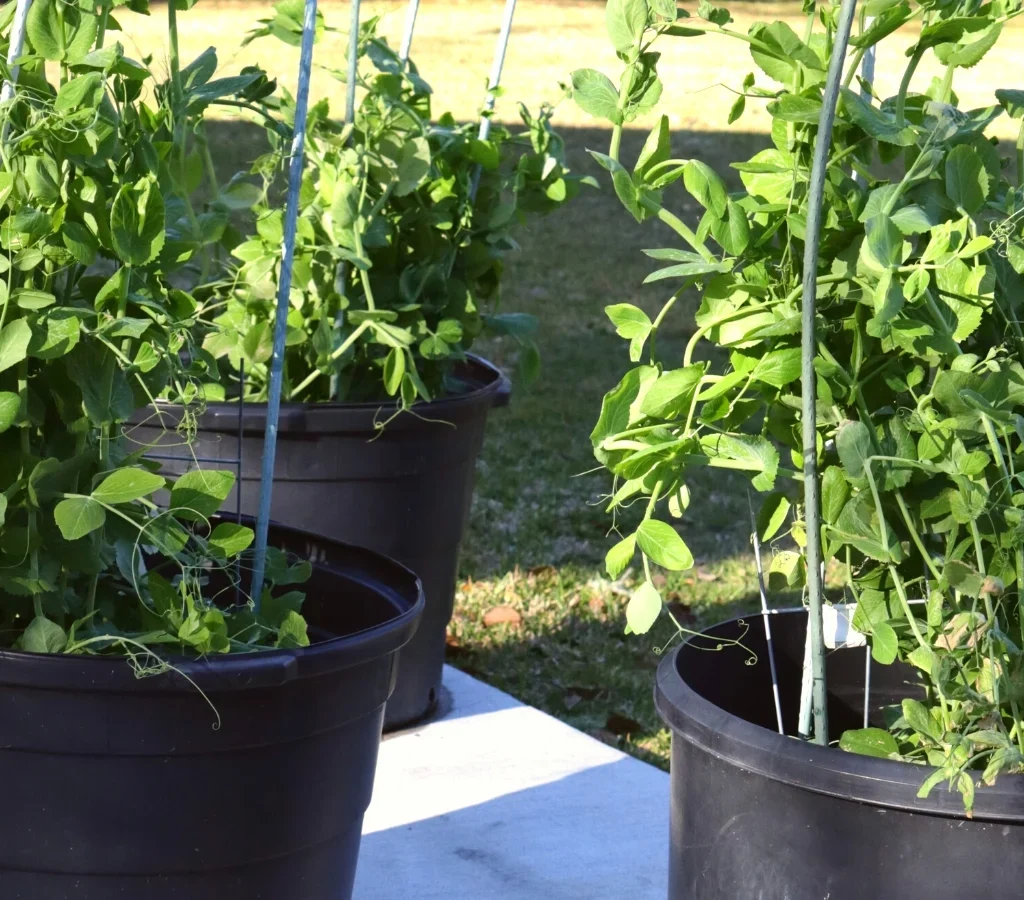
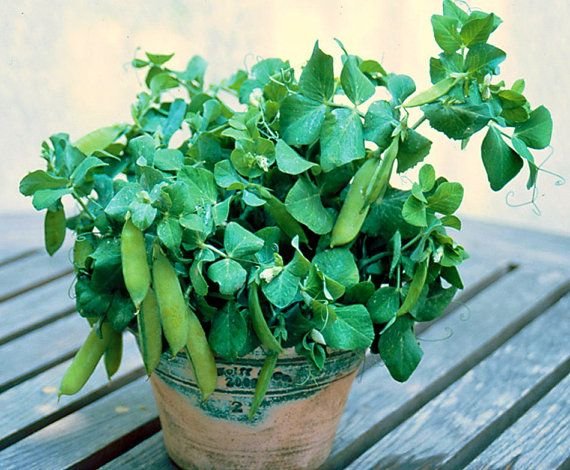
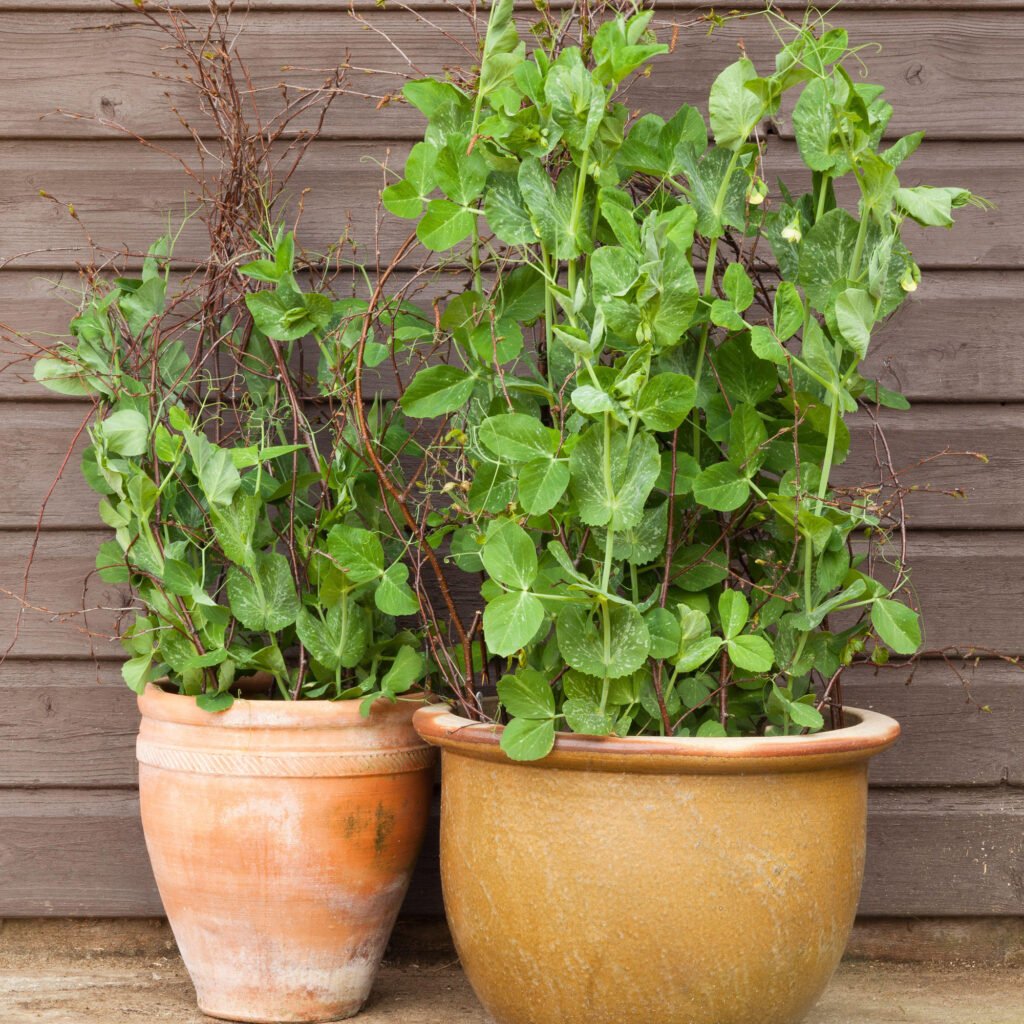
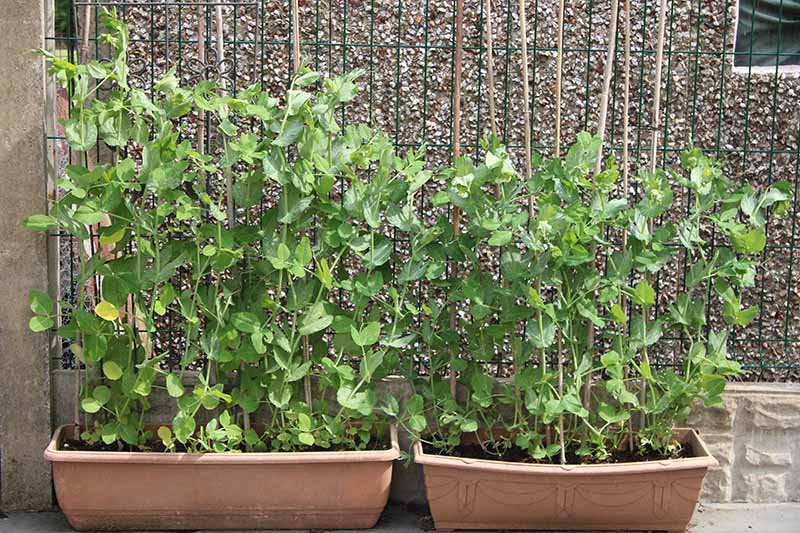
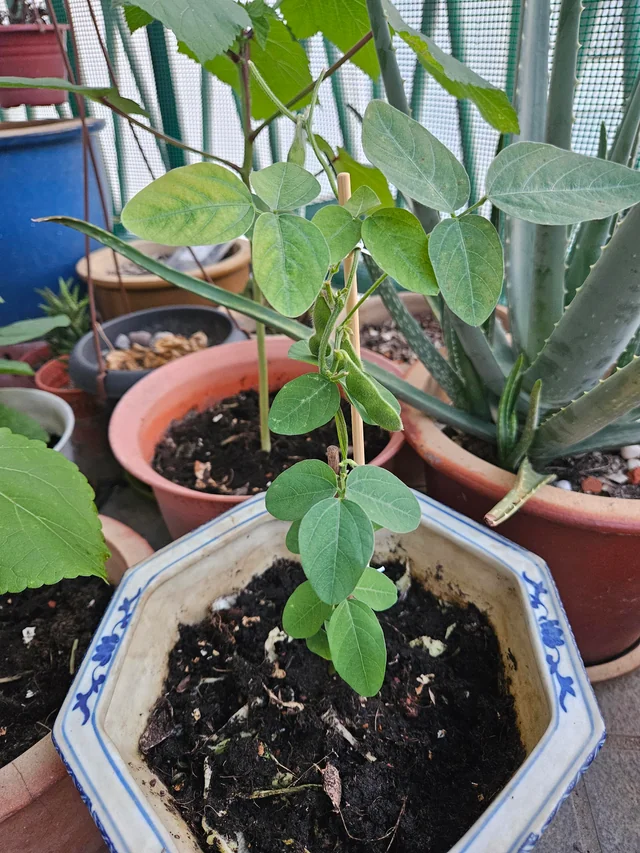
Step 12: Growing Edamame in Containers

Don’t have a backyard? No problem! You can easily grow edamame in pots or grow bags on a balcony or patio.

Container growing tips:

  • Choose pots at least 12–14 inches deep with drainage holes.
  • Plant 2–3 seeds per container, then thin to the strongest plant.
  • Place them in a sunny location with at least 6 hours of sunlight daily.
  • Follow the same watering and fertilizing routine as garden-grown edamame.

Container-grown edamame is compact and beautiful, adding greenery to your space while producing food for your table.


Final Thoughts

Growing edamame (soybeans) at home is an easy, rewarding, and sustainable way to enjoy fresh, protein-packed food straight from your garden. With just a bit of planning, care, and patience, you can transform a small patch of soil—or even a few pots—into a mini soy farm.

From sowing the seeds to steaming your first batch of freshly harvested pods, every stage of growing edamame brings joy, learning, and delicious rewards.

So grab a handful of soybean seeds, prepare your soil, and start growing your own organic edamame today—you’ll never look at store-bought soybeans the same way again!

How to Fast Grow Organic Turmeric in Useless Plastic Bags for a Big Harvest

How to Fast Grow Organic Turmeric in Useless Plastic Bags for a Big Harvest

If you’ve ever wanted to grow your own turmeric but thought it required a big garden or expensive containers—think again! You can easily grow organic turmeric in something as simple as an old plastic bag. That’s right—those unused shopping or grain bags lying around your home can become the perfect growing containers for one of nature’s most powerful healing plants.

In this step-by-step guide, you’ll learn how to grow turmeric quickly and organically using recycled plastic bags. We’ll cover everything—from preparing your planting material to caring for the plants and harvesting big, healthy rhizomes. Whether you’re a beginner gardener or a seasoned grower, this low-cost method will let you enjoy an abundant turmeric harvest at home.


Why Grow Turmeric at Home?

Turmeric (Curcuma longa) is a tropical spice plant known for its bright yellow rhizomes, which are rich in curcumin, a compound celebrated for its anti-inflammatory and antioxidant properties.

Here’s why growing it at home makes sense:

  • You get fresh, chemical-free turmeric for cooking or home remedies.
  • It’s easy to grow in containers or plastic bags.
  • You can reuse waste materials, making it eco-friendly.
  • You’ll get a year’s supply from just a few plants.

Even if you live in an urban area with limited space, turmeric grows beautifully in bags on balconies, patios, or rooftops.


Step 1: Choosing and Preparing Your Plastic Bag

You don’t need fancy planters—just a used rice sack, fertilizer bag, or any thick plastic bag that can hold soil.

Things to check:

  • The bag should be strong enough to hold moist soil.
  • It should be 12–15 inches deep and wide enough to accommodate the plant’s spread.
  • Punch 8–10 small holes at the bottom and lower sides for proper drainage.

To strengthen the structure, you can place the bag inside a crate or bucket, or roll down the top edge to make it sturdier.

This method not only reuses waste plastic but also prevents it from ending up in landfills—making it both eco-friendly and cost-effective.


Step 2: Preparing the Soil Mix

Turmeric grows best in rich, loose, and well-draining soil. Since the rhizomes develop underground, compact soil can limit their size and growth.

Ideal soil mix:

  • 50% garden soil
  • 30% organic compost or cow dung manure
  • 20% sand, coco peat, or rice husk for aeration

Mix the components thoroughly. Add a handful of neem cake or vermicompost to enhance soil fertility and protect against root pests.

Tip: Turmeric prefers slightly acidic to neutral soil with a pH of 5.5–7.


Step 3: Selecting Healthy Turmeric Rhizomes

The success of your crop depends largely on the quality of your planting material.

How to choose:

  • Select plump, firm rhizomes with at least 2–3 visible buds or eyes.
  • Avoid shriveled, moldy, or damaged pieces.
  • If possible, use organic turmeric from a trusted source or previous harvest.

Before planting, soak the rhizomes in warm water overnight to soften their skin and encourage faster sprouting. Some gardeners also soak them in a mild fungicide or turmeric solution to prevent rot.


Step 4: Planting the Rhizomes

Now it’s time to turn that “useless” bag into a mini turmeric garden!

How to plant:

  1. Fill the bag with soil, leaving 3–4 inches of space at the top.
  2. Place each rhizome horizontally about 2 inches deep, with the buds facing upward.
  3. Space them 4–5 inches apart to allow room for new growth.
  4. Cover gently with soil and water lightly.

Watering tip: Keep the soil evenly moist but not waterlogged—too much water at this stage can cause the rhizomes to rot.


Step 5: Choosing the Right Growing Conditions

Turmeric loves warm, humid, and partially shaded conditions. It’s a tropical plant that grows best in temperatures between 25°C and 35°C (77°F–95°F).

  • Light: Place your bag in a spot that receives 4–5 hours of indirect sunlight daily. Avoid harsh afternoon sun.
  • Temperature: If it’s cold where you live, grow the bagged turmeric indoors or in a greenhouse.
  • Humidity: Mist the leaves occasionally to maintain humidity, especially in dry climates.

Step 6: Watering and Fertilizing

For fast growth and big harvests, maintaining proper moisture and nutrition is essential.

Watering schedule:

  • Keep the soil consistently moist, watering every 2–3 days.
  • During hot or windy weather, increase frequency slightly.
  • Avoid standing water—it can cause rhizome rot.

Organic fertilizer routine:

  • Every 3–4 weeks, feed your plant with compost tea, liquid cow dung, or seaweed fertilizer.
  • Midway through the growing season, add another layer of compost or vermicompost on top of the soil—this boosts nutrient levels and supports rhizome expansion.

Pro Tip: Mulching with dry leaves or straw helps retain soil moisture and keeps weeds away.


Step 7: Caring for the Growing Plant

Once your turmeric starts sprouting, you’ll notice bright green shoots that can grow up to 3 feet tall. The leaves are beautiful and can also be used in cooking for their subtle flavor.

Care checklist:

  • Remove weeds regularly—they compete for nutrients.
  • Keep the soil loose by gently stirring the top layer every few weeks.
  • Protect plants from pests like aphids or mites by spraying neem oil or garlic extract.

Turmeric is a slow-growing plant, taking 8–10 months to reach maturity. Patience is key—but the results are worth the wait!


Step 8: Signs Your Turmeric is Ready for Harvest

You’ll know it’s time to harvest when:

  • The leaves and stems turn yellow and begin to dry.
  • The plant starts to look withered or dies back naturally.

This usually happens around 8–10 months after planting, depending on your climate and growing conditions.

Stop watering about 2–3 weeks before harvest to let the soil dry and make it easier to dig up the rhizomes.


Step 9: Harvesting Your Big Organic Turmeric

To harvest, gently remove the plant from the bag. Loosen the soil and pull out the rhizomes carefully to avoid breaking them.

Shake off excess soil and rinse the rhizomes under running water. You’ll notice the bright orange-yellow flesh inside—a sure sign of healthy, mature turmeric!

From a single bag, you can often get 2–3 kilograms (4–6 lbs) of fresh turmeric if grown with proper care.


Step 10: Curing and Storing Turmeric

To preserve turmeric’s flavor and shelf life, you’ll need to cure it after harvesting.

Curing steps:

  1. Boil the fresh rhizomes in water for 45 minutes to 1 hour.
  2. Drain and allow them to dry under the sun for 7–10 days until completely moisture-free.
  3. Once dry, store the rhizomes in airtight containers in a cool, dark place.

If you prefer, you can grind the dried rhizomes into turmeric powder for daily use in cooking and herbal remedies.


Step 11: Replanting for Continuous Supply

To keep your turmeric cycle going, reserve a few of the healthiest rhizomes from your harvest for replanting next season.

  • Store them in slightly moist sand or sawdust until it’s time to plant again.
  • Reuse the same bag after refreshing the soil with compost and organic matter.

This simple habit ensures a year-round supply of homegrown turmeric with almost zero additional cost.


Health and Household Benefits of Homegrown Turmeric

Fresh, organic turmeric isn’t just a kitchen spice—it’s a powerful natural medicine. Here are some of its incredible benefits:

  • Boosts immunity and fights infections
  • Reduces inflammation and joint pain
  • Improves digestion and liver function
  • Supports glowing skin when used in face masks or drinks
  • Acts as a natural antibiotic and antioxidant

You can use it in countless ways—add to curries, teas, smoothies, or golden milk for a daily dose of health.


Eco-Friendly Bonus: Turning Waste into Growth

By growing turmeric in unused plastic bags, you’re doing more than cultivating a spice—you’re upcycling waste into a sustainable gardening solution. This simple method reduces plastic pollution and proves that even waste materials can become a source of life and nourishment.

It’s a powerful example of how small steps at home can make a big environmental difference.


Final Thoughts

Growing turmeric in useless plastic bags is one of the easiest, cheapest, and most eco-friendly ways to produce your own organic spice. With minimal effort, a bit of care, and plenty of patience, you can enjoy a massive harvest of fresh, golden turmeric right from your balcony or backyard.

From planting the rhizomes to harvesting the golden roots, every stage of this journey is rewarding. You’ll not only save money but also experience the joy of growing your own powerful superfood—naturally and sustainably.

So grab those old plastic bags, prepare your soil, and start your own turmeric-growing adventure today. Your garden—and your family’s health—will thank you!

How to Grow Ginger at Home for Your Family to Enjoy All Year Round

How to Grow Ginger at Home for Your Family to Enjoy All Year Round

Growing your own ginger at home is one of the most rewarding and practical gardening projects you can take on. Not only is ginger an essential ingredient in countless dishes, teas, and home remedies, but it’s also surprisingly easy to grow—even if you don’t have a garden! With the right care, a single pot of ginger can provide your family with a year-round supply of this flavorful and health-boosting root.

In this guide, we’ll walk you through everything you need to know about growing ginger at home—from choosing the right variety and preparing the soil, to harvesting and storing it for continuous use.


Why Grow Ginger at Home?

Ginger (Zingiber officinale) is a tropical plant known for its aromatic rhizomes, which are widely used in cooking, herbal medicine, and drinks. Growing it at home has several benefits:

  • Fresh supply all year round: You’ll never run out of ginger for cooking or tea.
  • Chemical-free harvest: No pesticides or chemicals—just pure, natural ginger.
  • Space-friendly: It grows perfectly in pots, grow bags, or containers.
  • Low maintenance: Once planted, ginger requires very little attention.
  • Multiple uses: You can harvest both the roots and the leaves for culinary purposes.

Step 1: Choosing the Right Ginger Rhizomes

The first step in growing ginger successfully is selecting good-quality rhizomes.

  • Source: Purchase organic ginger rhizomes from a garden center or use store-bought ginger that hasn’t been treated with growth inhibitors (avoid the ones that look dry or shriveled).
  • Look for buds: Choose rhizomes with several visible “eyes” or growth buds—these are the points from which new shoots will emerge.
  • Healthy roots: Select firm, plump, and disease-free pieces.

Tip: If you’re using store-bought ginger, soak it in warm water overnight to remove any chemical residues that might prevent sprouting.


Step 2: Preparing the Growing Medium

Ginger thrives in loose, well-draining, and nutrient-rich soil. Since it grows underground, compact or heavy soil will restrict rhizome development.

Ideal potting mix:

  • 50% garden soil
  • 30% compost or well-rotted manure
  • 20% sand or coco peat for drainage

You can also add a handful of neem cake or organic fertilizer to keep the soil fertile and pest-free.

Container requirements:

  • Choose a pot or grow bag that is at least 12 inches deep and 12–16 inches wide.
  • Make sure it has proper drainage holes to prevent waterlogging.

Step 3: Choosing the Right Location

Ginger loves warm, humid, and partially shaded conditions. It’s a tropical plant that does best in temperatures between 25°C to 30°C (77°F to 86°F).

  • Indoors: Place the pot near a bright window with indirect sunlight.
  • Outdoors: Keep it in a semi-shaded area—avoid direct harsh sun, which can burn the leaves.

During cold months, bring the plant indoors or keep it in a greenhouse to protect it from frost.


Step 4: Planting the Ginger

Now comes the fun part—planting your ginger!

  1. Cut the rhizome into small pieces, each with at least one or two buds.
  2. Let the cut pieces dry for a day or two to prevent rot.
  3. Fill your pot with the prepared soil mix.
  4. Place the rhizome pieces horizontally about 2 inches below the surface with the buds facing upward.
  5. Gently cover them with soil and water lightly.

Pro Tip: Avoid overwatering in the early stages—too much moisture can cause rotting.


Step 5: Watering and Fertilizing

Ginger needs consistently moist but not soggy soil.

  • Watering frequency: Water every 2–3 days or when the top inch of soil feels dry. During the growing season, increase frequency slightly, especially in hot weather.
  • Fertilizer: Every 3–4 weeks, feed your ginger with organic compost, liquid seaweed, or cow dung tea to boost growth.

You can also mulch the top of the soil with dried leaves or straw to retain moisture and regulate temperature.


Step 6: Caring for Growing Ginger

Once the shoots start emerging (usually within 3–4 weeks), the plant grows steadily throughout the season.

Care tips:

  • Keep the soil consistently moist.
  • Mist the leaves occasionally to maintain humidity.
  • Remove weeds that compete for nutrients.
  • Add more soil around the base of the plant as it grows taller—this encourages rhizome expansion.

Ginger plants usually reach 2–3 feet in height and develop lush, green leaves that can be harvested for cooking or herbal teas.


Step 7: Harvesting Ginger Leaves

You don’t have to wait for months to enjoy your homegrown ginger—its leaves are edible too!

  • Timing: You can start harvesting the leaves about 2–3 months after planting.
  • How to use: The leaves have a mild gingery flavor and can be used in soups, curries, or teas for a refreshing aroma.

Simply snip off a few leaves from the top without damaging the main stem or rhizomes.


Step 8: Harvesting Ginger Rhizomes

After about 8–10 months, your ginger is ready for harvesting. The yellowing and drying of leaves are signs that the rhizomes have matured.

Steps to harvest:

  1. Stop watering 2–3 weeks before harvest to allow the soil to dry slightly.
  2. Gently dig up the plant using your hands or a small trowel.
  3. Shake off excess soil and wash the rhizomes carefully.

If you want a continuous supply, harvest only a portion of the rhizomes and let the rest continue growing. This way, you can enjoy fresh ginger throughout the year.


Step 9: Curing and Storing Ginger

To preserve ginger for long-term use, curing and proper storage are important.

Curing process:

  • Lay the freshly harvested rhizomes in a cool, dry, shaded area for about a week.
  • This helps toughen the skin and extend shelf life.

Storage tips:

  • Store unpeeled ginger in the refrigerator in a paper bag for up to 3–4 weeks.
  • For long-term use, freeze peeled ginger or make ginger paste and store it in airtight containers.

Bonus idea: You can also pickle or dry slices of ginger to enjoy its benefits year-round!


Step 10: Propagating for a Continuous Supply

To ensure your family always has ginger, reserve a few rhizomes from your harvest for replanting.

  • Choose young, healthy pieces with multiple buds.
  • Replant them in fresh soil or another container following the same steps above.
  • This cycle allows you to grow ginger continuously without buying new rhizomes every season.

Health Benefits of Homegrown Ginger

Fresh, organic ginger from your home garden offers numerous health benefits:

  • Boosts immunity and digestion
  • Reduces inflammation and nausea
  • Helps with cold and cough relief
  • Promotes better circulation
  • Supports healthy metabolism

Adding a few slices of fresh ginger to your tea, meals, or smoothies can do wonders for your overall well-being.


Final Thoughts

Growing ginger at home is a simple, satisfying project that rewards you with both flavor and health. Whether you’re cultivating it in a balcony pot or a backyard garden, this tropical plant adapts easily to different conditions with minimal effort.

With just a few rhizomes, you can ensure a year-round supply of this versatile spice for your family—straight from your garden to your kitchen.

So grab a pot, plant a few ginger pieces today, and enjoy the endless benefits of homegrown ginger every season!

When and How to Harvest Horseradish: A Complete Guide to Digging, Preparing, and Storing Fresh Roots

When and How to Harvest Horseradish: A Complete Guide to Digging, Preparing, and Storing Fresh Roots

Horseradish (Armoracia rusticana) is one of those underrated yet powerful plants every gardener should grow. With its fiery flavor and unmistakable aroma, horseradish adds a spicy kick to sauces, roasts, and dips. But beyond its culinary punch, it’s also incredibly hardy and easy to grow.

The key to enjoying the best flavor from your horseradish lies in knowing exactly when and how to harvest it—and, just as importantly, how to prepare it properly. If you’ve been growing horseradish in your garden or containers, this guide will walk you through every step of the process—from recognizing the right harvest time to cleaning, grating, and storing your roots for maximum freshness and heat.


1. Understanding the Horseradish Plant

Before you grab your garden fork, it’s good to know a bit about this powerful root. Horseradish is a perennial plant that belongs to the mustard family (Brassicaceae), making it a cousin of cabbage, radish, and wasabi.

It grows long, thick white roots and tall green leaves. While the leaves are edible when young, the real magic lies underground—the root is where that pungent, spicy flavor develops.

Horseradish thrives in cool climates and can survive frost, making it a perfect plant for fall and early spring harvests. Once planted, it spreads vigorously and can come back year after year if not completely dug out.


2. When Is the Right Time to Harvest Horseradish?

Timing is everything when it comes to harvesting horseradish. The best flavor and heat develop as the plant matures through cool weather.

Ideal harvest time:

  • Late fall (October–November): After the first frost but before the ground freezes.
  • Early spring: Before new leaves start to grow.

Frost triggers the roots to store more sugars and volatile oils, enhancing both the flavor and spiciness.

If you planted horseradish in spring, expect to harvest after about 10–12 months. The first year’s roots are usually the most tender and flavorful. Older roots can become woody, though they still pack plenty of heat.


3. Signs That Your Horseradish Is Ready for Harvest

You’ll know your horseradish roots are mature when:

  • The leaves start yellowing or dying back in late fall.
  • The plant has been in the ground for at least one growing season.
  • The roots are thick, firm, and about 8–12 inches long.

Avoid waiting too long, as overly mature roots can become fibrous and difficult to grate.


4. Tools You’ll Need for Harvesting

Gather the following tools before you begin:

  • A garden fork or spade (not a shovel, which may damage roots).
  • A pair of gloves (horseradish can irritate your skin).
  • A bucket or basket for collecting roots.
  • A knife or pruner for trimming leaves.

5. How to Harvest Horseradish Step by Step

Step 1: Cut back the foliage.
Trim the leaves to about 1–2 inches above the crown. This makes it easier to handle the plant while digging.

Step 2: Loosen the soil.
Insert your garden fork about 6–8 inches away from the crown and gently lift the soil around the plant. Be careful not to break the main root.

Step 3: Lift the plant.
Once the soil is loose, carefully pull out the entire root system. Horseradish roots can grow deep—up to 2 feet—so dig around to capture as much of it as possible.

Step 4: Separate the roots.
You’ll find a central main root and several smaller side roots. Keep the largest, thickest roots for grating and cooking. The thinner side roots can be saved for replanting next season.

Step 5: Shake off soil and rinse.
Gently shake off excess soil and rinse the roots under cool running water. Avoid scrubbing too hard until you’re ready to prepare them, as this can cause them to lose their pungency early.


6. How to Replant for Next Season

If you want a continuous supply of horseradish, it’s easy to propagate.

  • Select a few healthy side roots about 6–8 inches long.
  • Replant them in a new spot or container, about 2 inches deep and 12 inches apart.
  • Make sure the upper end of the cutting is level with the soil surface.

These cuttings will establish themselves and produce full roots by the next growing season.


7. Preparing Horseradish After Harvest

Fresh horseradish is incredibly potent, and proper preparation helps bring out its full flavor. The moment you cut or grate it, the plant’s cells release isothiocyanates, the compounds responsible for its sharp, sinus-clearing heat.

Here’s how to prepare it properly:

Step 1: Clean the roots.
Rinse the roots thoroughly and peel off the brown outer skin using a vegetable peeler. Slice off any damaged or fibrous parts.

Step 2: Cut into pieces.
Chop the root into small chunks, about 1-inch pieces, to make it easier to grate or process.

Step 3: Grate or blend.
You can grate the horseradish manually with a fine grater or use a food processor for convenience. Be warned—this process releases strong fumes, so it’s best done in a well-ventilated area or outdoors.

Step 4: Add vinegar.
Once grated, the mixture quickly becomes spicy. To control the heat level:

  • Add vinegar immediately if you want a mild flavor.
  • Wait 2–3 minutes before adding vinegar for a stronger, hotter flavor.

Use white vinegar or apple cider vinegar, about 2 tablespoons per cup of grated horseradish. It not only preserves the flavor but also stops the enzyme reaction that causes the heat to intensify.

Step 5: Store in jars.
Transfer the prepared horseradish into airtight glass jars. Refrigerate immediately. It can last up to 4–6 weeks in the refrigerator.


8. Making Homemade Horseradish Sauce

If you love a creamy, tangy kick to your dishes, homemade horseradish sauce is easy to prepare.

Ingredients:

  • ½ cup grated horseradish
  • ¾ cup sour cream or Greek yogurt
  • 1 tablespoon white vinegar or lemon juice
  • ½ teaspoon salt
  • Optional: 1 teaspoon sugar or mustard for balance

Directions:

  1. Mix all ingredients in a bowl until smooth.
  2. Taste and adjust vinegar or salt as needed.
  3. Store in an airtight container and refrigerate for up to a week.

This sauce pairs beautifully with roast beef, seafood, or even sandwiches.


9. Storing Whole Horseradish Roots

If you don’t want to process all your roots at once, store them whole for later use.

Storage tips:

  • Refrigeration: Wrap unpeeled roots in a damp paper towel and store in a perforated plastic bag in the refrigerator. They’ll last for 1–2 months.
  • Root cellar: In cooler climates, horseradish stores well in a root cellar or basement packed in slightly damp sand or sawdust.
  • Freezing: Grated horseradish can be frozen, but note that it may lose some flavor intensity after thawing.

10. Common Mistakes to Avoid When Harvesting and Preparing Horseradish

Even experienced gardeners can make a few slip-ups with this spicy root. Here are some things to watch out for:

  • Harvesting too early: Immature roots lack flavor and spiciness. Wait until at least one full season has passed.
  • Leaving roots in the ground too long: Overripe roots can become fibrous and tough.
  • Not using gloves: The oils from the root can irritate your skin and eyes.
  • Skipping ventilation: Always prepare horseradish in a well-ventilated area—its fumes are strong!
  • Adding vinegar too soon or too late: This can alter the desired heat level and shelf life.

By avoiding these mistakes, you’ll ensure your homemade horseradish turns out perfectly every time.


11. Culinary Uses of Fresh Horseradish

Fresh horseradish is incredibly versatile in the kitchen. You can use it to:

  • Add zest to roast beef or steak.
  • Mix into cocktail sauce for seafood.
  • Blend with mayonnaise or mustard for sandwiches.
  • Stir into mashed potatoes or deviled eggs for extra flavor.
  • Use as a natural decongestant—just a small sniff clears your sinuses instantly!

Its flavor intensity is strongest when freshly grated, so try to use it immediately after preparing for the best experience.


12. Health Benefits of Horseradish

Aside from its bold flavor, horseradish offers some impressive health benefits:

  • Boosts immunity: High in vitamin C and antioxidants.
  • Aids digestion: Stimulates appetite and digestive enzymes.
  • Clears sinuses: Natural decongestant properties.
  • Antimicrobial effects: Can help fight bacteria and infections.
  • Low in calories: Adds flavor without extra fat or carbs.

Just remember to enjoy it in moderation, as too much can cause stomach irritation for sensitive individuals.


Final Thoughts

Harvesting and preparing horseradish may seem intimidating at first, but once you get the hang of it, it’s an incredibly rewarding process. The spicy, aromatic kick of freshly prepared horseradish is miles ahead of any store-bought version.

By harvesting your roots at the right time, handling them carefully, and preparing them with vinegar for the perfect balance of heat, you can enjoy this fiery condiment all year long.

So when the leaves start to yellow and the air turns crisp, grab your garden fork—it’s time to dig up your horseradish and unleash its bold, unforgettable flavor straight from your garden to your table.

How to Grow Daikon Radish in a 5-Gallon Bucket: The Complete Seed-to-Harvest Guide

How to Grow Daikon Radish in a 5-Gallon Bucket: The Complete Seed-to-Harvest Guide

Daikon radish (Raphanus sativus var. longipinnatus), also known as Japanese radish or white radish, is a crunchy, mildly sweet root vegetable that’s popular in Asian cuisines. Known for its long white roots and crisp texture, this versatile vegetable can be eaten raw, pickled, stir-fried, or added to soups and stews.

If you don’t have a big garden, don’t worry — growing daikon radish in a 5-gallon bucket is easy, rewarding, and perfect for small spaces like balconies, patios, or rooftops. In this detailed guide, you’ll learn everything from selecting the right seeds and soil to caring for your plants and harvesting fresh, juicy radishes from your own container garden.


1. Why Grow Daikon Radish in Containers?

Daikon radish is usually grown in open soil, but it thrives just as well in containers with enough depth. Growing it in a 5-gallon bucket has several advantages:

  • Space-saving: Ideal for urban gardeners or those with limited yard space.
  • Soil control: You can customize the soil mix to ensure loose, rich, and well-draining conditions for straight roots.
  • Pest management: Easier to protect against soil-borne pests and root maggots.
  • Mobility: You can move the bucket to the best sunlight position or indoors during harsh weather.

With proper care, container-grown daikon radishes can reach their full size — some even 12 to 18 inches long!


2. Choosing the Right Bucket and Preparation

To grow healthy daikon radishes, the container must be deep enough for their long taproots.

Container requirements:

  • Size: At least 5 gallons in volume, with a minimum depth of 12–15 inches.
  • Material: Plastic buckets or tubs work best since they retain moisture and are easy to move.
  • Drainage: Drill 5–6 holes at the bottom to ensure excess water can escape and prevent root rot.

Optional tip: Place small stones or pebbles at the bottom for improved drainage, then fill with soil mix.


3. Preparing the Perfect Soil Mix

Daikon radishes thrive in loose, well-draining, nutrient-rich soil. Compact or rocky soil leads to misshapen roots, so it’s vital to create the right environment.

Ideal soil mix:

  • 50% garden soil or topsoil
  • 25% compost or well-rotted manure
  • 25% coco peat, perlite, or coarse sand for better aeration

Optional additives:

  • A handful of wood ash or bone meal to boost root growth.
  • Vermicompost for organic nutrition.

Make sure to mix the ingredients well before filling your bucket, leaving about 2 inches of space from the rim for watering.


4. Selecting and Sowing Daikon Radish Seeds

Daikon radishes grow best from direct seed sowing, as transplanting can damage their delicate taproots.

Steps for sowing seeds:

  1. Fill your 5-gallon bucket with the prepared soil mix.
  2. Sow seeds ½ inch deep and 2 inches apart.
  3. If planting multiple seeds in one bucket, maintain at least 4 inches of spacing between each.
  4. Gently cover the seeds with soil and water lightly.

Germination time: 4–7 days under ideal temperatures (18°C–25°C or 65°F–77°F).

Keep the bucket in a sunny spot, and make sure the soil stays consistently moist during germination.


5. Providing the Right Growing Conditions

Sunlight:
Daikon radish needs at least 5–6 hours of direct sunlight daily. Place the bucket in a sunny location or under grow lights if growing indoors.

Temperature:
Daikon grows best in cool weather — ideal for fall or early spring planting. The optimum growing range is between 10°C and 25°C (50°F to 77°F).

Watering:
Consistent moisture is key. Water the plant whenever the top inch of soil feels dry, but don’t let the soil become soggy. Uneven watering can cause cracking or poor root formation.

Mulching:
Apply a thin layer of organic mulch (like straw or dry leaves) on the surface to retain moisture and regulate soil temperature.


6. Thinning the Seedlings

Once seedlings are about 3 inches tall, thin them to ensure proper spacing and healthy root development.

How to thin:

  • Remove weaker seedlings, keeping only the strongest ones about 4–6 inches apart.
  • Be gentle to avoid disturbing nearby roots.

This step helps prevent overcrowding, ensuring each plant gets enough nutrients and room to grow straight, long roots.


7. Fertilizing for Healthy Growth

Daikon radish doesn’t need heavy fertilization, but adding nutrients at the right time boosts growth and flavor.

Fertilizer schedule:

  • At sowing: Mix compost or manure into the soil.
  • After 2 weeks: Use a diluted liquid fertilizer or compost tea every 10–14 days.
  • Mid-growth: Apply a phosphorus-rich fertilizer (like bone meal) to encourage root expansion.

Avoid excess nitrogen — it promotes leafy growth instead of root development.


8. Pest and Disease Management

Although daikon is relatively hardy, it can be affected by a few common pests and diseases.

Common pests:

  • Aphids: Small insects that suck sap from the leaves. Spray neem oil or insecticidal soap.
  • Flea beetles: Tiny jumping insects that chew holes in leaves. Use floating row covers or neem oil spray.
  • Root maggots: Prevent by keeping soil well-drained and rotating crops.

Diseases:

  • Downy mildew and leaf spot: Avoid overhead watering and ensure good air circulation.
  • Root rot: Prevent by avoiding waterlogging.

Always check your plants regularly and take prompt action if you notice signs of pest activity.


9. Supporting Healthy Leaf and Root Growth

Both the leaves and roots of daikon radish are edible and nutritious. To promote balanced growth:

  • Maintain consistent watering and light exposure.
  • Avoid over-fertilizing with nitrogen, as it causes lush foliage but small roots.
  • Remove yellowing or damaged leaves to prevent disease spread.

Healthy leaves indicate a strong root system beneath the soil.


10. Harvesting Daikon Radish

Daikon radishes are fast-growing, typically ready for harvest in 50–70 days depending on the variety.

Signs of readiness:

  • The top of the white root becomes visible above the soil surface.
  • Leaves are lush, green, and slightly spreading outward.
  • The root feels firm to the touch.

How to harvest:

  • Gently loosen the soil around the base.
  • Hold the leaves firmly at the crown and pull the radish upward.
  • If the soil is compact, water lightly before harvesting to soften it.

Tip: Harvest promptly once mature — leaving them too long in the soil can make them woody and less flavorful.


11. Post-Harvest Care and Storage

After harvesting, gently brush off the soil and trim the leaves to about 1 inch above the crown.

Storage options:

  • Refrigerator: Store in a plastic bag or airtight container for up to 2 weeks.
  • Cool, dark place: If kept dry, daikon can last about 10–14 days.
  • Pickling: Extend shelf life by making Japanese-style takuan or Korean kkakdugi (radish kimchi).

Freshly harvested daikon radishes are juicy, crunchy, and have a mild peppery flavor perfect for salads, soups, or stir-fries.


12. Saving Seeds for Next Season

If you’d like to continue growing daikon radish, let a few plants flower and set seed.

Steps for seed saving:

  1. Allow a mature radish to bolt and produce flower stalks.
  2. Let the seed pods dry on the plant.
  3. Collect the pods and store the seeds in a cool, dry place for next season.

Seeds remain viable for up to three years when stored properly.


13. Common Problems and Quick Fixes

ProblemPossible CauseSolution
Roots are small or misshapenSoil too compact or overcrowdedUse loose soil and thin seedlings properly
Cracked rootsIrregular wateringMaintain even soil moisture
Excessive leafy growthToo much nitrogen fertilizerUse balanced fertilizer with more phosphorus
Roots turning woodyLeft too long in soilHarvest on time, around 60 days

By monitoring these issues early, you can ensure healthy, flavorful harvests.


14. Benefits of Growing Daikon Radish at Home

Growing daikon radish in a 5-gallon bucket is not only fun but also highly rewarding. Here’s why you should try it:

  • Quick harvest: Ready in under 2 months.
  • Nutrient-rich food: High in fiber, vitamin C, potassium, and folate.
  • Dual harvest: Enjoy both leaves and roots.
  • Compact gardening: Perfect for balconies or patios.
  • Eco-friendly: Reduces food waste and packaging by growing your own produce.

Final Thoughts

Learning how to grow daikon radish in a 5-gallon bucket is an easy and satisfying project for beginners and seasoned gardeners alike. With the right soil, regular watering, and sunlight, you can enjoy a steady supply of crisp, white radishes right from your home.

Whether you’re growing for fresh salads, pickles, or Asian recipes, this hardy root vegetable will reward you with abundant harvests and a sense of accomplishment.

So grab a few seeds, a bucket, and get growing — your homegrown daikon radish journey starts today!


Harvesting Yellow Squash and Zucchini: Simple Growing, Cutting, and Care Tips for a Bountiful Home Garden

Harvesting Yellow Squash and Zucchini: Simple Growing, Cutting, and Care Tips for a Bountiful Home Garden

There’s something deeply satisfying about stepping into your garden and harvesting fresh vegetables that you’ve grown with your own hands. Among the easiest and most rewarding crops to grow are yellow squash and zucchini — both part of the summer squash family. These vibrant, fast-growing plants produce abundantly, thrive in warm weather, and require surprisingly little maintenance.

In this comprehensive guide, inspired by the video “Harvesting Yellow Squash and Zucchini plus Simple Growing and Cutting Tips! | Family Gardening VLOG”, we’ll walk you through every step of growing, maintaining, harvesting, and handling these garden favorites. Whether you’re a beginner or a seasoned home gardener, these practical insights will help you enjoy healthy plants, continuous harvests, and delicious produce all summer long.


Why Grow Yellow Squash and Zucchini?

Yellow squash and zucchini are both members of the Cucurbita pepo family and share many growing requirements. What makes them so popular is their productivity and versatility. Here’s why they deserve a spot in your home garden:

  1. Fast and Easy to Grow:
    Both varieties mature quickly — usually within 45–60 days — and can produce continuously through the summer.
  2. Abundant Yield:
    Just one or two plants can provide enough vegetables for a family throughout the season.
  3. Nutrient-Rich:
    They’re low in calories and rich in vitamins A, C, potassium, and fiber, making them a healthy addition to your diet.
  4. Perfect for Small Spaces:
    They can be grown in raised beds, traditional garden rows, or even large containers on patios or balconies.
  5. Culinary Versatility:
    From stir-fries and soups to grilled sides and casseroles, yellow squash and zucchini adapt beautifully to any recipe.

Understanding the Difference Between Yellow Squash and Zucchini

While they’re closely related, there are a few distinctions:

  • Zucchini: Usually dark green (though golden varieties exist), with a smooth skin and mild flavor.
  • Yellow Squash: Bright yellow, with a curved neck (crookneck) or straight neck, and a slightly nuttier taste.

Both grow quickly and are harvested young for the best flavor and texture.


Preparing the Garden for Planting

Before planting, choose the right location and prepare nutrient-rich soil.

  1. Sunlight:
    Select a spot that receives 6–8 hours of direct sunlight per day. These are sun-loving plants that thrive in warm temperatures.
  2. Soil Preparation:
    • Use well-draining, loamy soil enriched with compost or aged manure.
    • Ideal soil pH ranges from 6.0 to 7.5.
    • Add organic fertilizer before planting to give the plants a strong start.
  3. Space:
    Zucchini and yellow squash spread out as they grow, so allow at least 3 feet of space between each plant to ensure proper air circulation.

Planting Tips for Success

You can start your plants from seeds or transplants depending on your climate and growing setup.

1. Direct Seeding:

  • Sow seeds 1 inch deep in warm soil after the last frost.
  • Plant 2–3 seeds per mound, spaced about 2–3 feet apart.
  • Once seedlings appear, thin them to the healthiest one or two plants per mound.

2. Starting Indoors:

  • If you live in a cooler region, start seeds indoors 3–4 weeks before the last frost.
  • Transplant seedlings outdoors when the soil warms and the risk of frost has passed.

3. Container Gardening:

  • Choose large containers (at least 5 gallons in capacity).
  • Use high-quality potting mix rich in organic matter.
  • Place the container in a sunny spot and water regularly.

Watering and Feeding Your Plants

Proper watering is crucial for healthy growth and fruit development.

  • Consistent Moisture:
    Water deeply 2–3 times a week, keeping the soil evenly moist but not soggy. Dry soil can stress the plants and affect fruit production.
  • Morning Watering:
    Water early in the day to allow leaves to dry before nightfall, reducing the risk of fungal diseases.
  • Mulching:
    Apply organic mulch around the base to retain soil moisture, prevent weeds, and maintain a stable soil temperature.
  • Fertilization:
    Feed your plants with organic compost or a balanced vegetable fertilizer every 3–4 weeks. Once flowers appear, use a fertilizer higher in potassium and phosphorus to boost fruiting.

Flowering and Pollination

Yellow squash and zucchini plants produce both male and female flowers.

  • Male flowers appear first and have thin stems.
  • Female flowers have a small swelling beneath the petals, which develops into the fruit after pollination.

Pollination is usually done by bees, but if you notice poor fruit set, try hand pollinating using a small brush or by gently touching the male flower to the female one to transfer pollen.

Encourage pollinators by planting flowers like marigolds, zinnias, or nasturtiums nearby.


Simple Growing Tips from Family Gardeners

  1. Give Them Space:
    Overcrowded plants can lead to poor air circulation and disease. Keep enough distance between them.
  2. Prune Occasionally:
    Trim older or yellowing leaves to promote airflow and focus energy on new growth and fruiting.
  3. Watch for Pests:
    Common pests include squash bugs, cucumber beetles, and aphids. Control them naturally with neem oil, insecticidal soap, or by introducing beneficial insects like ladybugs.
  4. Avoid Overwatering:
    Standing water or soggy soil can lead to root rot. Ensure proper drainage in both garden beds and containers.

Common Problems and How to Fix Them

  • Powdery Mildew:
    Appears as white powdery spots on leaves. Prevent it by spacing plants well and watering at the base. Treat with a baking soda spray (1 teaspoon baking soda + 1 quart of water).
  • Blossom End Rot:
    Caused by calcium deficiency and inconsistent watering. Add crushed eggshells or compost to the soil and maintain even moisture.
  • Wilting Leaves:
    Could be due to squash vine borers. Check the stems and remove larvae if found. Cover young plants with row covers early in the season.

Harvesting Yellow Squash and Zucchini

Harvesting at the right time ensures tender, flavorful vegetables.

  1. When to Harvest:
    • Harvest yellow squash when they are about 5–7 inches long.
    • Zucchini should be picked at 6–8 inches for the best taste and texture.
    Larger fruits may look impressive but tend to become tough and seedy.
  2. How to Harvest:
    • Use a clean knife or pruning shears to cut the fruit from the stem.
    • Avoid twisting or pulling, which can damage the plant.
    • Harvest frequently — every 2–3 days — to encourage continuous production.
  3. Family Gardening Tip:
    Kids love to participate in harvesting because zucchinis and squash grow so fast that new fruits seem to appear overnight! Regular picking becomes a fun, rewarding family activity.

Post-Harvest Handling and Storage

After harvesting, proper storage helps retain freshness and flavor.

  • Cleaning:
    Gently rinse fruits with water to remove dirt. Avoid soaking them.
  • Storage:
    Keep in the refrigerator in perforated plastic bags. They’ll stay fresh for up to a week.
  • Preservation:
    For long-term storage, slice and freeze zucchini or yellow squash. They can also be pickled or dried for later use.

Creative Ways to Use Your Harvest

Once your baskets are full, it’s time to enjoy the fruits of your labor.

  • Grilled: Brush slices with olive oil and herbs for a healthy summer side dish.
  • Baked: Add shredded zucchini or squash to breads, muffins, and casseroles.
  • Sautéed: Stir-fry with garlic, onions, and tomatoes for a quick meal.
  • Stuffed: Hollow out larger fruits and fill them with rice, veggies, or cheese.
  • Raw: Use a spiralizer to make zucchini noodles for a low-carb pasta alternative.

The possibilities are endless — and all the more satisfying knowing you grew them yourself!


End-of-Season Care

When the growing season ends:

  • Remove old plants to prevent diseases from overwintering in the soil.
  • Add plant debris to the compost pile.
  • Rotate crops next season to maintain healthy soil and prevent pest buildup.

If you live in a mild climate, you can try succession planting — starting new seedlings every few weeks for a steady supply of fresh squash.


Conclusion

Growing and harvesting yellow squash and zucchini is one of the simplest, most enjoyable experiences in home gardening. With just a bit of care, sunshine, and consistent watering, these plants reward you with abundant, nutritious produce throughout the season.

By following the simple growing and cutting tips shared in this family gardening approach, you’ll soon have a flourishing garden full of golden squash and deep green zucchini ready to harvest. It’s a perfect project for families — easy to maintain, fast to grow, and endlessly rewarding.

So grab your gloves, plant a few seeds, and watch your garden come alive with these vibrant summer vegetables. Your homegrown harvest of yellow squash and zucchini will not only nourish your table but also bring joy to your gardening journey.

Why Growing Zucchini Is So Easy: A Complete Guide to Growing Zucchini at Home

Why Growing Zucchini Is So Easy: A Complete Guide to Growing Zucchini at Home

If you’re looking for one of the easiest and most rewarding vegetables to grow in your home garden, look no further than zucchini. This fast-growing summer squash is loved by gardeners everywhere for its simplicity, abundant yields, and versatility in the kitchen. Whether you’re a beginner starting your first garden or an experienced grower looking to maximize your harvest, zucchini is a must-have in your vegetable patch.

In this guide, we’ll uncover why growing zucchini is so easy and walk you through the complete process — from selecting the right variety to planting, caring, harvesting, and even troubleshooting common problems. By the end, you’ll know exactly how to grow healthy, productive zucchini plants right in your backyard, balcony, or even containers.


Why Zucchini Is So Easy to Grow

Zucchini (Cucurbita pepo) belongs to the squash family and is known for being remarkably resilient and fast-growing. The reasons it’s considered one of the easiest vegetables to cultivate include:

  1. Fast Growth Cycle:
    Zucchini grows rapidly, often producing fruit within just 45 to 60 days after planting. You can enjoy a continuous harvest all summer long.
  2. Adaptable Plant:
    It thrives in a wide range of soil types and climates, making it suitable for most home gardens around the world.
  3. Minimal Maintenance:
    Once established, zucchini plants require little care — just regular watering, some sunlight, and occasional feeding.
  4. Abundant Harvest:
    A single zucchini plant can produce dozens of fruits during the growing season, ensuring you never run out of fresh squash.
  5. Pest and Disease Resistance:
    While not immune to pests, zucchini plants are generally hardy and can recover quickly with basic garden care.

These traits make zucchini an ideal choice for new gardeners who want quick, visible results.


Choosing the Right Variety

Before you start planting, it’s important to select the right variety for your space and needs. Here are some popular and reliable types of zucchini:

  • Black Beauty: A classic variety known for its dark green, glossy fruits and excellent flavor.
  • Cocozelle: Italian heirloom zucchini with light green stripes and a tender texture.
  • Golden Zucchini: Bright yellow fruit that adds a splash of color to your garden and plate.
  • Patio Star: A compact, bush-type zucchini ideal for container gardening.
  • Raven: Produces dark, smooth zucchinis with a rich flavor and compact growth habit.

Choose based on your available space, color preference, and growing conditions.


Preparing the Soil

Zucchini loves rich, well-draining soil with plenty of organic matter. Here’s how to prepare your garden bed:

  1. Location:
    Pick a sunny spot that receives at least 6–8 hours of direct sunlight daily.
  2. Soil Type:
    Loose, loamy soil is ideal. If your garden soil is heavy clay, mix in compost, cocopeat, or well-rotted manure to improve drainage and fertility.
  3. pH Level:
    Aim for a slightly acidic to neutral pH between 6.0 and 7.5.
  4. Fertilization:
    Before planting, enrich the soil with organic compost or aged manure. Zucchini plants are heavy feeders, so nutrient-rich soil ensures vigorous growth and abundant yields.

Planting Zucchini at Home

You can grow zucchini either from seeds or seedlings, depending on your preference.

1. Sowing Seeds:

  • Sow seeds directly into the soil after the last frost date when temperatures stay above 18°C (65°F).
  • Plant seeds about 1 inch deep and 2–3 feet apart, as zucchini plants spread widely.
  • If growing in containers, use pots that are at least 12–18 inches deep and wide.

2. Transplanting Seedlings:

  • If starting indoors, sow seeds in small pots 3–4 weeks before the last frost.
  • Transplant the seedlings outdoors when they have 2–3 true leaves and the weather is warm.

3. Spacing:

Proper spacing is crucial to allow airflow and prevent fungal diseases. Keep 3 feet between each plant and 4 feet between rows.


Watering and Feeding

Zucchini plants are thirsty and require consistent moisture to thrive.

  • Watering:
    Water deeply 2–3 times a week, ensuring the soil remains moist but not soggy. Water at the base of the plant to prevent wetting the leaves, which can lead to fungal issues.
  • Mulching:
    Apply organic mulch (like straw or dry leaves) around the base to retain moisture and control weeds.
  • Feeding:
    Every 3–4 weeks, feed your plants with a balanced organic fertilizer or compost tea. Zucchini benefits from nitrogen early in its growth, followed by potassium and phosphorus during flowering and fruiting.

Supporting Growth and Pollination

Zucchini plants have large leaves and can sprawl across the ground. If you’re short on space, consider:

  • Trellising or staking to train vines upward and save space.
  • Hand pollination if you notice poor fruit development. Use a small brush or cotton swab to transfer pollen from male flowers (with thin stems) to female flowers (with tiny fruits beneath).

Bees are natural pollinators for zucchini, so avoid using chemical pesticides that might harm them.


Managing Pests and Diseases

Even though zucchini is easy to grow, some common garden pests and diseases can appear. Here’s how to handle them naturally:

  • Powdery Mildew:
    White powdery patches on leaves. Improve air circulation, water at the base, and spray with a mix of baking soda and water.
  • Aphids and Squash Bugs:
    Small sap-sucking insects that damage leaves. Spray neem oil or insecticidal soap to keep them away.
  • Blossom End Rot:
    Caused by calcium deficiency and inconsistent watering. Maintain steady moisture and enrich soil with compost.
  • Cucumber Beetles:
    Use row covers early in the season and rotate crops annually to avoid infestations.

With timely care, most of these problems can be managed easily without chemicals.


Harvesting Zucchini

Zucchini grows quickly once it starts fruiting. Harvesting at the right time ensures tender, flavorful produce.

  • When to Harvest:
    Pick zucchinis when they’re 6–8 inches long for best taste and texture. If left too long, they become oversized and lose tenderness.
  • How to Harvest:
    Use a clean knife or scissors to cut the fruit from the stem. Avoid twisting, as it can damage the plant.
  • Continuous Harvesting:
    The more you pick, the more the plant produces. Regular harvesting encourages continuous flowering and fruiting throughout the season.

Growing Zucchini in Containers

Don’t have space for a garden bed? Zucchini grows wonderfully in containers too!

  • Choose a large pot (at least 5 gallons) with good drainage.
  • Use high-quality organic potting mix.
  • Place the pot in a sunny location.
  • Water frequently, as containers dry out faster.
  • Add a support stake if needed to manage large leaves.

Container gardening is perfect for balconies, patios, or small yards — and zucchini rewards you with a surprising harvest even in limited space.


Storing and Using Zucchini

Once harvested, zucchini can be enjoyed in countless ways.

  • Storage:
    Fresh zucchini lasts up to a week in the refrigerator. For longer preservation, slice and freeze it, or turn it into pickles or chips.
  • Culinary Uses:
    Zucchini is a versatile ingredient that can be grilled, roasted, sautéed, or baked. From zucchini noodles to fritters, bread, and even desserts, this vegetable adds nutrition and flavor to your meals.

Tips for a Successful Zucchini Harvest

  1. Rotate Crops: Avoid planting zucchini in the same spot each year to reduce soil-borne diseases.
  2. Remove Old Leaves: Trim yellowing or overcrowded leaves to improve airflow.
  3. Encourage Pollinators: Plant nearby flowers like marigolds or nasturtiums to attract bees.
  4. Harvest Regularly: Frequent picking ensures tender zucchinis and extended productivity.
  5. Feed Organically: Compost or worm castings keep plants strong and soil healthy.

Conclusion

Growing zucchini at home is one of the easiest and most satisfying gardening experiences you can have. With minimal effort and care, you can enjoy weeks of abundant, fresh produce straight from your garden. Whether you plant them in the ground or in containers, zucchini rewards you with vigorous growth, fast results, and endless culinary possibilities.

So, if you’ve ever wondered why it’s so easy to grow zucchini, now you know — it’s because nature made this plant both resilient and generous. Start your zucchini garden today and enjoy the joy of harvesting your own crisp, flavorful squashes right from home!

Pruning Eggplants for Bigger Yields and Faster Harvests: A Complete Beginner’s Guide

Pruning Eggplants for Bigger Yields and Faster Harvests: A Complete Beginner’s Guide

Growing eggplants (also known as brinjals or aubergines) can be one of the most rewarding experiences in your home garden. These glossy purple fruits not only add a splash of color to your space but also produce abundantly with the right care. One often-overlooked technique for achieving higher yields and faster production is pruning. Proper pruning helps the plant focus its energy on fruit development rather than excess foliage growth, leading to stronger plants and better harvests.

In this complete guide, inspired by “Pruning Eggplant for Bigger Yield! Faster Production | Tips for Beginners”, we’ll walk through every essential step — from understanding why pruning matters, to how and when to do it correctly.


Why Pruning Eggplants Is Essential

Eggplants are vigorous growers. Left unpruned, they tend to develop a dense canopy of leaves and branches that can:

  • Block sunlight from reaching inner parts of the plant.
  • Restrict air circulation, increasing the risk of fungal diseases.
  • Cause smaller fruit sizes due to competition for nutrients.

By pruning strategically, you can:

  • Encourage the plant to produce larger, healthier fruits.
  • Improve air movement and light penetration.
  • Strengthen the plant’s overall structure for heavier yields.
  • Speed up fruit development by channeling the plant’s energy where it matters most.

In short, pruning = smarter growth and more abundant harvests.


Step 1: Prepare Your Eggplants for Pruning

Before you start pruning, make sure your eggplants are healthy and well-established. Typically, eggplants are ready for pruning once they are about 12–18 inches tall and have at least 6–8 mature leaves.

Here’s how to prepare:

  • Water the plant a few hours before pruning. This helps reduce stress.
  • Sterilize your pruning shears using rubbing alcohol or boiling water. Clean tools prevent disease spread.
  • Inspect the plant for pests or signs of fungal issues like powdery mildew. Address any problems first before you prune.

Step 2: Identify What to Prune

Not all parts of the plant should be pruned at once. Focus on removing the following:

  1. Suckers (side shoots):
    These small shoots grow from the leaf axils (the space between the main stem and a leaf). They compete with the main branches for nutrients and should be pinched off when young.
  2. Lower leaves:
    Remove the bottom 3–5 leaves near the soil level. These often touch the ground and can harbor soil-borne diseases. Removing them improves airflow around the base.
  3. Crowded branches:
    If two branches cross or rub against each other, prune one to prevent damage and promote balanced growth.
  4. Old or yellow leaves:
    These don’t contribute to photosynthesis efficiently and may attract pests. Removing them keeps the plant clean and healthy.

Step 3: Shape the Plant

Eggplants grow best when they have an open, well-structured shape. Here’s how to achieve that:

  • Main stem focus: Select two to three strong main stems to form the plant’s base structure. Remove excess side shoots and weak stems.
  • V-shaped structure: A V or open shape allows sunlight to reach the center of the plant, helping flowers set fruit more effectively.
  • Prune gradually: Avoid cutting off too much at once. Remove only about 20–25% of the foliage in a single session to prevent shock.

Regular pruning every 2–3 weeks will help maintain this shape and balance between leaf growth and fruiting.


Step 4: Encourage More Flowers and Fruit

After the initial pruning, your eggplant will redirect energy toward flowering. To maximize yields:

  1. Pinch off early flowers: If flowers appear too soon (before the plant is strong), pinch them off. This helps the plant grow stronger roots and stems before fruiting.
  2. Support fruiting branches: Once fruits begin to develop, use stakes or cages to support heavy branches and prevent them from snapping.
  3. Feed your plant: After pruning, give your eggplant a dose of balanced fertilizer (like 10-10-10 NPK) or compost tea to promote vigorous regrowth.

By controlling early flowers and feeding at the right time, you ensure that the later fruits are larger, juicier, and healthier.


Step 5: Maintain and Monitor After Pruning

Pruning isn’t a one-time task—it’s an ongoing part of plant maintenance. Here’s how to care for your eggplants after pruning:

  • Monitor growth: New suckers will continue to appear, especially during warm weather. Keep removing them regularly.
  • Water consistently: Eggplants need evenly moist soil. Avoid letting the soil dry out or become soggy.
  • Mulch the base: Adding organic mulch around the base helps retain moisture and suppress weeds.
  • Watch for pests: Aphids, flea beetles, and spider mites can attack new growth. Use neem oil or organic insecticidal soap as needed.

Common Mistakes to Avoid

Even experienced gardeners sometimes overdo pruning. Here are common mistakes to watch out for:

  1. Over-pruning: Cutting too much foliage can stress the plant and reduce photosynthesis.
  2. Pruning at the wrong time: Avoid pruning during extremely hot or dry days. The plant needs time to recover.
  3. Ignoring tools: Always use clean, sharp shears. Dirty tools spread bacteria and fungi.
  4. Neglecting aftercare: Failing to water or feed after pruning can weaken the plant.

Pruning should always be gentle and purposeful — you’re shaping growth, not stunting it.


Bonus Tip: Pruning for Continuous Harvest

Eggplants produce best when regularly harvested. Once fruits mature, pick them promptly — this encourages the plant to produce new flowers and fruits instead of wasting energy on overripe ones.

  • Harvest when the fruit’s skin is glossy and firm.
  • If the skin starts looking dull, it’s a sign of overripeness.
  • After harvesting, lightly prune again to remove any exhausted branches or yellow leaves.

This cycle of pruning + harvesting keeps your plant productive throughout the growing season.


Ideal Growing Conditions for Pruned Eggplants

To get the most out of your pruning efforts, make sure your eggplants are growing in ideal conditions:

  • Sunlight: 6–8 hours of direct sunlight daily.
  • Soil: Well-draining, fertile soil with pH between 6.0–6.8.
  • Temperature: Eggplants love warmth; ideal temperature range is 21–30°C (70–85°F).
  • Spacing: Maintain at least 18–24 inches between plants to allow good airflow.
  • Fertilizer: Apply organic compost or a balanced liquid feed every 2–3 weeks during fruiting.

Proper care combined with effective pruning will transform your eggplants from ordinary to extraordinary.


Final Thoughts

Pruning eggplants may sound intimidating at first, but it’s one of the most powerful techniques to boost yield and improve plant health. With a little patience and attention, even beginners can master it. Remember to start pruning early, remove unnecessary growth, and maintain the plant’s shape throughout the season.

By following these steps, you’ll enjoy stronger plants, faster fruiting, and a harvest full of large, glossy eggplants that make your garden truly stand out.

So grab your pruning shears, step into your garden, and watch your eggplants thrive like never before!

Growing Sugar Snap Peas in Containers: A Complete Guide from Seed to Harvest

Growing Sugar Snap Peas in Containers: A Complete Guide from Seed to Harvest

Growing your own food at home is one of the most satisfying experiences — and few crops are as rewarding as sugar snap peas. These crunchy, sweet, and versatile vegetables can be grown easily in containers, making them perfect for gardeners with limited space. Whether you live in an apartment, have a small patio, or just want to add some greenery to your balcony, this complete guide to growing sugar snap peas in containers from seed to harvest will help you enjoy fresh, flavorful pods all season long.

Let’s dive into everything you need to know — from choosing the right container and soil to caring for your plants and maximizing your harvest.


Why Grow Sugar Snap Peas in Containers?

Sugar snap peas are one of the most beginner-friendly crops you can grow. Unlike some vegetables, they thrive in cool weather, require minimal maintenance, and grow beautifully in pots or planters.

Here are a few reasons to grow them in containers:

  • Space-saving: You don’t need a garden bed — just a sunny balcony or deck.
  • Pest control: Container-grown peas are less susceptible to ground pests.
  • Easier maintenance: Containers allow better control over soil quality and drainage.
  • Perfect for early crops: Peas prefer cool weather and can be one of your first spring plantings.

With the right setup, you can enjoy baskets full of crisp, sweet pods — even in small urban spaces.


Step 1: Choosing the Right Variety

Before planting, it’s important to choose the right type of sugar snap pea for container growing. Some varieties grow tall and need more support, while others are compact and ideal for pots.

Best sugar snap pea varieties for containers:

  1. Sugar Ann: A dwarf, bush-type pea that grows about 2 feet tall and matures early.
  2. Cascadia: Compact, high-yielding, and resistant to common diseases.
  3. Sugar Daddy: Stringless pods and strong plants ideal for containers.
  4. Super Sugar Snap: Classic sweet flavor and great pod size, though needs trellising.

Compact or bush varieties are best for smaller spaces, but if you have room for a trellis or netting, taller varieties will reward you with larger harvests.


Step 2: Selecting the Perfect Container

Container choice can make or break your sugar snap pea success. Peas need enough depth for root growth and good drainage to prevent rot.

Ideal container features:

  • Depth: At least 12 inches deep for healthy root development.
  • Width: The wider the better — aim for a 12–16 inch diameter pot.
  • Material: Plastic, ceramic, grow bags, or even wooden boxes work well.
  • Drainage: Ensure your pot has several drainage holes at the bottom.

If you’re growing vining varieties, position your container where you can attach a trellis or support system.


Step 3: Preparing the Right Soil Mix

Sugar snap peas thrive in loamy, well-draining soil that’s rich in organic matter. Container-grown plants depend entirely on the soil mix you provide, so getting it right is essential.

Best soil mix for sugar snap peas:

  • 1 part garden soil or potting mix
  • 1 part compost or well-rotted manure
  • 1 part perlite or coco peat for improved drainage

Make sure the mix stays loose and airy — compacted soil restricts root growth. Peas prefer a slightly acidic to neutral pH (6.0–7.5). You can sprinkle a handful of bone meal into the mix to boost phosphorus, which helps with root and flower development.


Step 4: Planting Sugar Snap Peas from Seed

One of the best things about sugar snap peas is that they grow quickly and easily from seed — no need for transplants.

When to plant:

  • For spring crops: 4–6 weeks before your last expected frost date.
  • For fall crops: 8–10 weeks before the first frost.

Planting steps:

  1. Soak the seeds for 6–8 hours in lukewarm water to speed up germination.
  2. Fill your container with prepared soil mix, leaving about an inch of space at the top.
  3. Plant seeds 1 inch deep and 2 inches apart.
  4. Lightly water after planting to moisten the soil.

Keep the soil evenly moist until the seeds germinate, which usually takes 7–10 days.


Step 5: Providing Proper Support

Even compact pea varieties benefit from some form of support, as it keeps vines upright, improves airflow, and makes harvesting easier.

Support options:

  • Trellis: Insert a small A-frame or vertical trellis in the container at planting time.
  • Netting: Stretch lightweight garden netting above the container.
  • Stakes and strings: Place bamboo stakes and tie soft twine between them for vines to climb.

Install support immediately after planting, so you don’t disturb the roots later. Peas have delicate tendrils that latch onto nearby structures naturally.


Step 6: Watering and Fertilizing

Proper watering is key to a healthy pea crop. Because containers dry out faster than ground soil, you’ll need to check moisture levels regularly.

Watering tips:

  • Keep the soil evenly moist, not soggy.
  • Water deeply 2–3 times per week, depending on weather.
  • Avoid letting the soil dry out completely — it can stunt growth.
  • Use mulch (straw, leaves, or coco husk) to retain moisture and regulate temperature.

Fertilizing tips:

  • Sugar snap peas don’t need much fertilizer because they fix nitrogen naturally.
  • Mix compost or worm castings into the soil at planting.
  • During flowering, apply a light feeding of compost tea or liquid seaweed fertilizer to encourage pod formation.
  • Avoid high-nitrogen fertilizers; they promote leafy growth instead of pods.

Step 7: Sunlight and Temperature Requirements

Sugar snap peas love cool weather and plenty of sunlight.

Ideal conditions:

  • Sunlight: 6–8 hours per day.
  • Temperature: 55°F–75°F (13°C–24°C).
  • Partial shade: In hot climates, provide afternoon shade to prevent heat stress.

Containers can heat up quickly, so keep them in a spot with morning sun and light afternoon shade if temperatures climb above 80°F (27°C).


Step 8: Pest and Disease Control

Container-grown peas are generally healthy, but a few pests and diseases can appear if conditions aren’t right.

Common pests:

  • Aphids: Control with neem oil spray or insecticidal soap.
  • Slugs and snails: Use crushed eggshells or copper tape around containers.
  • Pea weevils: Use floating row covers early in the season.

Common diseases:

  • Powdery mildew: Avoid overhead watering and ensure good air circulation.
  • Root rot: Prevent by using well-draining soil and not overwatering.

Rotate crops each season and clean your containers before reusing them to prevent disease buildup.


Step 9: Flowering and Pollination

Sugar snap peas produce delicate white flowers before forming pods. They are self-pollinating, so you don’t need to rely on insects, though bees can help improve yield.

During flowering:

  • Keep soil moisture consistent.
  • Avoid disturbing the plants.
  • Don’t let them dry out — moisture stress can cause flowers to drop prematurely.

Within a week or two of flowering, small pods will start to appear.


Step 10: Harvesting Sugar Snap Peas

The best part of growing peas is harvesting those crisp, sweet pods. The timing of your harvest will determine the flavor and tenderness of your peas.

When to harvest:

  • Pods are ready 60–70 days after planting.
  • Pick when pods are bright green, plump, and smooth, but before the peas inside harden.
  • Harvest in the morning, when sugar content is highest.

How to harvest:

  • Use one hand to hold the vine and gently pull pods with the other hand.
  • Check every 1–2 days — frequent harvesting encourages more pod production.

If you leave mature pods on the plant too long, it signals the plant to stop producing new ones. Regular picking keeps it productive.


Step 11: Post-Harvest Care and Storage

Sugar snap peas taste best when eaten fresh, but you can store or preserve them easily.

Storage tips:

  • Keep freshly harvested peas in a perforated bag in the refrigerator for up to 5 days.
  • For longer storage, blanch pods for 2 minutes, cool in ice water, and freeze them in airtight bags.
  • Frozen peas retain most of their sweetness and nutrients.

Step 12: Saving Seeds for the Next Season

Saving seeds is easy and ensures you can regrow your favorite variety next year.

How to save seeds:

  1. Let a few pods mature fully on the vine until they turn brown and dry.
  2. Pick and open the pods to remove seeds.
  3. Dry the seeds completely and store them in an airtight container in a cool, dark place.

Seed-saving helps preserve strong, disease-resistant genetics for future crops.


Bonus Tips for Bigger and Sweeter Harvests

  • Plant early: Cooler weather results in sweeter pods.
  • Mulch well: Helps regulate soil temperature and moisture.
  • Harvest often: Picking regularly encourages more production.
  • Provide airflow: Prevent fungal diseases by spacing plants properly.
  • Use companion planting: Grow peas alongside lettuce, carrots, or radishes — they make great companions.

Final Thoughts

Growing sugar snap peas in containers is one of the easiest and most rewarding ways to enjoy homegrown vegetables. With a little attention to soil quality, sunlight, and watering, you can enjoy an abundance of sweet, crunchy pods right from your balcony or patio.

From sowing the first seed to harvesting handfuls of fresh pods, every step brings you closer to a delicious, nutritious reward. Follow these steps carefully, and soon you’ll be savoring your very own crop of container-grown sugar snap peas — fresh, organic, and bursting with sweetness.

5 Proven Tips to Grow a Ton of Snow Peas — From Seed to Harvest Like a Pro

5 Proven Tips to Grow a Ton of Snow Peas — From Seed to Harvest Like a Pro

If you’ve ever enjoyed the crisp sweetness of fresh snow peas in a salad or stir-fry, you already know why they’re such a favorite among gardeners. Snow peas are tender, versatile, and easy to grow, but with the right techniques, you can take your harvest from a handful to a ton of snow peas in just one season.

This complete guide, inspired by the video “5 Tips How to Grow a Ton of Snow Peas,” will walk you through everything you need to know — from preparing your soil and sowing seeds to caring for your plants and maximizing yield. By the end, you’ll have all the secrets to growing an abundant crop of snow peas right in your backyard or container garden.


Why Grow Snow Peas?

Snow peas are a gardener’s dream. They’re fast-growing, cold-hardy, and nutrient-rich, producing crisp, flat pods that are both edible and delicious. These peas thrive in cool weather and can be grown in small spaces, making them perfect for home gardens, patios, and balconies.

Here are a few reasons to grow them:

  • They’re rich in vitamin C, vitamin K, and fiber.
  • They fix nitrogen in the soil, improving fertility for future crops.
  • They’re low-maintenance and mature quickly — often in 60 days or less.
  • Freshly harvested pods taste much sweeter and crunchier than store-bought ones.

With just a few simple adjustments to your gardening routine, you can easily grow more snow peas than you ever thought possible. Let’s explore the five most effective tips for a bountiful harvest.


Tip 1: Choose the Right Variety and Plant at the Right Time

Not all pea varieties are created equal. For the best yield, you’ll want to pick a snow pea variety that suits your climate and space.

Best Snow Pea Varieties for High Yields:

  • Oregon Sugar Pod II: A classic high-yielding snow pea that’s disease-resistant and perfect for most climates.
  • Mammoth Melting Sugar: Produces large, tender pods with a sweet flavor and vigorous growth.
  • Avalanche Snow Pea: Compact and productive, excellent for container gardening.

Timing is Key

Snow peas are cool-season crops, meaning they thrive in mild temperatures — ideally between 55°F and 75°F (13°C to 24°C).

  • Spring planting: Sow seeds 4–6 weeks before your last expected frost.
  • Fall planting: Plant 8–10 weeks before the first expected frost for a late-season harvest.

If temperatures exceed 80°F (27°C), snow peas tend to stop flowering. Plant early in the season so your plants can mature before the weather heats up.


Tip 2: Prepare Nutrient-Rich, Well-Drained Soil

Snow peas prefer soil that is loamy, well-drained, and rich in organic matter. They don’t like waterlogged roots, so drainage is essential for healthy plants.

How to Prepare Your Soil for Maximum Growth:

  1. Loosen the soil: Dig down at least 8 inches to allow the roots to expand easily.
  2. Add compost: Mix in 2–3 inches of organic compost or well-rotted manure to boost fertility.
  3. Check pH levels: Snow peas grow best in slightly acidic to neutral soil (pH 6.0–7.5).
  4. Avoid nitrogen-heavy fertilizers: Peas fix their own nitrogen, so using too much can lead to leafy plants with fewer pods.

To improve drainage, you can also plant snow peas in raised beds or large containers with a light, airy potting mix.


Tip 3: Support Your Plants Early for Strong Growth

Snow peas are natural climbers, and giving them proper support ensures stronger plants, better airflow, and cleaner pods. Without support, vines can sprawl, leading to fewer pods and greater disease risk.

Best Support Options:

  • Trellis: Use a simple A-frame or vertical trellis about 5–6 feet tall.
  • Netting or fencing: Stretch garden netting or chicken wire between poles for climbing.
  • String lines: Run twine or string between stakes as the vines grow.

Install supports right after planting — it’s much easier than trying to add them later when vines start to tangle. As the plants grow, gently guide them toward the trellis so they can latch on naturally with their tendrils.

Proper support leads to more sunlight exposure and better airflow, reducing the risk of mildew and helping your snow peas grow stronger and more productive.


Tip 4: Master Watering and Feeding for Maximum Yield

Water and nutrients play a major role in determining how many pods your plants will produce — and how sweet they’ll taste.

Watering Tips:

  • Keep soil consistently moist but not soggy. Water deeply 2–3 times a week.
  • Morning watering is ideal so that the foliage dries out during the day.
  • Avoid overhead watering to prevent fungal diseases like powdery mildew.
  • Use mulch (like straw or dry leaves) to help retain soil moisture and regulate temperature.

Fertilizing for More Pods:

Snow peas don’t require much fertilizer, but a little organic feeding can go a long way.

  • Before planting: Mix in compost or a balanced organic fertilizer.
  • Mid-growth: Apply a light dose of compost tea or seaweed extract once the plants start flowering.
  • Avoid high-nitrogen fertilizers: These encourage leafy growth instead of pod formation.

Adding a small amount of bone meal or wood ash during flowering can boost phosphorus and potassium levels, which support pod development and sweetness.


Tip 5: Harvest Smart and Often for Continuous Production

One of the biggest secrets to growing a ton of snow peas is frequent harvesting. The more you pick, the more your plants will produce!

When to Harvest Snow Peas:

  • Pick pods when they’re flat, crisp, and about 3–4 inches long — before the peas inside start to swell.
  • Harvest early in the morning when sugar levels are at their highest.
  • Check your plants every 1–2 days during peak production.

How to Harvest Correctly:

  • Use two hands: hold the stem with one hand and snap off the pod gently with the other to avoid damaging the vine.
  • Regular picking encourages continuous flowering and pod formation.

If you leave mature pods on the plant too long, the plant will slow down production, thinking its job is done. Frequent harvesting keeps it in “growth mode,” leading to a much larger total yield.


Bonus Tip: Keep Your Plants Healthy and Pest-Free

To grow a ton of snow peas, you must protect your plants from common pests and diseases that can reduce yield.

Common Pests:

  • Aphids: Small sap-sucking insects that can distort leaves. Spray with neem oil or insecticidal soap.
  • Slugs and snails: Feed on tender shoots. Use crushed eggshells or diatomaceous earth around your plants as a barrier.
  • Pea weevils: Can damage pods. Use floating row covers early in the season.

Common Diseases:

  • Powdery mildew: Avoid overcrowding and water at the soil level.
  • Root rot: Ensure well-draining soil and don’t overwater.

Healthy plants not only produce more pods but also taste sweeter and have better texture.


Maximizing Sweetness in Snow Peas

To grow snow peas that are not just abundant but deliciously sweet, follow these tips:

  • Cool weather = sweeter peas. Plant early in spring or late in fall.
  • Regular watering: Water stress can make pods fibrous and bitter.
  • Quick harvest: Pick pods before they mature too much to maintain tenderness.
  • Immediate consumption: Eat peas soon after harvest; they lose sweetness quickly as sugars convert to starch.

After the Harvest: Storing and Saving Seeds

Fresh snow peas are best enjoyed immediately, but you can store or preserve them for later use.

Storage:

  • Store fresh pods in a perforated plastic bag in the refrigerator for up to 5 days.
  • For long-term storage, blanch the pods for 2 minutes, cool them in ice water, and freeze.

Saving Seeds for Next Season:

  • Leave a few pods to fully mature and dry on the vine.
  • Once brown and brittle, shell the peas and air-dry the seeds.
  • Store them in an airtight container in a cool, dark place.

Seed-saving ensures you have fresh, vigorous plants for next year’s crop — and it’s a sustainable way to keep growing your favorite variety.


Final Thoughts: Turning a Small Garden into a Pea Paradise

Growing snow peas doesn’t require acres of land or complicated equipment — just a little knowledge and consistent care. By following these five essential tips:

  1. Choose the right variety and timing.
  2. Prepare rich, well-drained soil.
  3. Support your vines early for healthy growth.
  4. Water and feed correctly for robust pod production.
  5. Harvest frequently and handle your plants gently.

You can easily transform your garden or container setup into a pea-producing powerhouse.

With their sweet flavor, crisp texture, and nutritional benefits, snow peas are a joy to grow and harvest. Once you master these techniques, you’ll find yourself sharing baskets of fresh peas with neighbors, friends, and family — proof that you truly learned how to grow a ton of snow peas!