Okra, also known as lady’s finger, is a versatile vegetable prized for its edible pods and nutritious leaves. The young leaves can be used in soups, stews, and salads, while the pods are commonly cooked in curries or fried. For urban dwellers or small-space gardeners, purchasing fresh okra regularly can be expensive and inconsistent in quality.
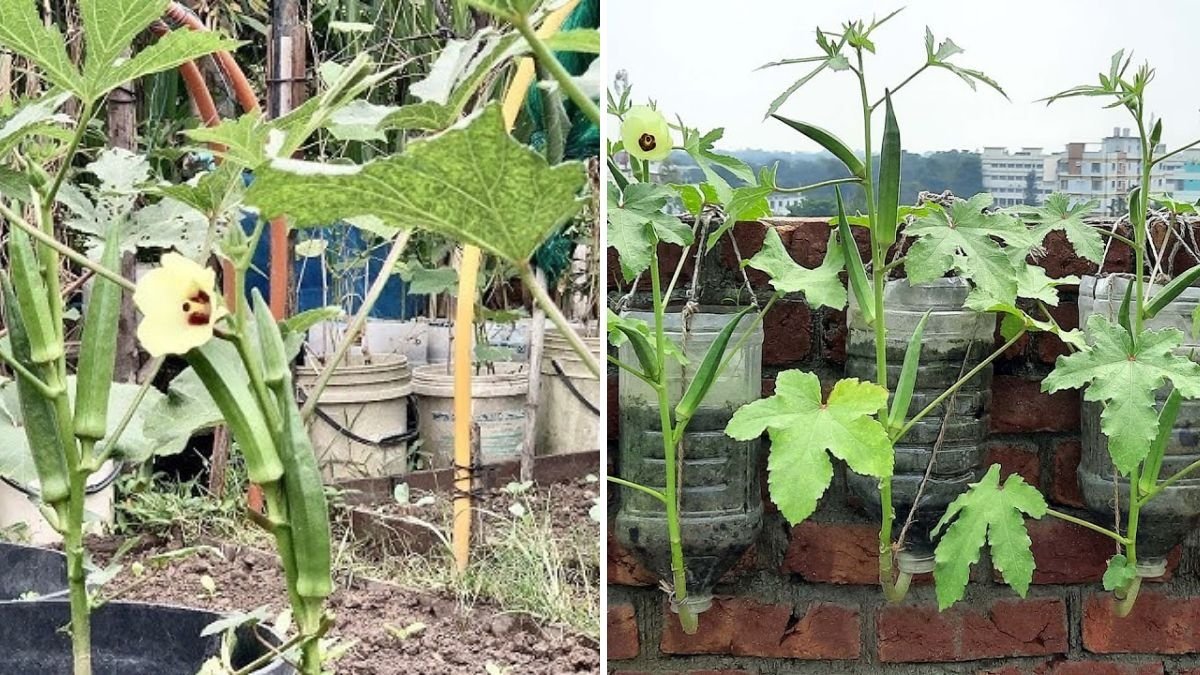
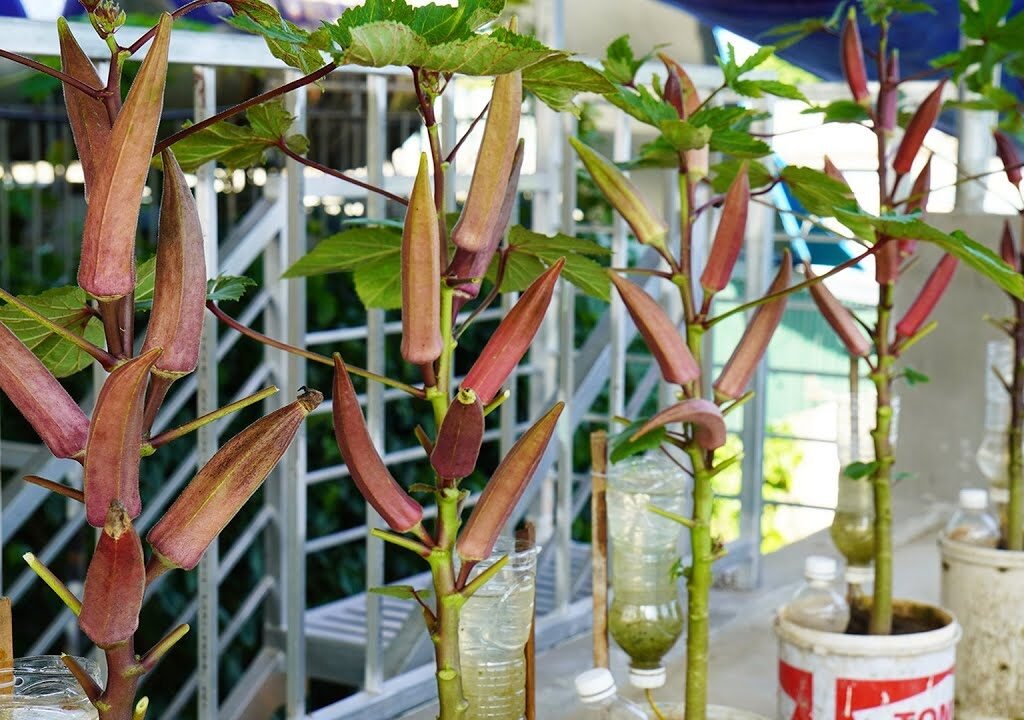
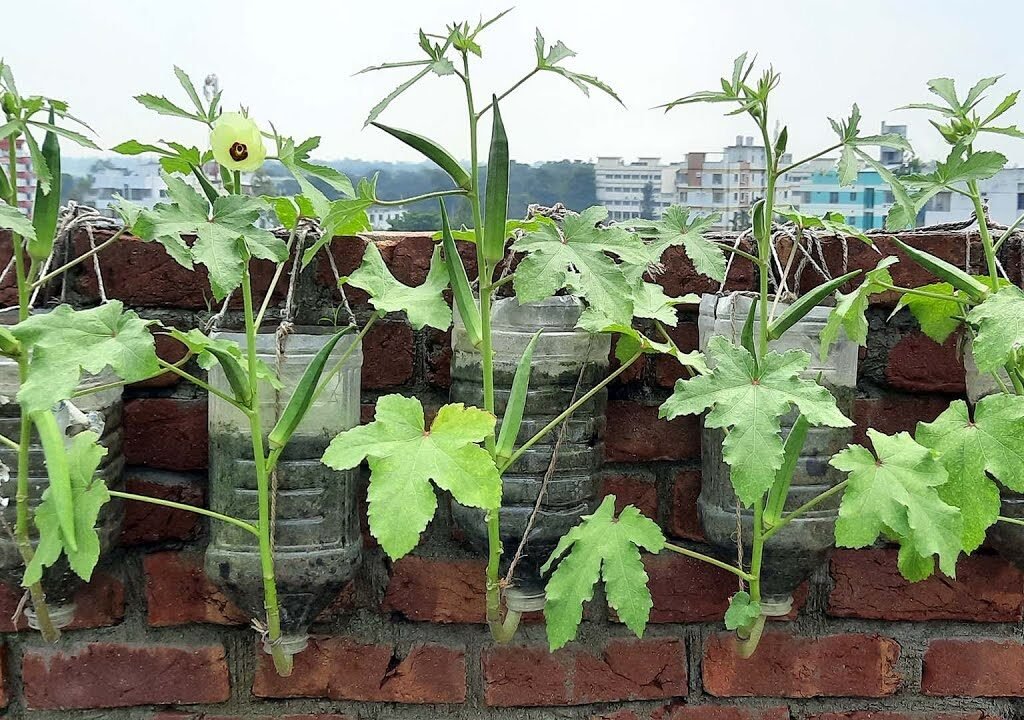
But here’s the good news: you can grow okra at home in bottles, using a simple and space-saving method that provides both leaves and pods. This innovative approach allows anyone, even beginners, to enjoy fresh, homegrown okra without a traditional garden. In this article, we’ll guide you step by step on how to grow okra in bottles, from seeds to harvest, with tips to maximize leaves and pods.
Why Grow Okra in Bottles?
Growing okra in bottles offers many advantages, especially for urban gardening:
- Space Efficiency: Perfect for balconies, windowsills, and small patios.
- Fresh & Organic: Control your growing environment for pesticide-free vegetables.
- Water-Saving: Self-watering setups reduce water usage and maintain consistent moisture.
- Dual Harvest: Grow both okra leaves and pods, increasing utility.
- Beginner-Friendly: Easy to set up and maintain, even for first-time gardeners.
This method ensures a steady supply of fresh leaves and pods, giving you homegrown okra year-round.
Step 1: Choosing the Right Okra Seeds

The first step in successful bottle gardening is selecting high-quality seeds:
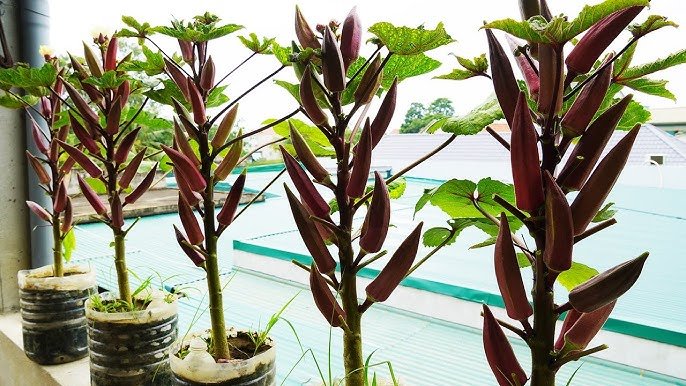
- Varieties: Common choices include Clemson Spineless, Annie Oakley, and Baby Star. Dwarf or compact varieties are ideal for containers.
- Seed Quality: Use fresh, viable seeds with a high germination rate for the best results.
- Leaf and Pod Use: Some varieties have tender leaves and flavorful pods. Consider what you’ll use more frequently.
Selecting the right seeds ensures strong germination and healthy plants capable of producing both leaves and pods.
Step 2: Preparing Your Bottle Garden
Plastic bottles are ideal for container gardening because they’re lightweight, reusable, and easy to modify.
Materials Needed:
- 2–3 liter plastic bottles (cleaned)
- Scissors or craft knife
- Cotton string (for self-watering, optional)
- Soil and compost
Steps to Prepare Bottles:
- Cut the bottle into two halves. The bottom part will hold soil, while the top part can be inverted or used as a funnel.
- Make drainage holes at the bottom.
- For a self-watering system, thread a cotton string through the holes to act as a wick and place it into a water reservoir.
- Fill the bottle with nutrient-rich soil and compost.
This setup allows your okra plants to receive consistent water while saving space and effort.
Step 3: Preparing Nutrient-Rich Soil
Okra thrives in well-draining, fertile soil. The soil must support both leaf and pod growth.
Recommended soil mix:
- 1 part potting soil
- 1 part compost or organic matter
- 1 part perlite, sand, or coco peat for aeration
Optional Additions:
- Banana peels, coffee grounds, or diluted compost tea add potassium, phosphorus, and nitrogen, boosting leaf growth and pod development.
Healthy, nutrient-rich soil is essential for vigorous plants that produce tender leaves and abundant pods.
Step 4: Sowing Okra Seeds
Starting okra from seeds is easy and rewarding:
- Make a small hole about 1 inch deep in the soil.
- Place 2–3 seeds in each bottle.
- Cover lightly with soil and water gently.
- Keep the bottle in a warm, sunny spot (70–85°F).
Seeds typically germinate within 7–12 days. Once seedlings emerge, thin to one strong plant per bottle. This ensures the plant focuses energy on producing both leaves and pods.
Step 5: Sunlight Requirements
Okra is a sun-loving plant, requiring sufficient light for healthy foliage and pod formation:
- Sunlight: 6–8 hours of direct sunlight per day.
- Indoor Growth: Use grow lights if natural sunlight is limited.
- Rotate Containers: Ensure even light exposure for all leaves and stems.
Adequate sunlight encourages strong stems, lush leaves, and abundant flowers, which develop into pods.
Step 6: Watering Your Bottle Garden
Consistent watering is key for container-grown okra:
- Water when the top inch of soil is dry.
- Ensure drainage holes prevent waterlogging.
- Mulch with straw or coconut husk to retain moisture.
- For self-watering bottles, refill the water reservoir every 3–5 days.
Proper moisture supports leaf growth and ensures pods develop fully without stress.
Step 7: Fertilizing for Maximum Yield
Even with nutrient-rich soil, occasional fertilization ensures optimal growth:
- Early Growth: Use a balanced liquid fertilizer every 2–3 weeks for strong leaves and stems.
- Flowering & Pod Formation: Apply fertilizers rich in potassium and phosphorus to encourage flowering and fruiting.
- Organic alternatives: Compost tea, diluted cow manure, or banana peel mulch.
Avoid over-fertilizing with nitrogen, as excessive leaf growth may reduce pod production.
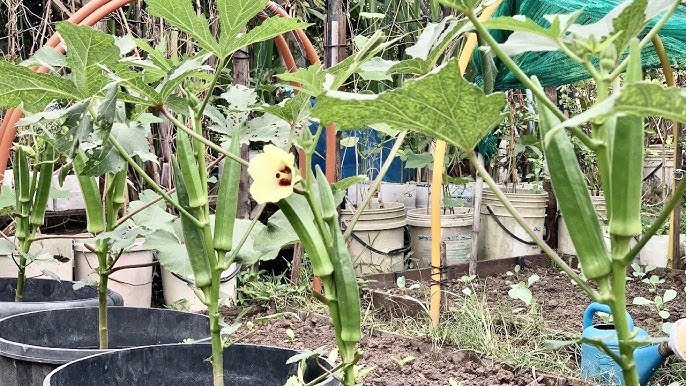
Step 8: Supporting Your Plants
Okra plants can grow tall and develop multiple branches:
- Use bamboo stakes or small sticks to support the main stem.
- Tie branches gently to prevent bending or breaking.
- Prune some side shoots to focus energy on producing leaves and pods.
Proper support ensures healthy growth and reduces the risk of breaking or disease, particularly on balconies.
Step 9: Flowering and Pollination
Okra flowers are bright yellow with a red center and develop into pods after pollination:
- Outdoor plants are naturally pollinated by bees.
- Indoor or balcony plants may require hand pollination using a soft brush or gentle shaking.
- Successful pollination ensures full pods and continued flowering.
Fertilization and adequate sunlight enhance flower production, leading to more leaves and pods.
Step 10: Harvesting Leaves and Pods
One of the benefits of bottle gardening is that you can harvest leaves and pods simultaneously:
- Leaves: Pick young, tender leaves regularly for soups, salads, or stews.
- Pods: Harvest when they are 4–6 inches long, 5–7 days after flowering.
- Use scissors or garden shears to avoid damaging the stem.
- Frequent harvesting encourages continuous growth and maximum yield.
With proper care, one bottle can provide a steady supply of both edible leaves and pods.
Step 11: Troubleshooting Common Issues
Even in bottles, you may encounter some challenges:
- Yellow Leaves: Usually due to overwatering or nutrient deficiency. Adjust soil moisture and fertilization.
- Slow Growth: May result from insufficient sunlight or crowded roots. Thin seedlings and provide 6–8 hours of light.
- Pests: Aphids, whiteflies, or caterpillars may appear. Treat naturally with neem oil or mild soap water.
Regular monitoring ensures your plants remain healthy and productive.

Step 12: Benefits of Growing Okra at Home
- Fresh and Organic: Control your growing environment for safe, pesticide-free vegetables.
- Space-Efficient: Ideal for urban spaces like balconies and windowsills.
- Water-Efficient: Self-watering bottles reduce water waste.
- Dual Harvest: Enjoy nutritious leaves and pods from the same plant.
- Cost-Effective: Save money by producing your own okra year-round.
Growing okra in bottles is a sustainable, rewarding way to enjoy fresh, homegrown vegetables, even in small spaces.
Conclusion
If you’ve been buying okra from the market, it’s time to take control and grow it yourself using bottles at home. This method is simple, efficient, and beginner-friendly. From sowing seeds and preparing nutrient-rich soil to self-watering bottles, supporting plants, and harvesting leaves and pods, anyone can cultivate healthy okra in a small space.
With proper care, sunlight, and fertilization, you can enjoy a continuous supply of fresh okra leaves and pods, save money, and experience the satisfaction of urban gardening. Start your bottle garden today and stop buying okra from the store — enjoy fresh, delicious, and nutritious okra right from your own home!
Leave A Comment