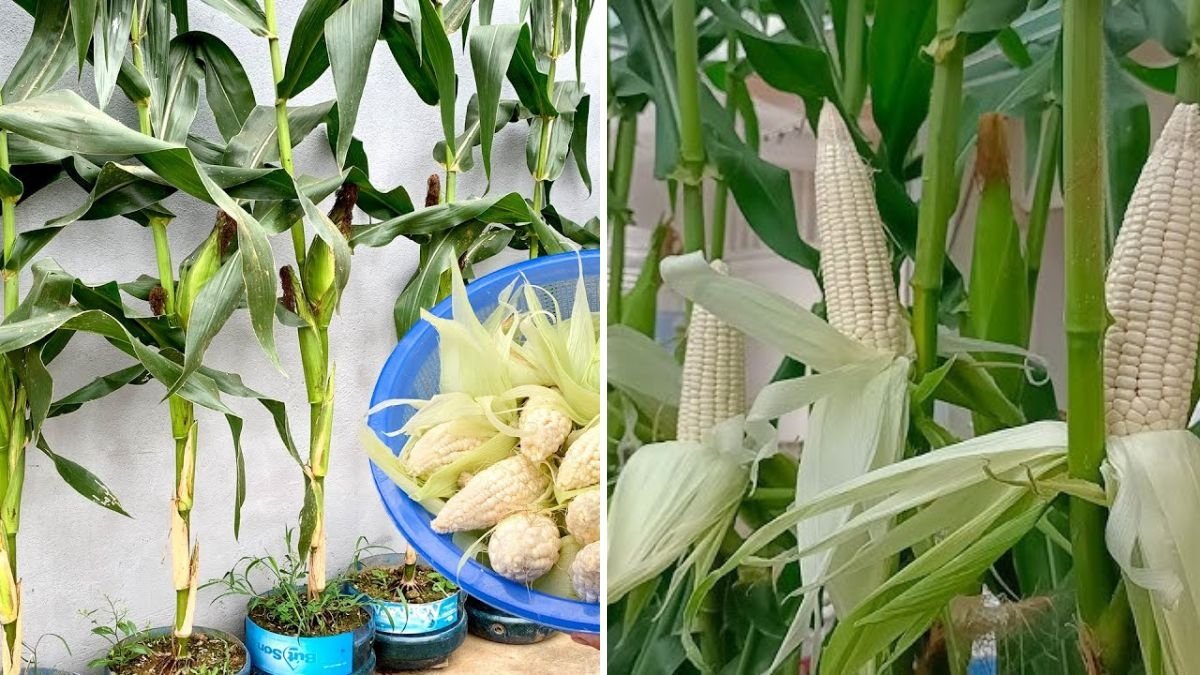
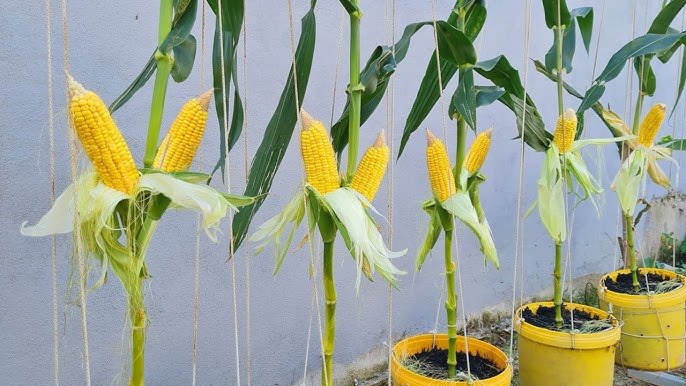
Have you ever thought about growing your own glutinous corn (sticky corn) at home, even without a large garden? It might sound impossible—but thanks to smart container gardening techniques, you can now grow this delicious, chewy, and nutrient-rich corn right in recycled plastic bottles! This innovative method is easy, space-saving, and sustainable, allowing anyone—even city dwellers—to enjoy fresh, homegrown corn.
In this article, we’ll take you step by step through how to grow glutinous corn in plastic bottles, from preparation to harvest. You’ll learn the best growing medium, watering routine, sunlight requirements, and harvesting tips to ensure a healthy, high-yield crop.
Why Grow Glutinous Corn in Plastic Bottles?
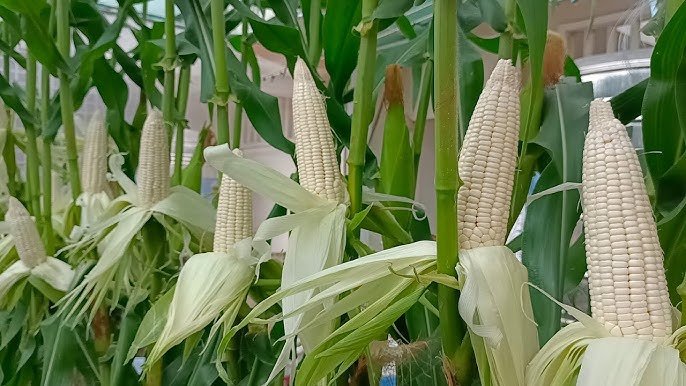
Glutinous corn, often called sticky corn or waxy corn, is a popular variety in many Asian cuisines. It has a soft, sticky texture and is perfect for boiling, grilling, or making desserts. Growing it at home has several benefits:
- Space Efficiency:
Plastic bottles are compact, making them ideal for balconies, patios, or small gardens. You can hang or stack them vertically for maximum space use. - Eco-Friendly Solution:
By reusing old bottles, you reduce plastic waste and contribute to a more sustainable environment. - Low Maintenance:
Growing corn in bottles requires minimal soil, water, and fertilizer compared to traditional field cultivation. - Year-Round Gardening:
If you control the temperature and lighting conditions, you can grow glutinous corn almost any time of the year.
Step 1: Choosing and Preparing the Plastic Bottles
For growing corn, large plastic bottles (preferably 5-liter or bigger) are recommended. Follow these steps to prepare them:
- Cut the bottle horizontally: Cut around the middle, leaving the top half as a funnel and the bottom as a base.
- Create drainage holes: Make 4–6 small holes at the bottom to prevent waterlogging.
- Add a water reservoir (optional): For a self-watering system, insert a small tube or cotton rope from the bottom to the top part to help wick moisture.
- Clean thoroughly: Rinse the bottles with soap and water to remove any residues before planting.
Step 2: Preparing the Potting Mix
Glutinous corn needs nutrient-rich, well-drained soil for optimal growth. You can make your own mix using:
- 50% garden soil or compost
- 30% coco peat or rice husk
- 20% perlite or sand for aeration
Mix in a handful of organic fertilizer or composted manure to boost initial nutrient levels. This combination ensures the roots get enough oxygen while retaining sufficient moisture.
Step 3: Germinating Glutinous Corn Seeds
Before planting, soak your glutinous corn seeds in warm water for 8–10 hours. This softens the seed coat and helps speed up germination.
Then:
- Wrap them in a damp paper towel and place them in a warm, dark spot for 2–3 days.
- Once small sprouts appear, they’re ready for planting.
This pre-germination step ensures a higher success rate and faster seedling growth.
Step 4: Planting the Seeds
Now that your bottles and soil are ready, it’s time to plant!
- Fill each bottle with the prepared soil mix, leaving about 3 cm from the top.
- Make 2–3 small holes (about 2–3 cm deep).
- Place one germinated seed per hole.
- Cover lightly with soil and water gently.
If you’re growing multiple bottles, space them 25–30 cm apart to allow air circulation and sunlight exposure.
Step 5: Providing Light and Temperature
Corn loves sunlight—it needs at least 6–8 hours of direct sunlight daily. If growing indoors, place your bottles near a south-facing window or use grow lights to supplement natural light.
Ideal temperature range:
- Day: 25–32°C (77–90°F)
- Night: 18–22°C (64–72°F)
Maintaining stable warmth ensures steady growth and healthy pollination later.
Step 6: Watering and Feeding
Because bottles have limited soil, watering consistency is key. Keep the soil moist but not soggy.
- Water lightly every 1–2 days, depending on your climate.
- Use a spray bottle or small watering can to avoid disturbing the roots.
For nutrients, apply a liquid organic fertilizer or compost tea every 10–15 days. Glutinous corn is a heavy feeder, so additional nitrogen early on helps promote leaf growth, while phosphorus and potassium during flowering enhance cob development.
Step 7: Pollination Techniques
Corn plants rely on wind pollination, but in container gardening, you might need to assist manually. When tassels (male flowers) appear at the top and silks (female flowers) emerge from the cob area:
- Gently shake or tap the tassels over the silks to distribute pollen.
- Repeat this process every morning for 3–4 days for better fertilization.
This step ensures your glutinous corn cobs develop fully and evenly.
Step 8: Pest and Disease Management
Even in containers, pests can sometimes attack your plants. Common problems include:
- Aphids: Small insects that suck sap from leaves. Use neem oil spray or soapy water.
- Corn earworms: These can burrow into cobs. Cover developing cobs with paper sleeves for protection.
- Fungal diseases: Prevent by ensuring good airflow and avoiding waterlogged soil.
Keeping the growing area clean and rotating crops seasonally helps reduce disease buildup.
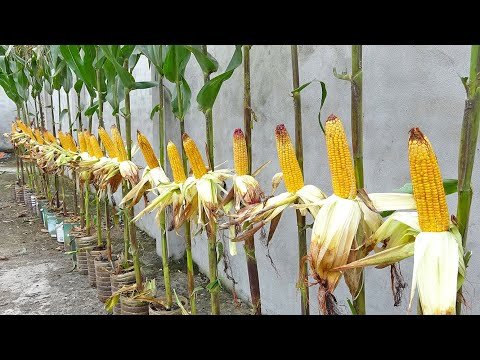
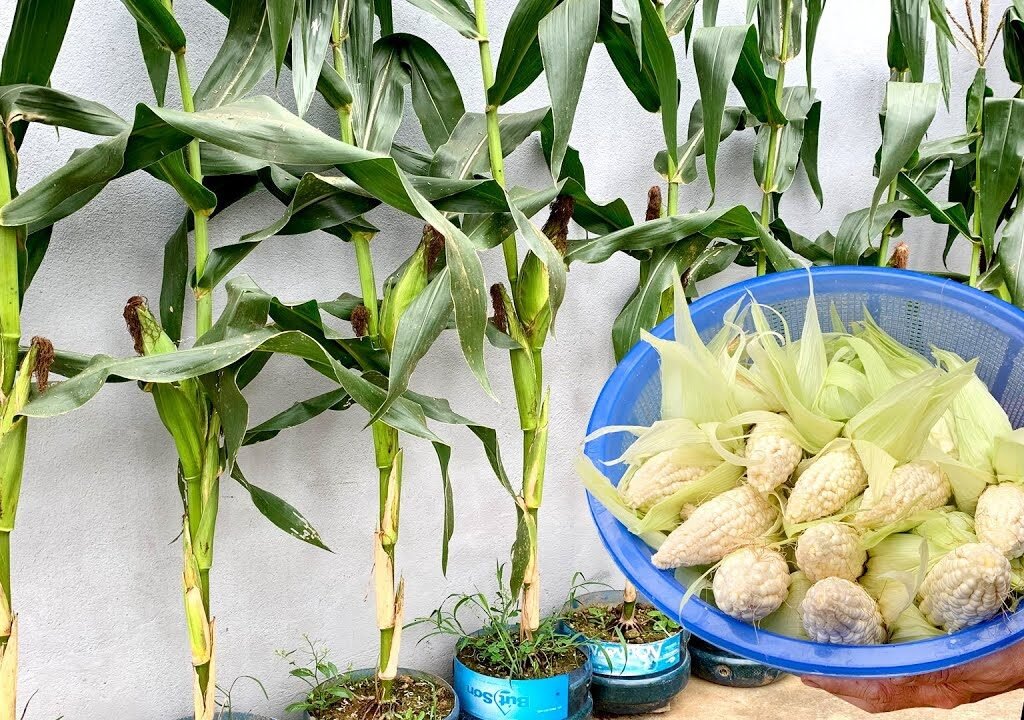
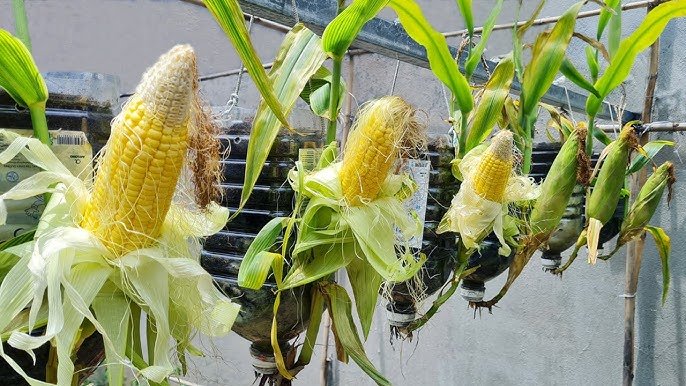
Step 9: Harvesting Glutinous Corn
Glutinous corn is usually ready for harvest 70–90 days after planting, depending on the variety.
Signs that your corn is ready:
- Silks turn brown and dry out.
- Kernels are full and plump when you gently press them.
- The outer husk feels firm.
To harvest, twist or cut the cobs off carefully. Freshly harvested glutinous corn tastes sweetest when cooked immediately—either steamed, boiled, or grilled.
Step 10: Post-Harvest Processing and Use
After harvesting, you can:
- Cook fresh: Steam or boil for 10–15 minutes for a soft, chewy texture.
- Store: Keep unpeeled cobs in the refrigerator for up to 5 days.
- Preserve: Blanch and freeze kernels for longer storage.
You can also save a few healthy kernels as seeds for your next planting cycle!
Eco-Friendly and Sustainable Benefits
Growing glutinous corn in plastic bottles isn’t just about convenience—it’s a step toward sustainable urban farming. You’re giving waste materials a new purpose and reducing dependency on store-bought vegetables.
Plus, this method is perfect for teaching kids and beginners about plant biology, recycling, and food self-sufficiency.
Final Thoughts
Growing glutinous corn in plastic bottles at home proves that innovation and sustainability can go hand in hand. With a few recycled bottles, good soil, and some sunlight, you can harvest multiple ears of fresh, sticky corn without needing a big farm.
It’s simple, rewarding, and eco-friendly—a small-scale agricultural revolution you can start today from your balcony or rooftop.
So grab some bottles, get your seeds ready, and start your mini glutinous corn farm today. You’ll be amazed at how much you can grow with just a few resources and a little care!
Leave A Comment